


Applications
5
Di5510/Di7210
5-29
6
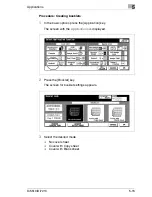
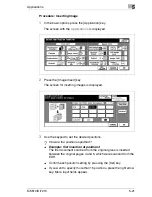
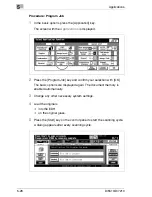
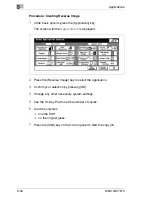
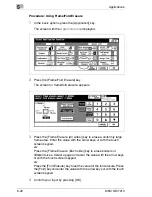
Press the [Confirm] key to proceed with the scan cycle.
or
Press the [Cancel] key to delete the last scan cycle.
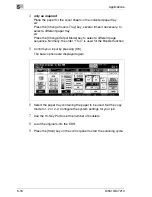
7
Repeat steps 3 to 6 for the other partial jobs of the original set.
8
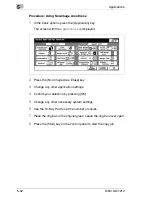
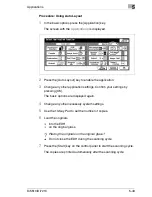
Select the output type and enter the number of copies with the 10-Key
Pad.
9
Press the [Store] key to complete the store procedure. Press the
[Start] key on the control panel to start the copy job.
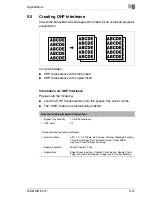
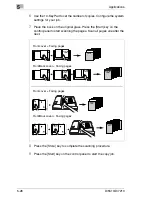
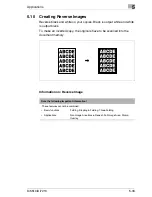
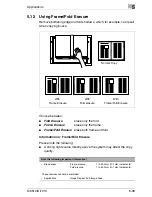
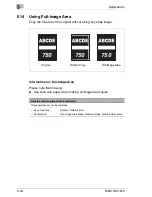
Correct order maintained?
Scan the originals in the order in which the copies are to be output.
Summary of Contents for Di5510
Page 1: ...Di5510 Di7210 Advanced Information...
Page 2: ......
Page 28: ...1 Introduction 1 16 Di5510 Di7210...
Page 90: ...2 Getting to Know Your System 2 62 Di5510 Di7210 9 Close the finisher door...
Page 96: ...2 Getting to Know Your System 2 68 Di5510 Di7210...
Page 148: ...3 Initial Steps 3 52 Di5510 Di7210...
Page 236: ...4 Basic Functions 4 88 Di5510 Di7210...
Page 352: ...6 Network functions 6 54 Di5510 Di7210 3 Configure settings as required...
Page 455: ...Troubleshooting 8 Di5510 Di7210 8 13 5 Close the finisher door...
Page 457: ...Troubleshooting 8 Di5510 Di7210 8 15 5 Close the finisher door...


