Performance Series HQA Digital Video Recorder Local User Guide
120
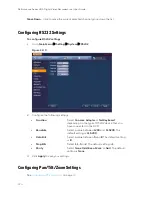
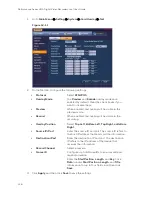
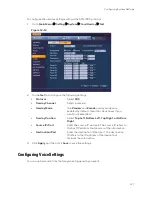
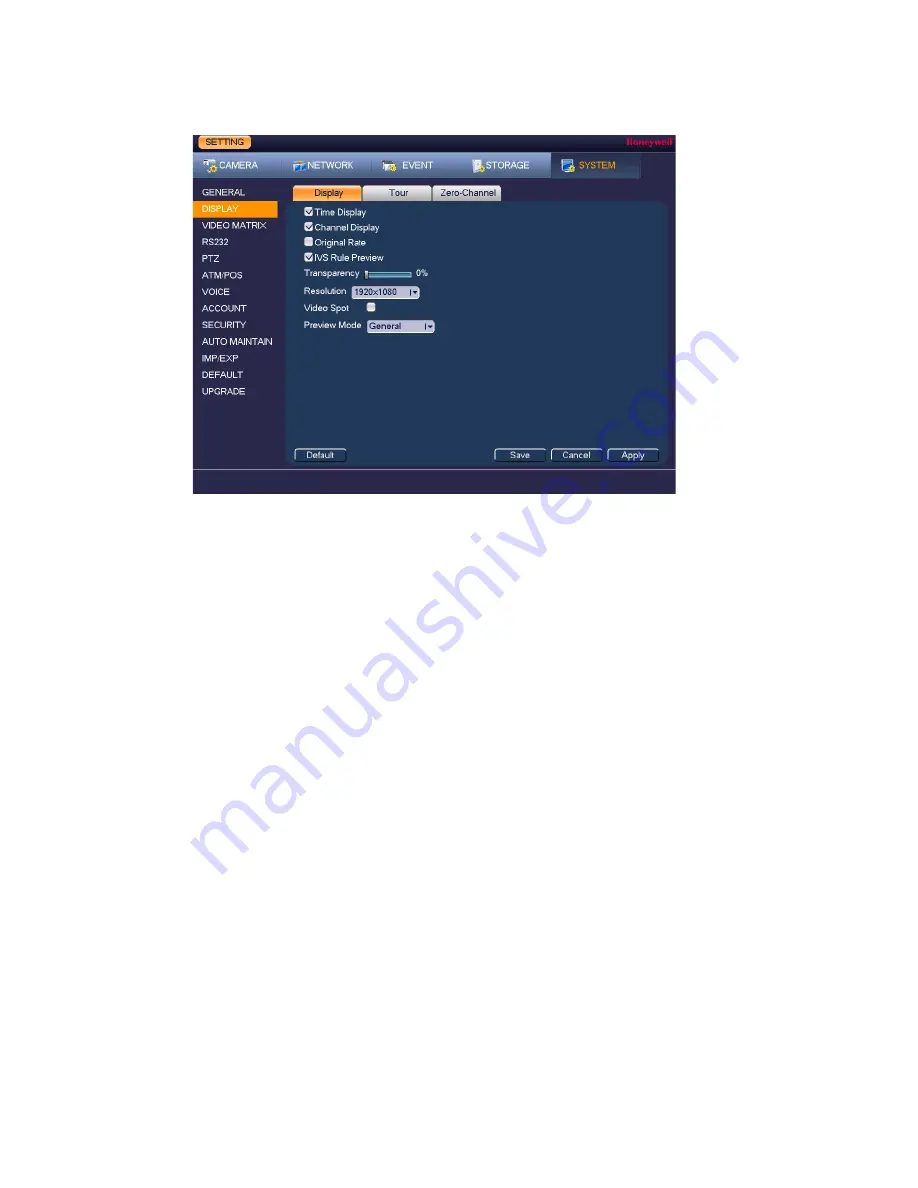
Figure 12-5
2.
On the
Display
tab, configure the following settings:
•
Time Display
To display the current time in each channel window
in live view mode, select the check box. To hide the
time, clear the check box.
•
Channel Display
To display the camera name, status, and channel
number in each channel window, select the check
box. To hide the camera name, status, and channel
number, clear the check box.
•
Original Rate
Check to display the image in its actual
size/proportion.
•
Preview Enhancement
To enhance the display image, select the check box.
To keep the default settings, clear the check box.
•
Transparency
Set the transparency of the graphical user interface
(GUI) to a value between
0
and
100
, with
0
being
totally opaque and
100
being totally transparent.
•
Resolution
Set the resolution of your display.
Note
You must restart the DVR for new display
resolution settings to take effect.
•
Video Spot
Click to enable Video Spot on a secondary monitor,
on which you can view video from selected cameras
or inputs.
•
Preview Mode
Select
Show Face
List to see, on the right side of
the
Live View
image, all of the snapshots taken as a
result of face detection.
3.
Click
Apply
to save your settings.
Summary of Contents for HRHT4041
Page 2: ...Issue Date Revisions A 04 2018 New document ...
Page 6: ......
Page 96: ...Performance Series HQA Digital Video Recorder Local User Guide 84 Figure 9 13 ...
Page 173: ......


