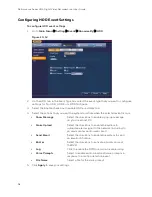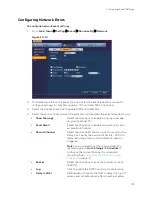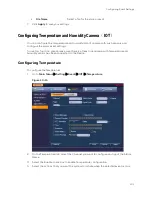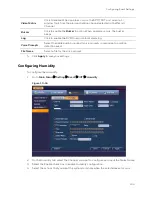
Configuring Event Settings
89
client).
•
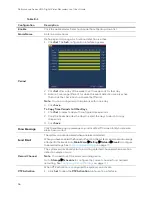
Send Email
Select the check box to enable the system to
send an email notification. If the Snapshot
function is enabled, an image can be
attached to the email.
•
Record Channel
Select the channel(s) that you want to record.
In the
Delay
box, specify the amount of time
(1–300 s) to delay recording after a motion
detection event is triggered.
Note
You also need to set the motion detection recording period. Go to
Storage >
Schedule
to configure the current channel for scheduled recording. See
•
PTZ Activation
Select the check box to activate PTZ functions,
and then click
Select
. In the PTZ Activation
window, for each PTZ camera, select the preset,
tour, or pattern that you want to be called when
a motion detection event occurs, and then click
OK
.
•
Delay (Latch)
Set a length of time for the DVR to delay turning
off events and activated input after an external
alarm is cancelled.
•
Tour
Select the check box to enable a tour of the
selected channels.
•
Snapshot
Select the check box to take a snaphot of
selected channels.
•
Video
Matrix
Click to enable. When an event occurs, the SPOT
OUT port video (a 1-window tour) from the event
activation channel selected in the Record
Channel.
•
Buzzer
Select the check box to activate a buzzer noise
at the DVR.
•
Log
Click to enable the DVR to record a local event
log.
•
Voice Prompts
Select to enable audio broadcast/voice prompts
in response to a motion detection event.
•
File Name
Select a file for the voice prompt.
3.
Click
Apply
to save your settings.
4.
To test your settings, click
Test
.
5.
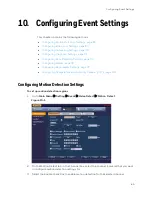
To copy the motion detection settings to additional channels, click
Copy
, select the
channels that you want to copy the settings to, and then click
OK
.
Configuring Video Loss Settings
To configure video loss settings
Summary of Contents for HRHT4041
Page 2: ...Issue Date Revisions A 04 2018 New document ...
Page 6: ......
Page 96: ...Performance Series HQA Digital Video Recorder Local User Guide 84 Figure 9 13 ...
Page 173: ......


