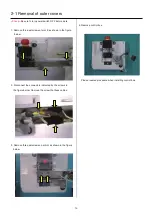
1
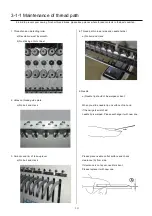
7
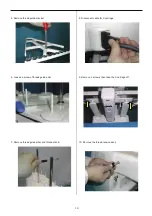
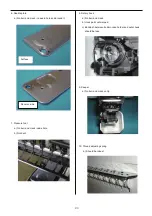
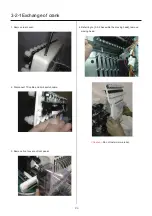
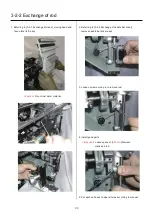
11. Remove the guide.
12. Take off rubber cap.
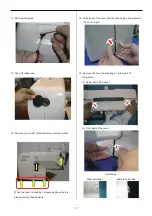
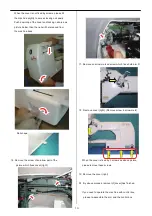
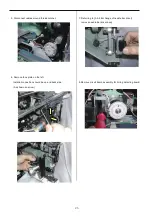
13. Remove cover (left). (Remove screw in arrow mark)
When the cover is fixed by 3 screws as above picture,
please remove these screws.
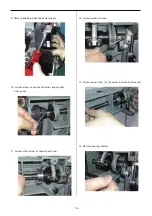
14. Unlock nail of the cover (left) by pressing an arrow point of
the cover (right).
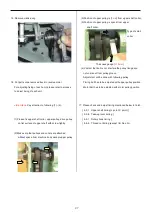
15. Remove the cover by pressing an arrow part of
the picture.
(1) Upper part of the cover
(2) Front part of the cover
Nail shape
Male nail shape Female nail shape
x
x
Summary of Contents for HCS2-1201-30
Page 1: ...Maintenance Manual for Embroidery Machine HCS2 1201 30 Version 2 3 HappyJapan Inc...
Page 154: ...153 5 1 1 Electrical connection diagram except for Rev A...
Page 155: ...154 5 1 1 Electrical connection diagram except for Rev A...
Page 156: ...155 5 1 2 List of electrical connection diagrams except for Rev A...
Page 157: ...156 5 1 3 Electrical connection diagram for Rev A...
Page 158: ...157 5 1 3 Electrical connection diagram for Rev A...
Page 159: ...158 5 1 4 List of electrical connection diagrams for Rev A...
Page 160: ...159 5 2 1 Connection of inverter 100V Inverter set...
Page 161: ...160 5 2 2 Connection of inverter 200V Inverter set...
Page 165: ...160c HCD8116 TP switch board ass y 6 5 265 2 1 6 7 257...

