


www.eaton.com
IM02601004E
Page 165
10 Firmware Upgrade
10 FIRMWARE UPGRADE
The Power Xpert Meter and display firmware is field upgradeable. Firmware can be
remotely upgraded using a web interface by connecting through any Ethernet port pro-
vided on the display or the meter. Mulitple meters in the RS485 sub-network also can be
upgraded when connected through the meter configured as a gateway.
Important!
Make certain that you download the correct firmware for the PXM4000/
PXM6000/PXM8000 meters. Firmware for previous versions of the Power Xpert Meter,
with model numbers of PX4
xxx
, PX6
xxx
, or PX8
xxx
is not compatible with the PXM4000/
PXM6000/PXM8000 meters.
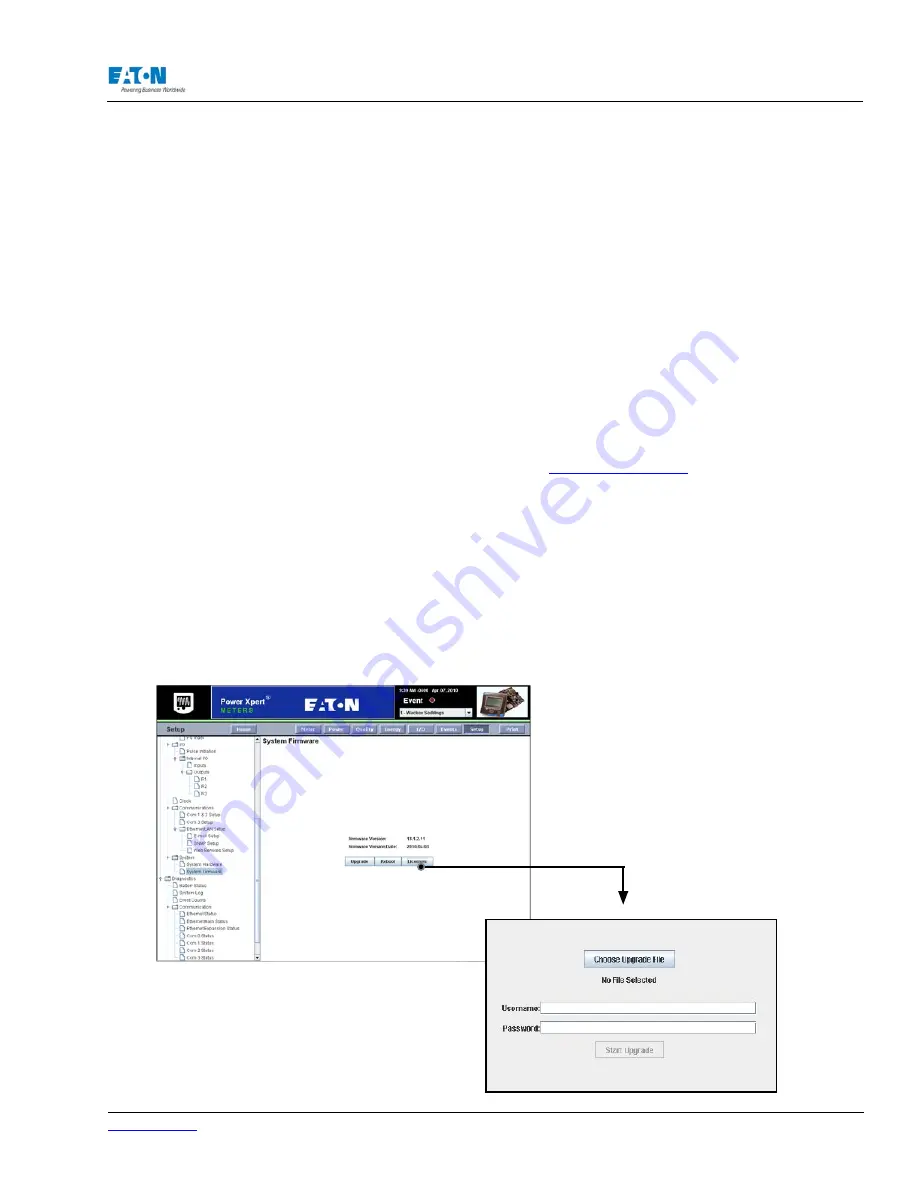
10.1. Locating & Upgrading System Firmware on the Web
Locate and download the firmware on the
www.eaton.com/pxm
web site.
Save the
firmware upgrade zip file in the PC. Click on the Upgrade button on the System Firmware
screen. Options for the upgrade will be displayed.
Select the device you wish to upgrade from the left side of the screen. When a PC is con-
nected to the meter, a display unit is listed as the Master Device. If a PC is connected to
the Display Ethernet port, the display is listed as the Display.
Always upgrade the display unit before upgrading the meter.
Locate and select the Firmware upgrade by clicking on the Choose Upgrade File button
and then browsing the directory with the pop up file browser. Enter the user name and
password. The user must have permission to upgrade the firmware. The administrative
password will work.
Summary of Contents for Power Xpert PXM 4000
Page 1: ...User and Installation Manual IM02601004E Power Xpert PXM 4000 6000 8000 ...
Page 8: ...Page vi IM02601004E www eaton ...
Page 19: ...www eaton com IM02601004E Page 11 1 Introduction ...
Page 24: ...Page 16 IM02601004E www eaton ...
Page 36: ...Page 18 IM02601004E www eaton com 2 Quick Start Guide for the Meter Module ...
Page 45: ...www eaton com IM02601004E Page 37 3 Installation 3 8 MeterDimensions ...
Page 46: ...Page 38 IM02601004E www eaton 3 Installation Dimension Con t ...
Page 47: ...www eaton com IM02601004E Page 39 3 Installation Dimension Con t ...
Page 48: ...Page 40 IM02601004E www eaton 3 Installation Dimension Con t ...
Page 53: ...www eaton com IM02601004E Page 45 3 Installation ...
Page 54: ...Page 46 IM02601004E www eaton 3 Installation ...
Page 55: ...www eaton com IM02601004E Page 47 3 Installation ...
Page 56: ...Page 48 IM02601004E www eaton 3 Installation ...
Page 57: ...www eaton com IM02601004E Page 49 3 Installation ...
Page 58: ...Page 50 IM02601004E www eaton 3 Installation ...
Page 59: ...www eaton com IM02601004E Page 51 3 Installation ...
Page 60: ...Page 52 IM02601004E www eaton 3 Installation ...
Page 61: ...www eaton com IM02601004E Page 53 3 Installation ...
Page 62: ...Page 54 IM02601004E www eaton 3 Installation ...
Page 63: ...www eaton com IM02601004E Page 55 3 Installation ...
Page 66: ...Page 58 IM02601004E www eaton 3 Installation ...
Page 75: ...www eaton com IM02601004E Page 67 4 Introduction to Web Server Screens ...
Page 76: ...Page 68 IM02601004E www eaton 4 Introduction to Web Server Screens ...
Page 86: ...Page 78 IM02601004E www eaton 5 Introduction to the Local Graphical Display ...
Page 108: ...Page 100 IM02601004E www eaton 6 Functions on the Web Server Pages ...
Page 128: ...Page 120 IM02601004E www eaton 7 Functions on the Graphical Display ...
Page 164: ...Page 156 IM02601004E www eaton 8 Setup on the Web Server Pages ...
Page 198: ...Page 190 IM02601004E www eaton A MODBUS Communication ...
Page 242: ...Page 234 IM02601004E www eaton ...
Page 252: ...Page 244 IM02601004E www eaton D Diagnostics ...
Page 254: ...Page 246 IM02601004E www eaton D Diagnostics ...


