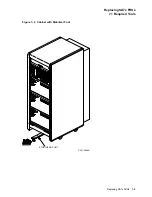


Replacing SA7x FRUs
7.8 Power Harness Removal and Installation
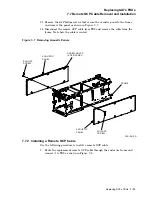
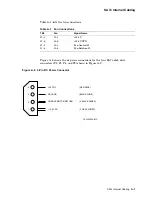
Figure 7–9 SA7x Enclosure Power Harness
FRAME
BOTTOM
SINGLE
BLACK
PIGTAIL
BLACK
SINGLE
ORANGE
DC DRIVE
POWER
SWITCHES
LF
LR
RR
RF
SINGLE/
PIGTAIL
BLACK
POWER SUPPLY
CONNECTOR
PHILLIPS
SCREWS
BOTTOM COVER REMOVED
PHILLIPS
SCREWS
CXO-2614A
SWITCH
REAR
Note
The left-rear and right-rear cables are 80 cm (31.5 in) long. The left-front
and right-front cables are 38 cm (15 in) long. Be sure to route the proper
cable to the proper disk position.
4. Connect the TB2 power cable to connector J7 on TB2.
5. Install the protective cover over the drive power switches and secure it with
the two Phillips screws.
6. Reinstall both acoustic panels.
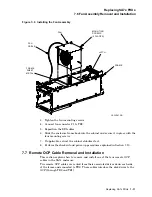
7. Slide the frame back into the chassis and secure it in place with the four
mounting screws.
Replacing SA7x FRUs 7–17


