Replacing SA7x FRUs
7.9 SDI Cable Removal and Installation
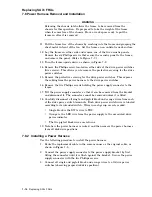
7.9.2 Installing an Enclosure SDI Cable
Use the following procedure to install an enclosure SDI cable:
1. Connect the SDI port connector to the proper connector on the SDI bulkhead.
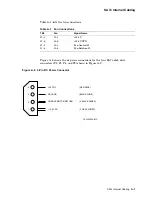
2. Route the SDI cable as shown in Figure 7–10. Verify connections using
Figure A–5 in Appendix A.
3. Secure the cable with tie-wraps.
4. Reinstall both acoustic panels.
5. Slide the frame back into the enclosure chassis and secure it in place with the
four mounting screws.
6. If applicable, retract the cabinet stabilizer foot.
7. Reinstall the OCP. (See Section 7.3.)
8. Reinstall the disk drives. (See Chapter 6.)
9. Reinstall the power supply. (See Section 7.2.)
10. Reconnect the SDI cables to the rear bulkhead of the enclosure.
11. Install the front and rear enclosure covers.
12. Perform the checkout and power-up procedures listed in Section 7.10.
7.10 SA7x Checkout
Perform the following checkout to verify normal operation of the disk drives,
power supply, OCP, and fan assembly before returning the SA7x enclosure to
service.
CAUTION
Before performing this checkout and power-up procedure, be sure the
enclosure frame is secured in the chassis and the front and rear enclosure
covers are installed. Failure to do so will defeat the cooling airflow of
the enclosure and may result in permanent damage to the disk drives or
power supply.
1. Verify that all power and interface connections to the rear of the enclosure
are correct and secure.
2. Verify that the Line Voltage Selector switch on the power supply of the SA7x
enclosure has been set to the proper source voltage. If not, set the switch as
described in Section 3.2.
3. Verify that the drive power switches are turned off.
4. Verify that the enclosure power cord is securely connected to the cabinet
power controller.
5. Turn the enclosure Master On/Off switch on.
6. Verify the power is on by checking that the fan is operating. Do this by
feeling for airflow out the rear of the enclosure. If the fan does not start,
recheck the power connections. If power connections are connected properly,
verify that the power supply is firmly seated in its connector. If the power
still does not come on, refer to Chapter 5.
7–20 Replacing SA7x FRUs

