


52
| Wireless Network
Dell PowerConnect W-Series Instant Access Point 6.1.2.3-2.0.0.0
| User Guide
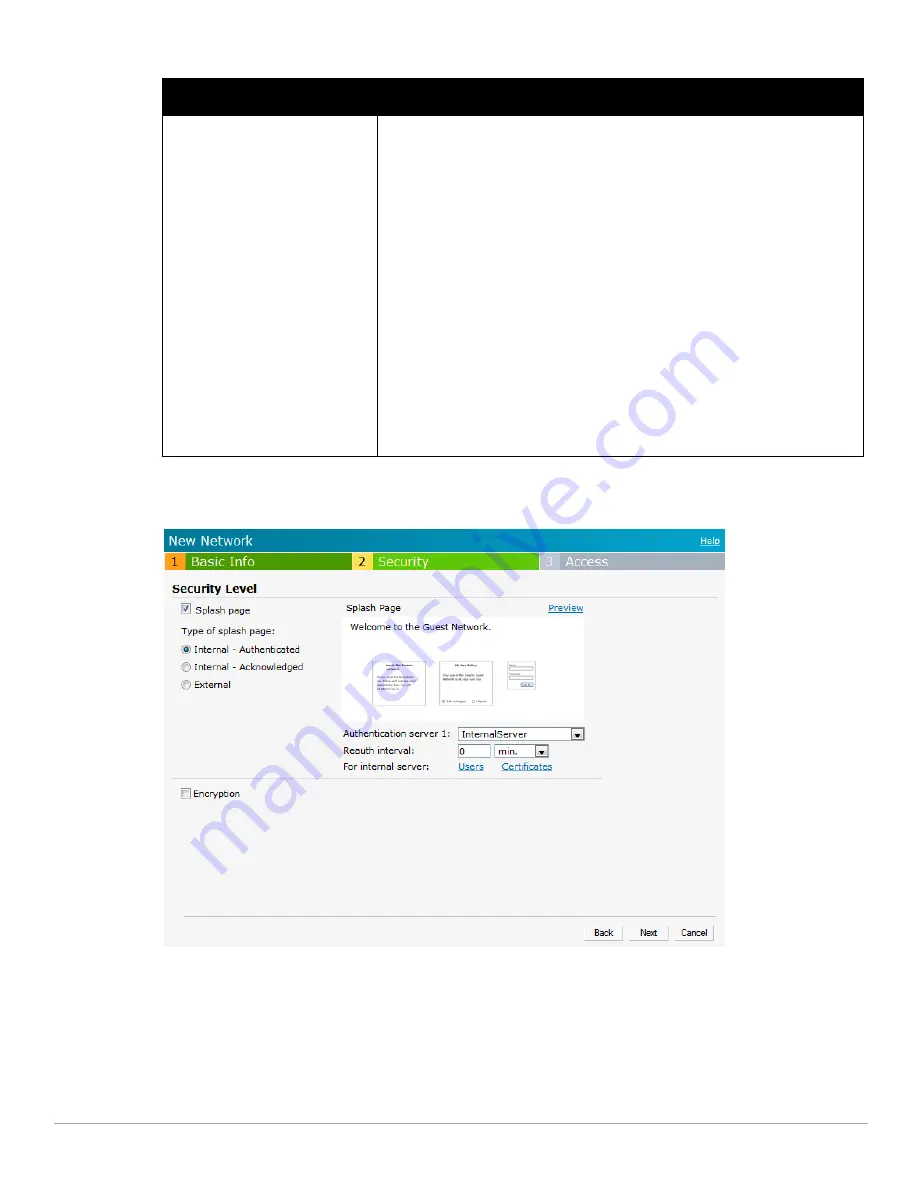
If you do not want to set the captive portal authentication, clear the
Splash page
check box.
Figure 32
Adding a Guest Network—Splash Page Settings
9. Select the
Encryption
check box and perform the following steps (These steps are optional):
a. Select the required key management option from the
Key management
drop-down list. Available options
are:
WPA-2 Personal
WPA Personal
Both (WPA-2 & WPA)
External
An external server will be used to display the splash page to the user. If this option is
selected, then do the following:
1.
Enter the IP or hostname of the external server in the IP or hostname text box.
2.
Enter the URL of the captive portal page in the URL text box.
3.
Enter the number of the port to be used for communicating with the external server
in the Port text box.
4.
In the Authentication text box, enter the unique signature that the external server
will return in the response after a successful user authentication.
5.
Select the required Authentication server 1 option from the drop-down list. Available
options are:
New—If you select this option, then an external radius server has to be configured
to authenticate the users. For information on configuring an external RADIUS server,
see
“Configuring an External RADIUS Server” on page 79
.
6.
Reauth interval—When set to a value greater than zero, the Access Points will
periodically reauthenticate all associated and authenticated clients.
7.
Accounting—When enabled, the Access Points will post accounting information as
RADIUS START and RADIUS STOP accounting records to the RADIUS server.
8.
Accounting interval—When set to a value greater than zero, the IAP will periodically
post accounting information as RADIUS INTERIM accounting records to the RADIUS
server.
Table 9
Conditions for Adding a Guest Network—Basic Info Tab (Continued)
Splash Page Type
Description and steps to set up
Summary of Contents for PowerConnect W-IAP175P
Page 1: ...Dell PowerConnect W Series Instant Access Point 6 1 2 3 2 0 0 0 User Guide ...
Page 8: ...8 Contents Dell PowerConnect W Series Instant Access Point 6 1 2 3 2 0 0 0 User Guide ...
Page 12: ...12 Figures Dell PowerConnect W Series Instant Access Point 6 1 2 3 2 0 0 0 User Guide ...
Page 14: ...14 Tables Dell PowerConnect W Series Instant Access Point 6 1 2 3 2 0 0 0 User Guide ...
Page 58: ...58 Mesh Network Dell PowerConnect W Series Instant Access Point 6 1 2 3 2 0 0 0 User Guide ...
Page 72: ...72 Managing IAPs Dell PowerConnect W Series Instant Access Point 6 1 2 3 2 0 0 0 User Guide ...
Page 74: ...74 NTP Server Dell PowerConnect W Series Instant Access Point 6 1 2 3 2 0 0 0 User Guide ...
Page 96: ...96 Authentication Dell PowerConnect W Series Instant Access Point 6 1 2 3 2 0 0 0 User Guide ...
Page 148: ...148 Monitoring Dell PowerConnect W Series Instant Access Point 6 1 2 3 2 0 0 0 User Guide ...


