


22
| Instant User Interface
Dell PowerConnect W-Series Instant Access Point 6.1.2.3-2.0.0.0
| User Guide
Banner
The banner is a horizontal grey rectangle that appears at the top left corner of the Instant UI. It displays the
company name, logo, and Virtual Controller's name.
Search
Administrators can search an IAP, client, or a network using a simple
Search
dialog box in the Instant UI. This
Search option helps fill in the blank when you type in a word and suggested matches will be automatically
displayed in a dynamic list. The list is more relevant and detailed when more number of keywords are typed in.
This is similar to the auto-complete feature of Google Search.
Tabs
The Instant UI consists of the following tabs:
Networks—Provides information about the Wi-Fi networks in the Dell Instant network.
Access Points—Provides information about the IAPs in the Instant network.
Clients—Provides information about the clients in the Instant network.
Each tab appears in a compressed view by default. A number, specifying the number of networks, IAPs, or clients
in the network precedes the tab names. Click on the tabs to see the expanded view and click again to compress
the expanded view. Items in each tab are associated with a triangle icon. Click on the triangle icon to sort the data
in increasing or decreasing order. Each tab is explained in the following sections.
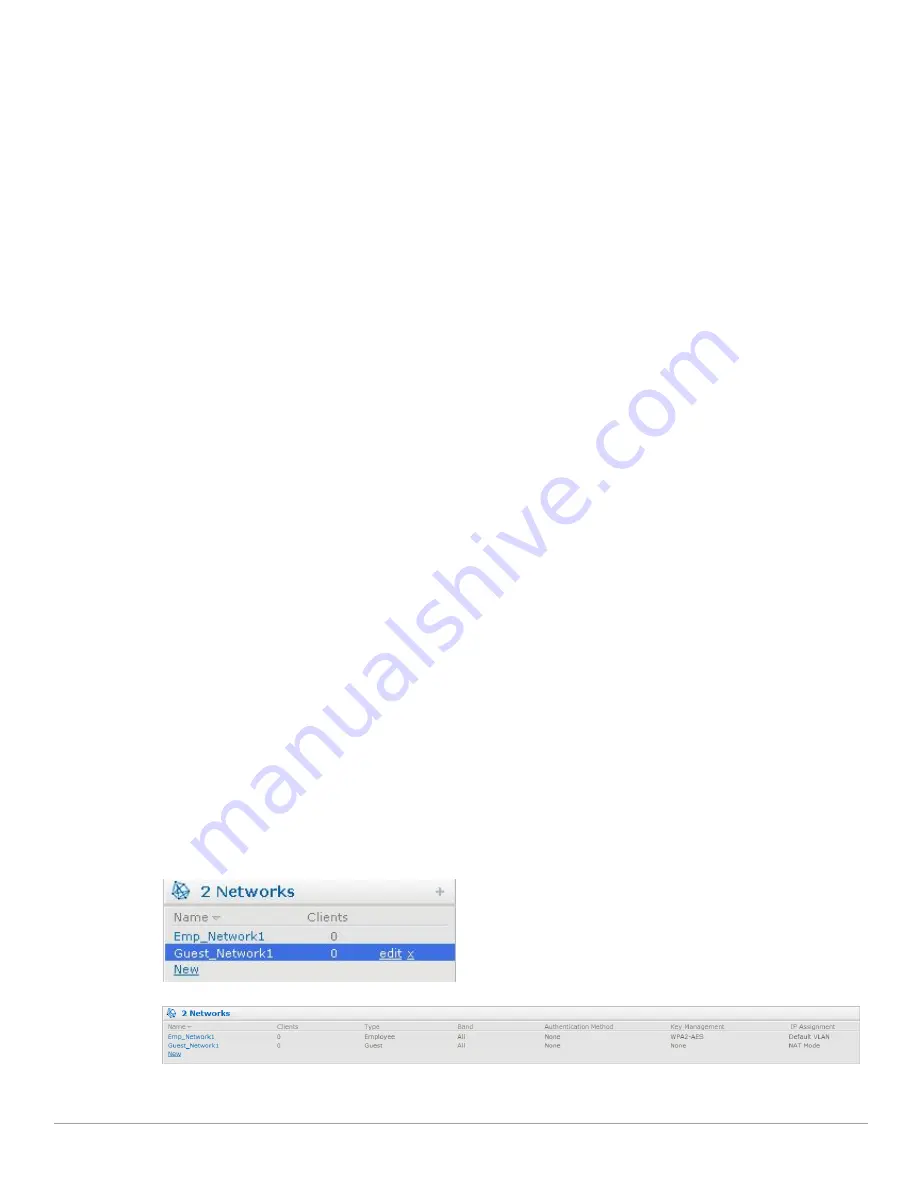
Networks Tab
This tab displays a list of Wi-Fi networks that are configured in the Dell Instant network. The network names
appear as links. The expanded view displays the following information about each Wi-Fi network:
Name
—Name of the network.
Clients
—Number of clients that are connected to the network.
Type
—Network type: Employee, Guest, or Voice.
Band
—Band in which the network is broadcast: 2.4 GHz band, 5.4 GHz band, or both.
Authentication Method
—Authentication method required to connect to the network.
Key Management
—Authentication key type.
IP Assignment
—Source of IP address for the client.
To add a Wi-Fi network, click the
New
link in the
Networks
tab. For more information about a wireless network
and the procedure to add a wireless network, see
Chapter 3, “Wireless Network” on page
39
.
An
edit
link appears on clicking the network name in the
Networks
tab. For information about editing a wireless
network, see
“Editing a Network” on page
53
. To delete a network, click
x
on the right side of the
edit
link.
Figure 6
Networks Tab—Compressed View and Expanded View
Summary of Contents for PowerConnect W-IAP175P
Page 1: ...Dell PowerConnect W Series Instant Access Point 6 1 2 3 2 0 0 0 User Guide ...
Page 8: ...8 Contents Dell PowerConnect W Series Instant Access Point 6 1 2 3 2 0 0 0 User Guide ...
Page 12: ...12 Figures Dell PowerConnect W Series Instant Access Point 6 1 2 3 2 0 0 0 User Guide ...
Page 14: ...14 Tables Dell PowerConnect W Series Instant Access Point 6 1 2 3 2 0 0 0 User Guide ...
Page 58: ...58 Mesh Network Dell PowerConnect W Series Instant Access Point 6 1 2 3 2 0 0 0 User Guide ...
Page 72: ...72 Managing IAPs Dell PowerConnect W Series Instant Access Point 6 1 2 3 2 0 0 0 User Guide ...
Page 74: ...74 NTP Server Dell PowerConnect W Series Instant Access Point 6 1 2 3 2 0 0 0 User Guide ...
Page 96: ...96 Authentication Dell PowerConnect W Series Instant Access Point 6 1 2 3 2 0 0 0 User Guide ...
Page 148: ...148 Monitoring Dell PowerConnect W Series Instant Access Point 6 1 2 3 2 0 0 0 User Guide ...


