


Diagnostic aids
3-11
2.
Reload RFID media in Tray 2 with the RFID media that was just printed in step 1, and then press
continue
.
The test page will be printed.
Note:
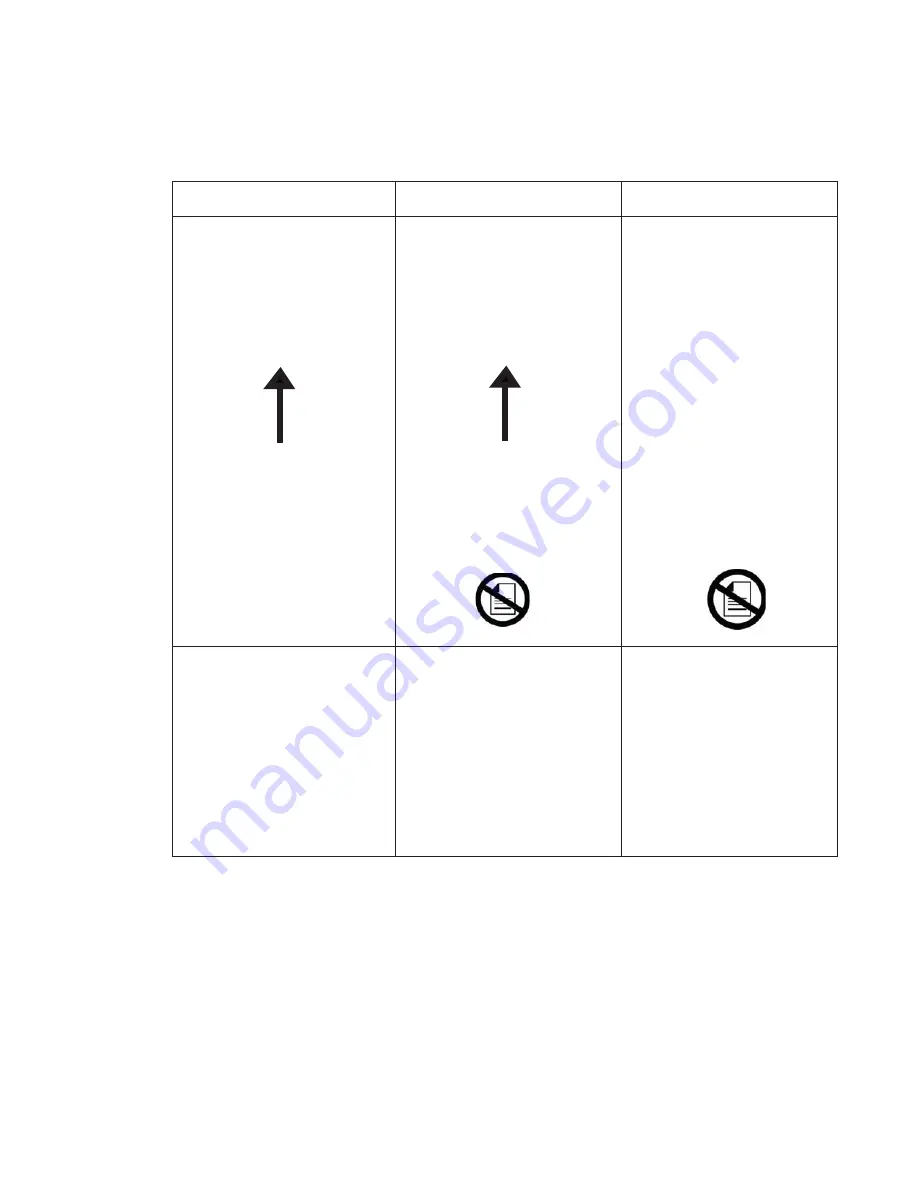
The sheet should be placed face down with the arrow pointing toward the front of the printer.
If the page looks like this:
If the page looks like this:
If the page looks like this:
Then step 2 of the test passed.
Proceed to step 3
Then the test has failed.
This is an indication that the RFID
tag could not be read.
Possible causes:
1. Bad RFID media
2. RFID UHF option failure
Try the test again with a new piece
of RFID media. If the test fails
again, replace the RFID UHF
option.
Then the test has failed.
This is an indication that the RFID
tag could not be read because the
RFID sheet printed in step 1 was
not reloaded (or reloaded
incorrectly) for step 2.
Try the test again with a new piece
of RFID media and make sure the
sheet printed in step 1 is reloaded
into Tray 2 during step 2.
Step 1.
Step 1 is complete
2. Press Continue.
Step 2.
1. Place a sheet of plain paper i
2. Press Continue.
Step two is complete.
Step 1.
Step 1 is complete.
2. Press Continue.
Step 2.
1. Place a sheet of plain paper in Tray
Step two is complete.
Step 2.
1. Place a sheet of plain paper in Tray 2.
Step two is complete.
1. Place this sheet in Tray 2 face-down with the
arrow pointing toward the front of the printer
arrow pointing toward the front of the printe
1. Place this sheet in Tray 2 face-down with t
he
RFID Option Test
RFID Option Test
RFID Option Test
RFID Option Test
RFID Option Test
Summary of Contents for 5230DN
Page 1: ... HOO Q GQ GQ GQ 6HUYLFH 0DQXDO 15 December 2009 ...
Page 2: ... ...
Page 14: ...xiv Service Manual ...
Page 19: ...Notices and safety information xix ...
Page 20: ...xx Service Manual ...
Page 34: ...1 10 Service Manual ...
Page 206: ...2 172 Service Manual ...
Page 318: ...3 112 Service Manual ...
Page 366: ...4 48 Service Manual 6 Remove the operator panel hinge assembly right ...
Page 369: ...Repair Information 4 51 9 Lift the operator panel door assembly out of the machine ...
Page 436: ...4 118 Service Manual 3 Remove the HCIT tray cover front A ...
Page 438: ...4 120 Service Manual 3 Remove the HCIT cover rear ...
Page 440: ...4 122 Service Manual 3 Remove the HCIT cover right ...
Page 469: ...Repair Information 4 151 5 Install the flash card into the system board ...
Page 518: ...4 200 Service Manual ...
Page 520: ...5 2 Service Manual ...
Page 524: ...7 2 Service Manual Assembly 1 Covers ...
Page 526: ...7 4 Service Manual Assembly 2 5230n dn 5350dn and 5530dn Operator panel ...
Page 528: ...7 6 Service Manual Assembly 3 T656dne Operator panel MPF and smart card ...
Page 530: ...7 8 Service Manual Assembly 4 Drive motor assemblies and duplex ...
Page 532: ...7 10 Service Manual Assembly 5 Media path and ducts 1 2 2 3 4 5 6 7 8 9 10 11 12 12 ...
Page 534: ...7 12 Service Manual Assembly 6 Printhead charge and transfer ...
Page 536: ...7 14 Service Manual Assembly 7 Pick arm assembly trays and MPF ...
Page 538: ...7 16 Service Manual Assembly 8 LVPS fuser and electrical cables 1 ...
Page 540: ...7 18 Service Manual Assembly 9 HVPS system card and electrical cables 2 ...
Page 548: ...7 26 Service Manual Assembly 13 SFP stapler assembly 1 1 ...
Page 552: ...7 30 Service Manual Assembly 15 SFP stapler assembly 3 4 5 1 2 3 6 6 7 8 9 10 11 ...
Page 554: ...7 32 Service Manual Assembly 16 SFP stapler assembly 4 1 2 ...
Page 556: ...7 34 Service Manual Assembly 17 5 bin mailbox 1 3 12 7 5 2 11 4 13 8 10 9 1 14 6 ...
Page 564: ...7 42 Service Manual Assembly 21 Envelope feeder and external duplex 1 2 ...
Page 582: ...I 12 Service Manual ...
Page 584: ...5230n dn Printer ...
Page 585: ...5 5 30dn Printer ...
Page 586: ...5 35 0dn Printer ...


