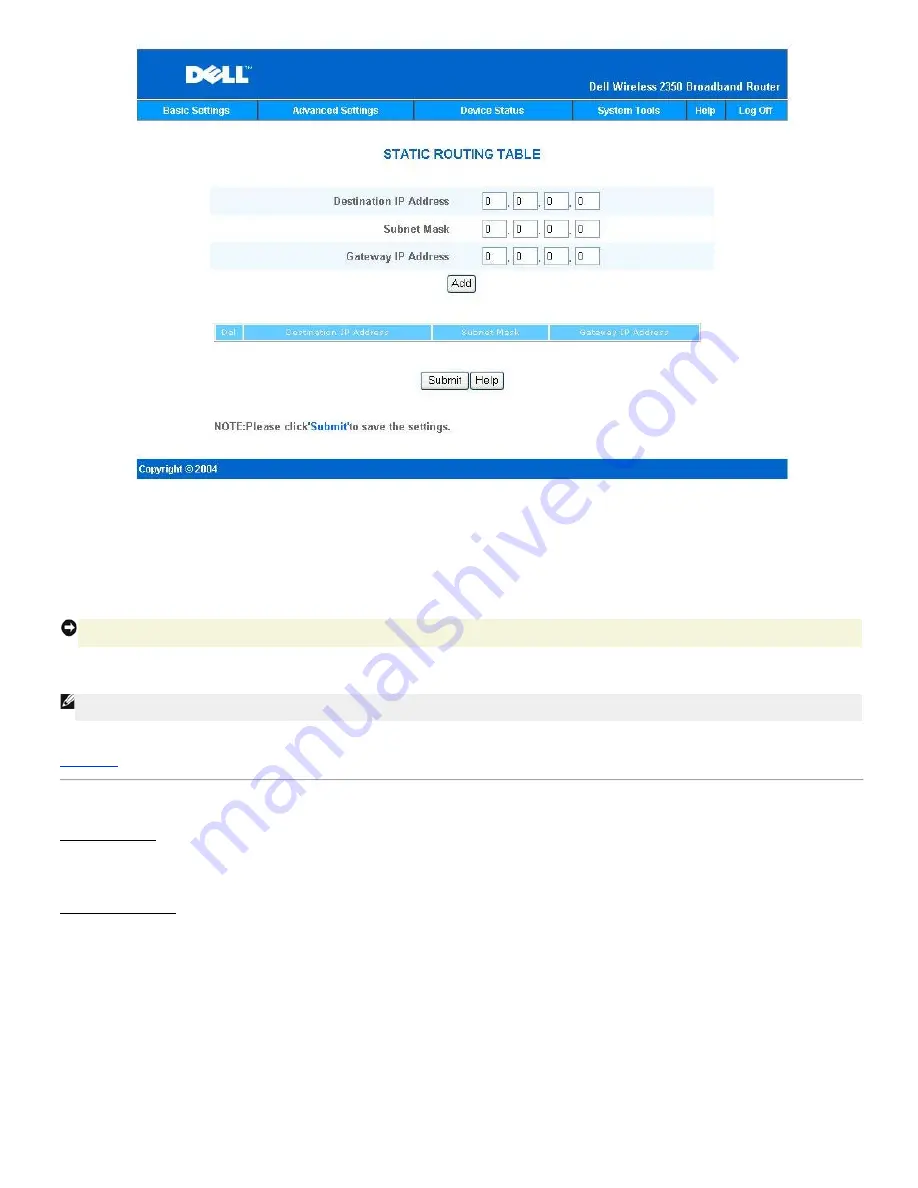
Static routes are manually configured routes to remote networks. That is, the route is predefined and is not discovered by the
Routing Information Protocol
(RIP), as
in dynamic routing. Static routing allows you to assign a gateway to an IP address or network. If there are routers on your internal network that do not function with RIP
1 or 2, you can set up a static route to those routers.
The advantage to using static routing is that network traffic is reduced; thus, static routing is beneficial for slow Internet connections. Routing using static routes is
practical for small networks. For larger networks, the router needs to dynamically keep track of changes in the physical wiring of the network, and the use of dynamic
routing (RIP) is recommended.
NOTICE:
The Static Routing settings are intended for advanced network administrators only. Do not change these settings unless you are certain of the correct
values. You may not be able to access the configuration tool if invalid information is entered.
To use static routing, manually add the Destination IP Address, Subnet Mask, and Gateway IP Address for each route you are adding to the Static Routing Table, and
click
Add
. Then click
Submit
. If you are routing to an entire network, the last number in the destination IP address should be a zero (0); for example, 192.168.0.0.
NOTE:
In static routing, the Dell Wireless 2350 Broadband Router does
NOT
dynamically discover routing information and does
NOT
use RIP. The Dell Wireless
2350 Broadband Router currently does
NOT
support RIP.
Use the fields beside each route and the
Delete
button to remove static routes from the Static Routing Table.
Back to Top
Administration Settings
Password Settings
The Dell Wireless 2350 Broadband Router uses a password to authenticate the user before allowing changes to be made to any network settings. If you would like to
change the current password, click to select
Change Your Password
and enter the new password in both
New Password
and
Retype Password
fields. Write down
the password and keep it in a secure location for future reference.
System Administration
·
HTTP Port No.
Do not change the
HTTP Port
value unless you have reason to do so. Typically, web servers listen for incoming web requests on port 80.
·
Allow remote user to configure the device
If you would like a remote user to be able to administer your Dell Wireless 2350 Broadband Router over the Internet, click to select titled
Allow remote user to
configure the device
. Enter the IP address for the remote administration host computer.
·
Allow remote user to ping the device
Click to select
Allow remote user to ping the device
to enable your Dell Wireless 2350 Broadband Router to be pinged by any user on the Internet. This
feature is helpful if you want to allow other Internet users to check the status of your Dell Wireless 2350 Broadband Router.
·
Enable UPnP function
UPnP stands for Universal Plug and Play, a protocol which allows UPnP-enabled client computers, such as Windows XP, to discover
and configure the Dell Wireless 2350 Broadband Router. One of most common use of UPnP on the router is to open ports to allow application-specific data to
be forwarded through the router for various Internet services or gaming applications. The router detection and the router configuration process can be carried
out automatically by the UPnP-enabled client applications such as
MSN Messenger
so you won't have to do it manually. Click to select
Enable UPnP function
to enable this service.
Summary of Contents for 2350 - Wireless WLAN Broadband Router
Page 2: ...P N Y6925 Revision A01 December 2004 ...
Page 10: ...Back to Contents Page ...
Page 35: ...Confirming the Internet Connection ...
Page 37: ...The next step is to reboot your modem After rebooting the modem click next to continue ...
Page 48: ...Back to Top Back to Contents Page ...
Page 72: ...P N Y6925 Revision A01 December 2004 ...
Page 78: ...Back to Contents Page ...
Page 130: ...Confirming the Internet Connection ...
Page 132: ...The next step is to reboot your modem After rebooting the modem click next to continue ...
Page 143: ...Back to Top Back to Contents Page ...
Page 211: ...Back to Contents Page ...


