6/ Repair Procedures
1503-0151-000
5/26/0
6-23
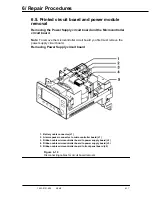
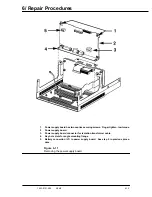
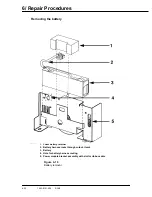
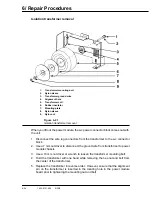
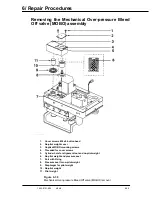
See previous illustration numbered callouts.
1. Remove the foam battery retainer.
2. Disconnect the battery cable connector from the power supply board.
3. Lift the cable out of the slot in the power module.
4. Remove battery and dispose of according to local regulations
5. Install a properly conditioned replacement battery in reverse order of removal
Important:
Check the conditioning date marked on the replacement battery.
Do not install a battery which is 60 days past the conditioning date.
If the replacement battery is 60 days past the conditioning date, re-
turn the replacement battery or dispose of according to local regu-
lations.
Testing After Maintenance
6. Perform section "4/Test and Calibration" and then section "3/Post-Service
Checkout."
7. Charge the battery for 24 hours before returning the ventilator to clinical use.
a Switch ON system power to turn ON the ventilator.
b. If "Low Battery" appears, the message should go away within 5
minutes. If the message does not go away, the battery is not be-
ing charged properly.
c. The system and ventilator must remain plugged in to charge the
battery.
Summary of Contents for Aestiva 7900 SmartVent
Page 2: ...1503 0151 000 3 27 97 ...
Page 4: ...1503 0151 000 3 27 97 ...
Page 12: ...Notes viii 1503 0151 000 3 27 97 ...
Page 18: ...1 Introduction 1 6 1503 0151 000 5 26 0 Notes ...
Page 44: ...2 Theory of Operation 2 26 1503 0151 000 3 27 97 Notes ...
Page 46: ...3 Post Service Checkout 3 2 1503 0151 000 5 26 0 Notes ...

