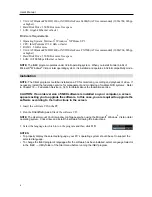
User’s Manual
18
Recording Service
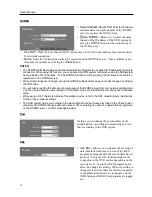
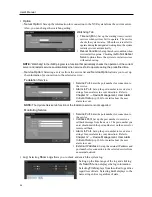
: Select a recording service (supported only for the network video devices). The
device is registered on the recording service and the NVR system performs recording according to a
recording schedule. The channel number of the recording service indicates the maximum number of
cameras that can be registered, and the name indicates the name of a recording service, which was
set during the Service menu setup. When selecting the
Do not record
option, the iNEX program
treats the device during the Schedule setup as though it was not registered and does not perform any
of the scheduled activities associated with the device. If you delete the device from the recording
service after some recording has been done, you cannot search or play back the previously recorded
video though you register the device again. You can check the list of devices registered on the recording
service on a
Device Setup
tab while setting up the recording service in the Service menu. Refer to
Chapter 14 — Storage Management
(p. 119) for details.
Streaming Service
: Select whether or not to use the streaming service for monitoring video from
the device. Streaming service allows remote monitoring of live images in a WAN environment (up
to two users). The number of channels that can be streamed equals the number of channels that can
be recorded. Refer to
Chapter 11 — Streaming
(p. 97) for details.
Apply to All Devices
: Select to apply the same user ID and password to all selected devices if you
selected more than one device and the selected devises have the same user ID and password.
NOTES:
If the device is a DVR, it might be necessary to enter the DVR port numbers depending on the specifications
and version of the DVR.
When registering a four-channel network video transmitter which uses the iNEX protocol, all four cameras
are automatically registered even if some of the four cameras are disabled.
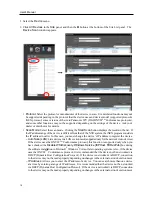
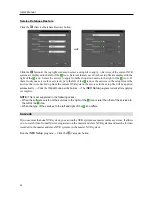
4.
Click
Device Group
in the
Site
panel, and then the button at the bottom of the
Site
panel. The
Add
Device Group
window appears.
Name
: Enter the device group name.
Location
: Select an upper group to which the device group will belong.
Select Devices Below
,
Selected Device List
: Check the box beside cameras in the left panel, and
the selected cameras are added to the right panel.
Clicking the
OK
button completes the device group registration.
Summary of Contents for CRINEXSN04-2TB
Page 1: ......
Page 2: ......
Page 8: ...User s Manual vi Troubleshooting 160 Specification 161 Index 163 ...
Page 18: ...User s Manual 10 ...
Page 32: ...User s Manual 24 ...
Page 54: ...User s Manual 46 ...
Page 70: ...User s Manual 62 ...
Page 82: ...User s Manual 74 ...
Page 94: ...User s Manual 86 ...
Page 102: ...User s Manual 94 ...
Page 142: ...User s Manual 134 ...
Page 164: ...User s Manual 156 ...
Page 170: ...User s Manual 162 ...


