20060301
3-2-6
Using the Graph Window
Panning the Graph Window
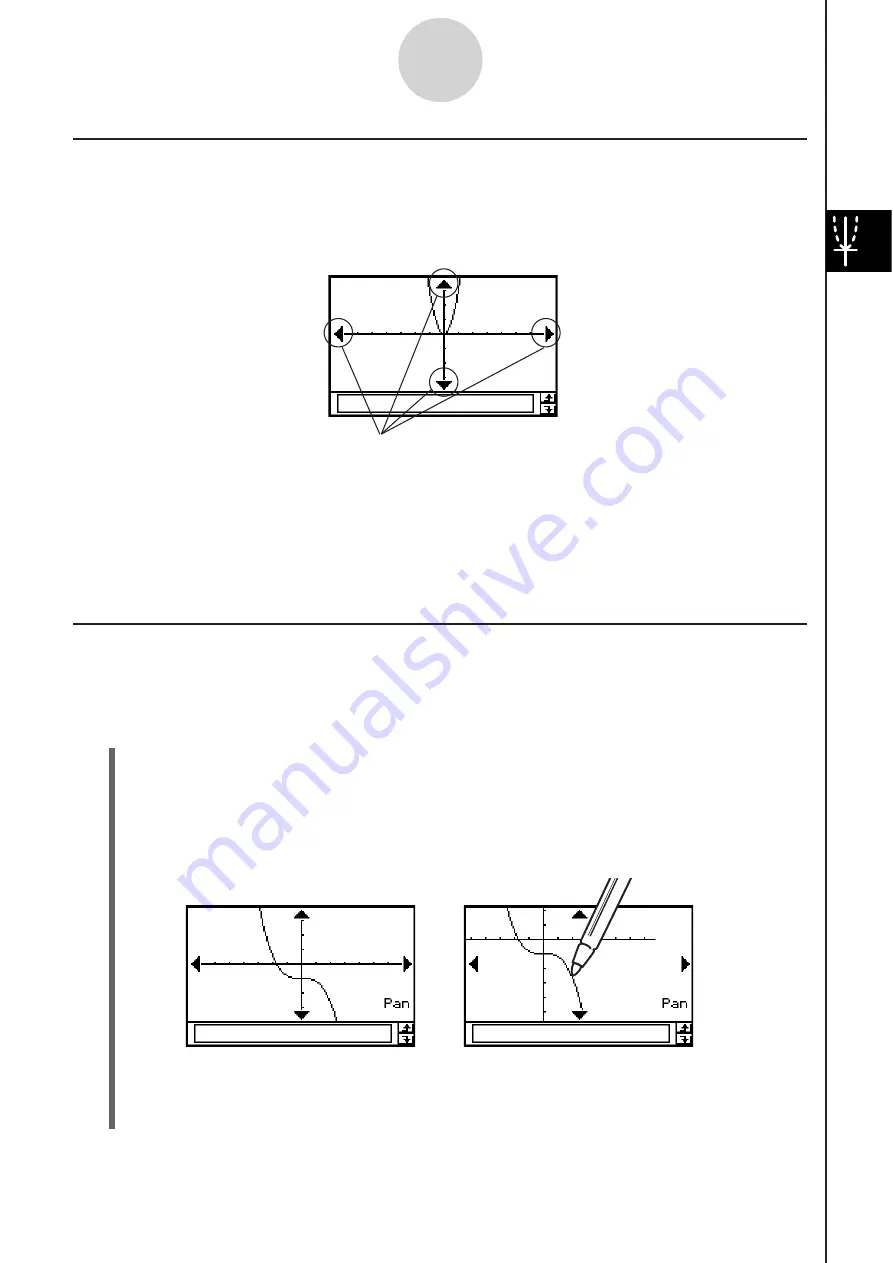
Placing the stylus against the Graph window and dragging causes the window to scroll
automatically in the direction you drag.
S
Cla
ss
Pad Operation
(1) Tap the Graph window to make it active.
(2)
Tap
4
.
(3) Holding the stylus anywhere against the Graph window, drag it in the direction you
want.
• This causes the Graph window to scroll automatically in accordance with the
dragging.
(4) When the Graph window shows the area you want, remove the stylus from the display.
• This causes the graph to be redrawn on the Graph window.
After
4
is tapped
While panning
Tip
• Display of the graph controller arrows is turned off under initial default settings. Use the Graph
Format dialog box to turn them on, if you want. For more information, see “Application Format
Settings” on page 1-9-4.
• You can also use the graph controller arrows and cursor key to change the configuration of a
graph. For details, see “3-5 Modifying a Graph”.
Graph controller arrows
Scrolling the Graph Window
After drawing a graph, you can use either of the two operations to scroll it up, down, left, or
right.
• Tap the graph controller arrows at the edges of the Graph window.
• Use the cursor key.
Summary of Contents for ClassPad 330
Page 11: ...20060301 20090601 ClassPad 330 ClassPad OS Version 3 04 ...
Page 277: ...20060301 3 3 10 Storing Functions 3 Tap AND Plot OR Plot ...
Page 779: ...20090601 S Graph Line Clustered C S Graph Line Stacked E 13 9 2 Graphing ...
Page 780: ...20090601 S Graph Line 100 Stacked F S Graph Column Clustered G 13 9 3 Graphing ...
Page 781: ...20090601 S Graph Column Stacked I S Graph Column 100 Stacked J 13 9 4 Graphing ...
Page 782: ...20090601 S Graph Bar Clustered K S Graph Bar Stacked 9 13 9 5 Graphing ...


