Advanced Guide
>
Scanning
>
Scanning with Other Application Software
>
Appendix: Useful Information on Scanning
>
Adjusting Cropping Frames
Adjusting Cropping Frames
You can specify the scan area by creating a cropping frame on the image displayed in the Preview area.
When you click Scan, only the portion within the cropping frame will be scanned and passed to the
application.
You can create two or more cropping frames. When you click Scan, all cropping frames will be scanned.
(Scan is repeated for each cropping frame.)
Important
You cannot create additional cropping frames when you used Multi-Crop in ScanGear's Advanced
Mode.
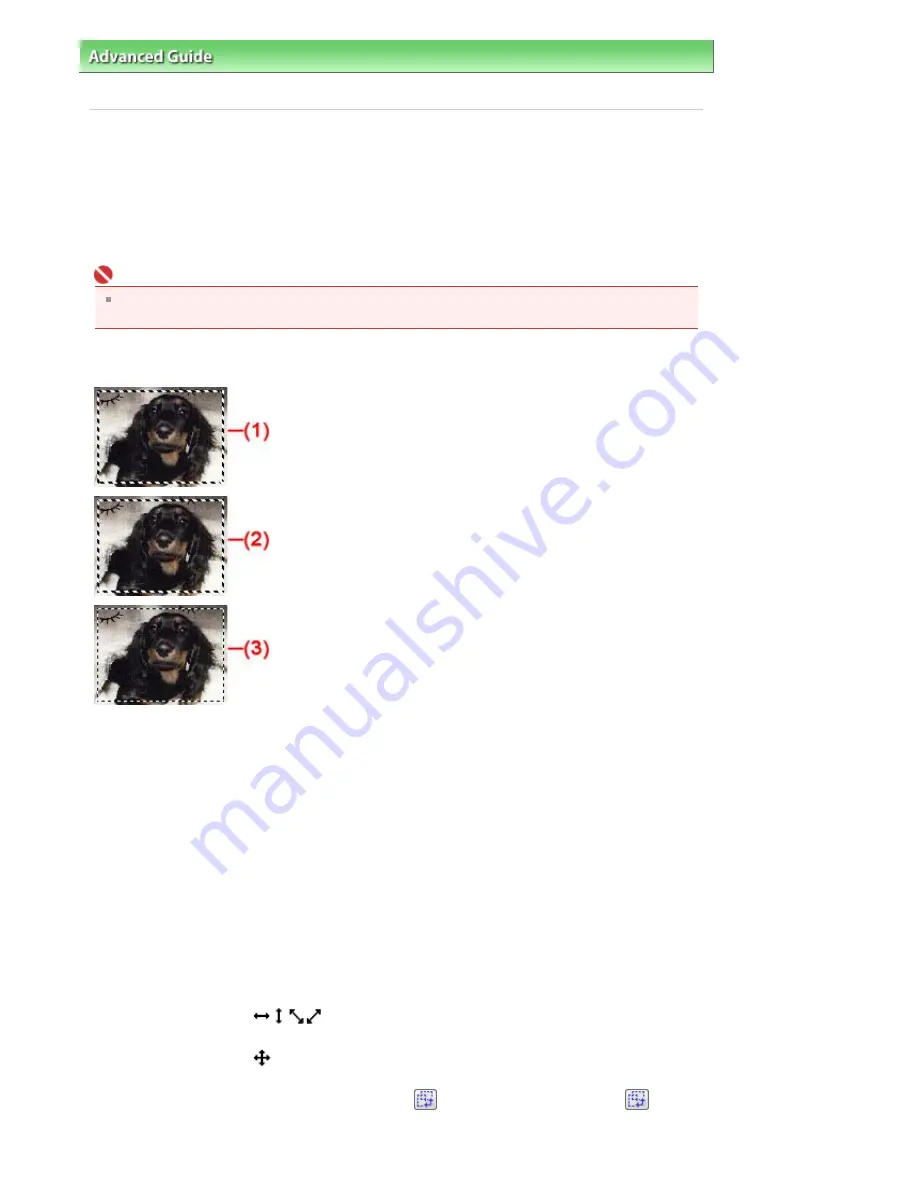
Cropping frame types
(1) Focus Cropping Frame (rotating thick broken lines)
The settings in Basic Mode or Advanced Mode will be applied.
(2) Selected Cropping Frame (stationary thick broken lines)
The settings will be applied to the Focus Cropping Frame and Selected Cropping Frames
simultaneously. You can select multiple cropping frames by clicking them while pressing the Ctrl key.
(3) Unselected Cropping Frame (stationary thin broken lines)
The settings will not be applied.
Initial cropping frame
A cropping frame (Focus Cropping Frame) is displayed automatically around the preview image
according to the document size. You can also create a cropping frame by dragging the mouse in the
Preview area.
Adjusting a cropping frame
The cursor will change into
when it is positioned over a cropping frame. If you click and drag
the mouse in the direction of the arrow, the cropping frame will expand or contract accordingly.
The cursor will change into
when it is positioned within a cropping frame. Click and drag the mouse
to move the entire cropping frame.
You can rotate a cropping frame 90 degrees by clicking
(Switch Aspect Ratio). However,
(Switch
Aspect Ratio) is not available when Output Size is Flexible.
Page 496 of 681 pages
Adjusting Cropping Frames
Summary of Contents for MP480 series
Page 29: ...Checklist Staff paper Page top Page 29 of 681 pages Printing a Notebook Paper ...
Page 41: ...position See Aligning the Print Head Page top Page 41 of 681 pages Printing Documents Windows ...
Page 59: ...Page top Page 59 of 681 pages Loading Paper ...
Page 62: ...Page top Page 62 of 681 pages Loading Envelopes ...
Page 65: ...Page top Page 65 of 681 pages Loading Originals ...
Page 71: ...Page top Page 71 of 681 pages Examining the Nozzle Check Pattern ...
Page 84: ...Page top Page 84 of 681 pages Cleaning the Paper Feed Roller ...
Page 128: ...Page top Page 128 of 681 pages Selecting a Photo ...
Page 130: ...Page top Page 130 of 681 pages Editing ...
Page 132: ...Page top Page 132 of 681 pages Printing ...
Page 204: ...Page top Page 204 of 681 pages Attaching Comments to Photos ...
Page 208: ...See Help for details on each dialog box Page top Page 208 of 681 pages Setting Holidays ...
Page 244: ...Page top Page 244 of 681 pages Setting Paper Dimensions Custom Size ...
Page 257: ...Page top Page 257 of 681 pages Printing with ICC Profiles ...
Page 343: ...Printing Photos Sending via E mail Editing Files Page top Page 343 of 681 pages Saving ...
Page 425: ...installed Page top Page 425 of 681 pages Custom Dialog Box ...
Page 553: ...Page top Page 553 of 681 pages Printing with Computers ...
Page 612: ...Page top Page 612 of 681 pages Paper Jams ...
Page 619: ...Page top Page 619 of 681 pages Error Message Appears on a PictBridge Compliant Device ...


