


Adjust the brightness of an image by selecting the type of graph (tone curve) showing the balance of
tone input and output. You can make fine adjustments to the brightness of a specific area.
Adjusting Tone Curve
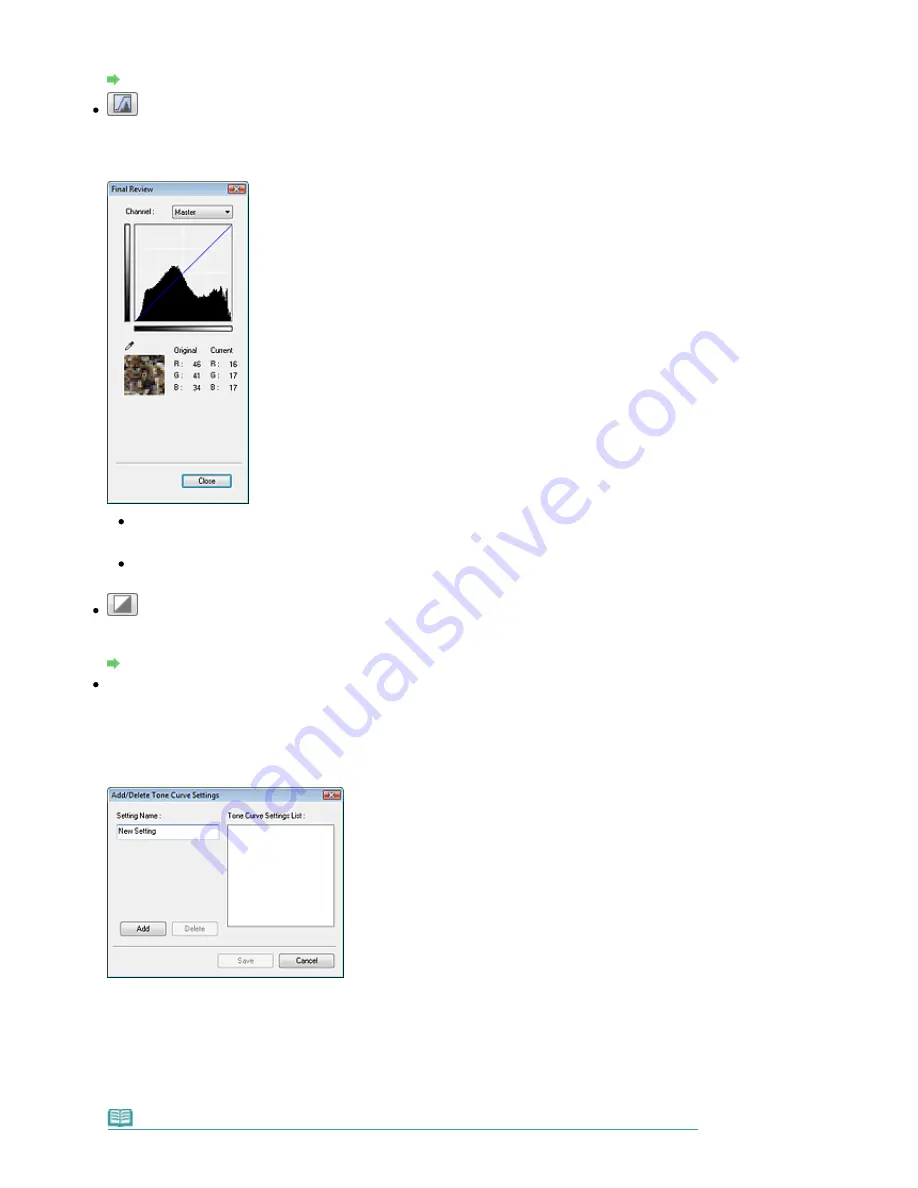
(Final Review)
Make a final check of color adjustments. The final synthesized tone curve and the histogram derived
from the subsequent image processing will be displayed. There are no settings to make in this
screen.
For a color image, select a color in Channel to check either Red, Green or Blue, or select Master to
check three colors together.
If you place the cursor on the preview image, the portion will be enlarged and its RGB values (only
K when Color Mode is Grayscale) before and after the adjustments will be displayed.
(Threshold)
Set the boundary (threshold) at which black and white are divided. By adjusting the threshold level, you
can sharpen text in a document or reduce show-through in newspapers.
Setting Threshold
Custom
You can name and save a set of tone curve and threshold settings created with the Color Adjustment
Buttons.
Select Add/Delete... from the pull-down menu. When Color Mode is set to anything but Black and
White, the Add/Delete Tone Curve Settings dialog box opens. When Color Mode is Black and White,
the Add/Delete Threshold Settings dialog box opens.
Enter Setting Name and click Add. The name appears in Tone Curve Settings List or Threshold
Settings List.
Click Save to save.
You can load and apply the saved tone curve/threshold settings to a preview image. To load the
settings, select the saved item from the pull-down menu.
To delete an item, select it in Tone Curve Settings List or Threshold Settings List and click Delete.
Note
Page 485 of 681 pages
Color Adjustment Buttons
Summary of Contents for MP480 series
Page 29: ...Checklist Staff paper Page top Page 29 of 681 pages Printing a Notebook Paper ...
Page 41: ...position See Aligning the Print Head Page top Page 41 of 681 pages Printing Documents Windows ...
Page 59: ...Page top Page 59 of 681 pages Loading Paper ...
Page 62: ...Page top Page 62 of 681 pages Loading Envelopes ...
Page 65: ...Page top Page 65 of 681 pages Loading Originals ...
Page 71: ...Page top Page 71 of 681 pages Examining the Nozzle Check Pattern ...
Page 84: ...Page top Page 84 of 681 pages Cleaning the Paper Feed Roller ...
Page 128: ...Page top Page 128 of 681 pages Selecting a Photo ...
Page 130: ...Page top Page 130 of 681 pages Editing ...
Page 132: ...Page top Page 132 of 681 pages Printing ...
Page 204: ...Page top Page 204 of 681 pages Attaching Comments to Photos ...
Page 208: ...See Help for details on each dialog box Page top Page 208 of 681 pages Setting Holidays ...
Page 244: ...Page top Page 244 of 681 pages Setting Paper Dimensions Custom Size ...
Page 257: ...Page top Page 257 of 681 pages Printing with ICC Profiles ...
Page 343: ...Printing Photos Sending via E mail Editing Files Page top Page 343 of 681 pages Saving ...
Page 425: ...installed Page top Page 425 of 681 pages Custom Dialog Box ...
Page 553: ...Page top Page 553 of 681 pages Printing with Computers ...
Page 612: ...Page top Page 612 of 681 pages Paper Jams ...
Page 619: ...Page top Page 619 of 681 pages Error Message Appears on a PictBridge Compliant Device ...


