


Advanced Guide
>
Scanning
>
Scanning with Other Application Software
>
ScanGear (Scanner Driver) Screens
>
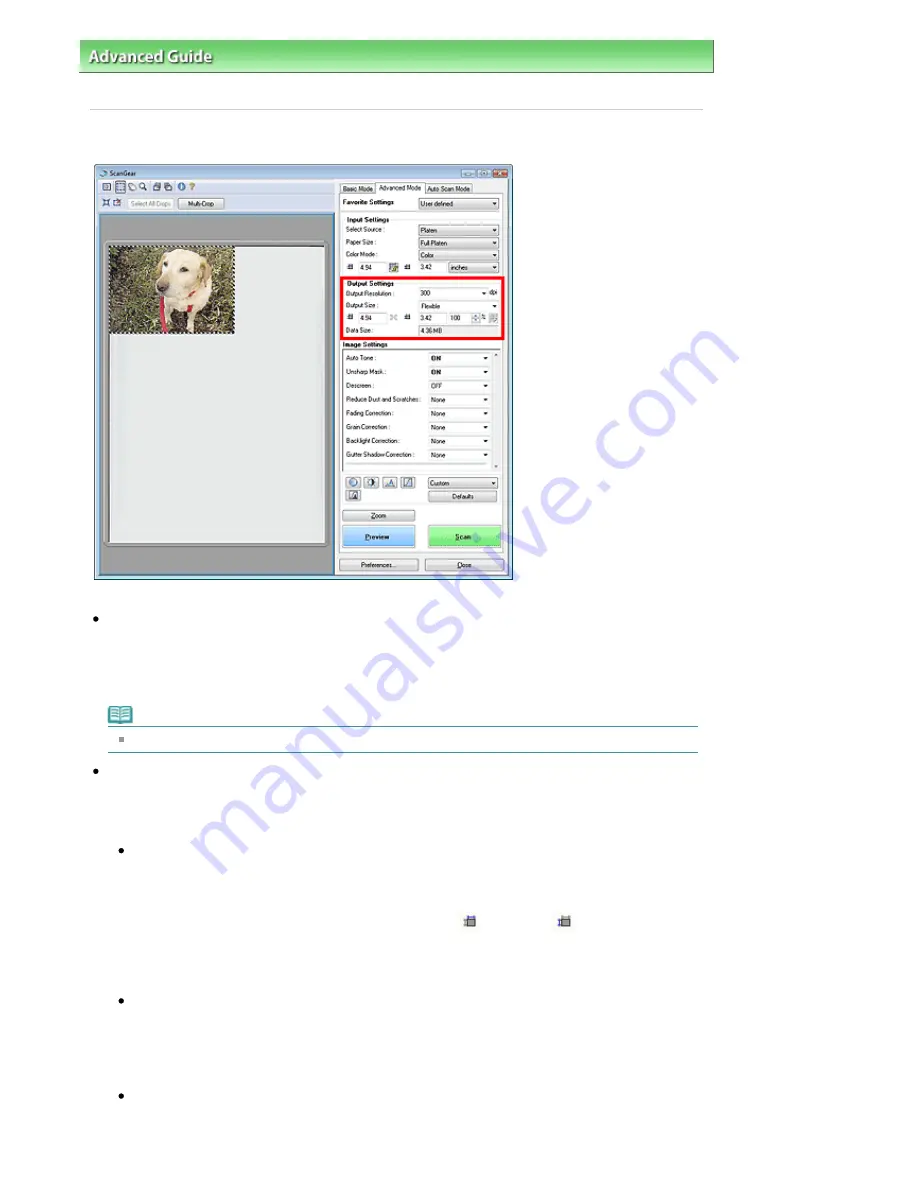
Output Settings
Output Settings
Output Settings allows you to set the following items:
Output Resolution
Select the resolution to scan at.
The higher the resolution (value), the more detail in your image.
Select a resolution from the options displayed by clicking the button, or enter a value within the range
of 25 dpi to 19200 dpi (in 1 dpi increments).
Note
See "
Resolution
" for details.
Output Size
Select an output size.
Select Flexible to set custom sizes or select a size for printing or displaying. Select Add/Delete... to set
custom size and save it as a new output size option.
Flexible
You can specify the output resolution and scale, and adjust the cropping frame. When no cropping
frame is displayed, the entire Preview area will be scanned. When a cropping frame is displayed,
the portion within the cropping frame will be scanned.
To enlarge/reduce the scanned image, enter values into
(Width) and
(Height) in Output
Settings or specify a value (by 1%) for %. The maximum value available for % depends on the
Output Resolution. % can be specified for up to 19200 dpi (the maximum available output
resolution).
Paper Size (L, etc.) & Monitor Size (1024 x 768 pixels, etc.)
Width, height and scale cannot be specified. The preview image will be cropped according to the
selected output size and resolution. The portion within the cropping frame will be scanned at the
size of the selected paper/monitor size. You can drag the cropping frame to enlarge, reduce or
move it while maintaining the aspect ratio.
Add/Delete...
Open the Add/Delete the Output Size dialog box, in which you can save/delete custom output
sizes.
Page 478 of 681 pages
Output Settings
Summary of Contents for MP480 series
Page 29: ...Checklist Staff paper Page top Page 29 of 681 pages Printing a Notebook Paper ...
Page 41: ...position See Aligning the Print Head Page top Page 41 of 681 pages Printing Documents Windows ...
Page 59: ...Page top Page 59 of 681 pages Loading Paper ...
Page 62: ...Page top Page 62 of 681 pages Loading Envelopes ...
Page 65: ...Page top Page 65 of 681 pages Loading Originals ...
Page 71: ...Page top Page 71 of 681 pages Examining the Nozzle Check Pattern ...
Page 84: ...Page top Page 84 of 681 pages Cleaning the Paper Feed Roller ...
Page 128: ...Page top Page 128 of 681 pages Selecting a Photo ...
Page 130: ...Page top Page 130 of 681 pages Editing ...
Page 132: ...Page top Page 132 of 681 pages Printing ...
Page 204: ...Page top Page 204 of 681 pages Attaching Comments to Photos ...
Page 208: ...See Help for details on each dialog box Page top Page 208 of 681 pages Setting Holidays ...
Page 244: ...Page top Page 244 of 681 pages Setting Paper Dimensions Custom Size ...
Page 257: ...Page top Page 257 of 681 pages Printing with ICC Profiles ...
Page 343: ...Printing Photos Sending via E mail Editing Files Page top Page 343 of 681 pages Saving ...
Page 425: ...installed Page top Page 425 of 681 pages Custom Dialog Box ...
Page 553: ...Page top Page 553 of 681 pages Printing with Computers ...
Page 612: ...Page top Page 612 of 681 pages Paper Jams ...
Page 619: ...Page top Page 619 of 681 pages Error Message Appears on a PictBridge Compliant Device ...


