


Advanced Guide
>
Printing from a Computer
>
Printing with the Bundled Application Software
>
Correcting and
Enhancing Photos
> Using the Auto Photo Fix Function
Using the Auto Photo Fix Function
Apply optimum corrections automatically to the photos used for an album or calendar.
Important
The Auto Photo Fix function is not available for Photo Print. Photo Print allows you to automatically
apply suitable corrections to all photos when printing. Select this option in Image on the Advanced
tab of the Preferences dialog box. To display the Preferences dialog box, click
(Settings) in the
Layout/Print screen or select Preferences... from the File menu.
Once image is corrected with Auto Photo Fix and saved, it cannot be corrected again with Auto
Photo Fix.
Also, Auto Photo Fix may not be available for images edited using an application, digital camera,
etc. manufactured by other companies.
1.
Select photos in the Select Images screen, then click
(Correct/Enhance
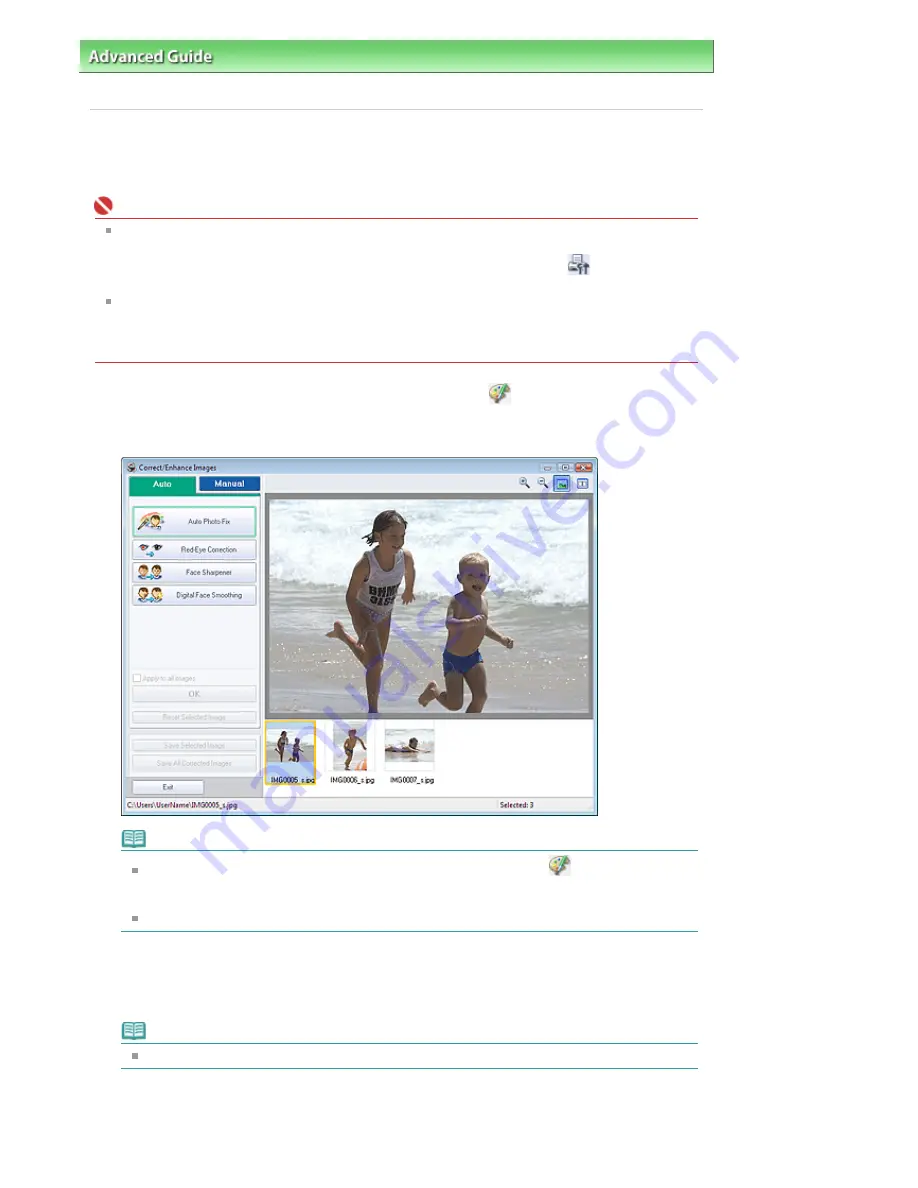
Images).
The Correct/Enhance Images window appears.
Note
You can also display the Correct/Enhance Images window by clicking
(Correct/Enhance
Images) in the Layout/Print or Edit screen. In that case, only the image displayed in Preview
can be corrected/enhanced.
See "
Correct/Enhance Images Window
" for details on the Correct/Enhance Images window.
2.
Select the image you want to correct from the list displayed in the lower part of the
Correct/Enhance Images window.
The image appears in Preview.
Note
If only one image is selected, the thumbnail does not appear below Preview.
3.
Make sure that Auto is selected.
Page 152 of 681 pages
Using the Auto Photo Fix Function
Summary of Contents for MP480 series
Page 29: ...Checklist Staff paper Page top Page 29 of 681 pages Printing a Notebook Paper ...
Page 41: ...position See Aligning the Print Head Page top Page 41 of 681 pages Printing Documents Windows ...
Page 59: ...Page top Page 59 of 681 pages Loading Paper ...
Page 62: ...Page top Page 62 of 681 pages Loading Envelopes ...
Page 65: ...Page top Page 65 of 681 pages Loading Originals ...
Page 71: ...Page top Page 71 of 681 pages Examining the Nozzle Check Pattern ...
Page 84: ...Page top Page 84 of 681 pages Cleaning the Paper Feed Roller ...
Page 128: ...Page top Page 128 of 681 pages Selecting a Photo ...
Page 130: ...Page top Page 130 of 681 pages Editing ...
Page 132: ...Page top Page 132 of 681 pages Printing ...
Page 204: ...Page top Page 204 of 681 pages Attaching Comments to Photos ...
Page 208: ...See Help for details on each dialog box Page top Page 208 of 681 pages Setting Holidays ...
Page 244: ...Page top Page 244 of 681 pages Setting Paper Dimensions Custom Size ...
Page 257: ...Page top Page 257 of 681 pages Printing with ICC Profiles ...
Page 343: ...Printing Photos Sending via E mail Editing Files Page top Page 343 of 681 pages Saving ...
Page 425: ...installed Page top Page 425 of 681 pages Custom Dialog Box ...
Page 553: ...Page top Page 553 of 681 pages Printing with Computers ...
Page 612: ...Page top Page 612 of 681 pages Paper Jams ...
Page 619: ...Page top Page 619 of 681 pages Error Message Appears on a PictBridge Compliant Device ...


