


4.
Configure the stamp while viewing the preview window
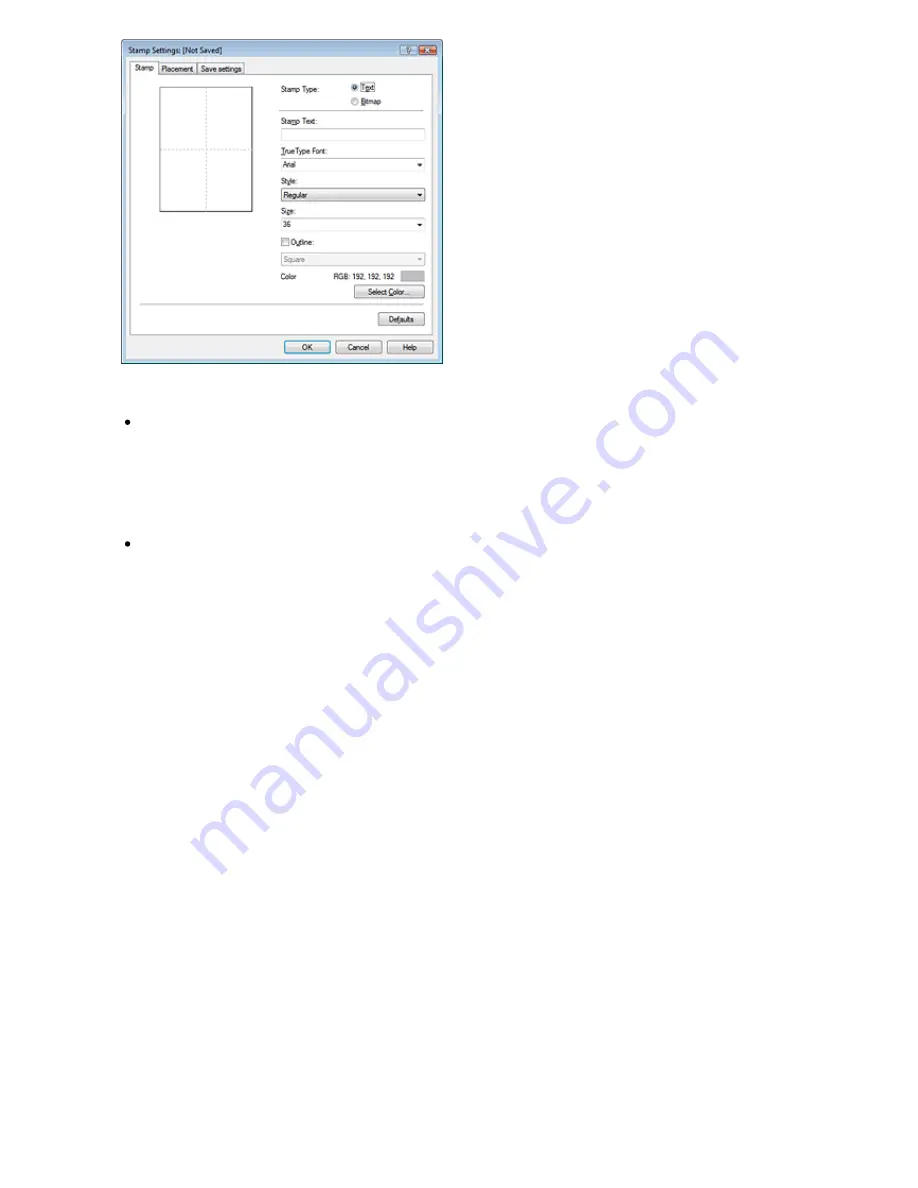
Stamp tab
Select Text or Bitmap with Stamp Type.
When registering a text, the characters must already be entered in Stamp Text. Change the True
Type Font, Style, Size, and Outline settings, as necessary. You can select the color of the stamp
by clicking Select Color....
For Bitmap, click Select File... and select the bitmap file (.bmp) to be used. Change the settings
of the Size and Transparent white area if necessary.
Placement tab
Select the stamp position from the Position list. You can also select Custom from the Position
list and specify coordinates for X-Position and Y-Position.
You can also change the stamp position by dragging the stamp in the preview window.
To change the stamp position angle, type a value in the Orientation box directly.
5.
Save the stamp
Click the Save settings tab and enter a new stamp title in the Title box, and then click Save.
Click OK when the confirmation message appears.
6.
Complete the setup
Click OK. The Stamp/Background dialog box opens again.
The registered title appears in the Stamp list.
Changing and registering some of stamp settings
1.
Select the stamp for which the settings are to be changed
Check the Stamp check box in the Stamp/Background dialog box, and then select the title of the
stamp to be changed from the Stamp list.
2.
Click Define Stamp...
The Stamp Settings dialog box opens.
3.
Configure the stamp while viewing the preview window
4.
Save the stamp
Click Save overwrite on the Save settings tab.
If you want to save the stamp with a different title, type a new title in the Title box and click Save.
Click OK when the confirmation message appears.
5.
Complete the setup
Page 236 of 681 pages
Saving a Stamp Setting
Summary of Contents for MP480 series
Page 29: ...Checklist Staff paper Page top Page 29 of 681 pages Printing a Notebook Paper ...
Page 41: ...position See Aligning the Print Head Page top Page 41 of 681 pages Printing Documents Windows ...
Page 59: ...Page top Page 59 of 681 pages Loading Paper ...
Page 62: ...Page top Page 62 of 681 pages Loading Envelopes ...
Page 65: ...Page top Page 65 of 681 pages Loading Originals ...
Page 71: ...Page top Page 71 of 681 pages Examining the Nozzle Check Pattern ...
Page 84: ...Page top Page 84 of 681 pages Cleaning the Paper Feed Roller ...
Page 128: ...Page top Page 128 of 681 pages Selecting a Photo ...
Page 130: ...Page top Page 130 of 681 pages Editing ...
Page 132: ...Page top Page 132 of 681 pages Printing ...
Page 204: ...Page top Page 204 of 681 pages Attaching Comments to Photos ...
Page 208: ...See Help for details on each dialog box Page top Page 208 of 681 pages Setting Holidays ...
Page 244: ...Page top Page 244 of 681 pages Setting Paper Dimensions Custom Size ...
Page 257: ...Page top Page 257 of 681 pages Printing with ICC Profiles ...
Page 343: ...Printing Photos Sending via E mail Editing Files Page top Page 343 of 681 pages Saving ...
Page 425: ...installed Page top Page 425 of 681 pages Custom Dialog Box ...
Page 553: ...Page top Page 553 of 681 pages Printing with Computers ...
Page 612: ...Page top Page 612 of 681 pages Paper Jams ...
Page 619: ...Page top Page 619 of 681 pages Error Message Appears on a PictBridge Compliant Device ...


