CHAPTER 3 PROGRAMMING WITH ICONS
76 PD-3000
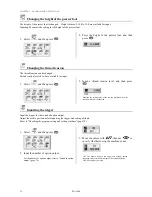
Changing the height of the presser foot
The height of the presser foot is changed. Height values of -10.0 to 10.0 are available for input.
Inputting 00 cancels the setting for the height of the presser foot.
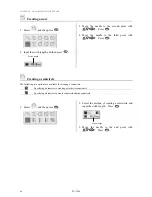
1. Select
, and then press
.
2. Press the height of the presser foot, and then
press
.
Changing the thread tension
The thread tension can be changed.
Thread tension levels 0 to 9 are available for input.
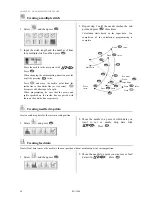
1. Select
, and then press
.
2. Input a thread tension level, and then press
.
Inputting the trigger
Input the trigger for the extended option output.
Adjust the needle position before inputting the trigger and setting attribute.
Refer to "Checking the program setting and setting attribute" (page 78).
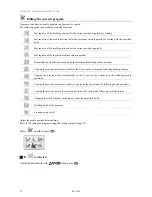
1. Select
, and then press
.
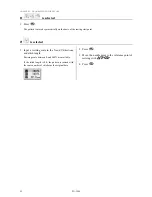
2. Input the number of option output.
For the number of option output, refer to "Extended option
output" (page 74).
3. Move the cursor with
, then use
to
specify whether to stop the machine or not.
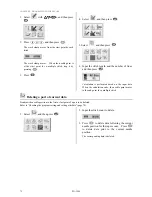
ON: The needle stops at the upper end without thread
breakage, and restarts after output of the extended option.
OFF: Sewing does not stop.
Displays the setting value of the sewing machine when the
sewing machine is connected.
Summary of Contents for PD-3000
Page 8: ...PD 3000 ...
Page 9: ...PD 3000 Chapter 1 Read Me ...
Page 12: ...CHAPTER 1 READ ME 4 PD 3000 ...
Page 13: ...PD 3000 Chapter 2 Setting Up Your Programmer ...
Page 28: ...CHAPTER 2 SETTING UP YOUR PROGRAMMER 20 PD 3000 ...
Page 29: ...PD 3000 Chapter 3 Programming with Icons ...
Page 95: ...PD 3000 Chapter 4 Programming with Commands ...
Page 152: ...CHAPTER 4 PROGRAMMING WITH COMMANDS 144 PD 3000 ...
Page 153: ...PD 3000 Chapter 5 Extended Option Output ...
Page 181: ...PD 3000 Chapter 6 Reading Saving Deleting Program and Formatting Media ...
Page 190: ...CHAPTER6 READING SAVING DELETING PROGRAM AND FORMATTING MEDIA 182 PD 3000 ...
Page 191: ...Chapter 7 Checking Copying Moving Changing Program ...
Page 199: ...PD 3000 Chapter 8 Displaying Sewing Machine Program ...
Page 201: ...PD 3000 Chapter 9 Displaying a Clock ...
Page 204: ...CHAPTER 9 DISPLAY A CLOCK 196 PD 3000 ...
Page 205: ...PD 3000 Additional Information ...


