CHAPTER 3 PROGRAMMING WITH ICONS
40 PD-3000
Zigzag stitch
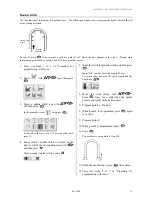
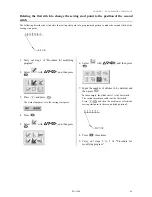
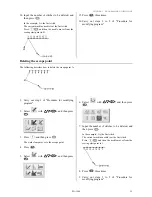
The following describes how to program zigzag stitch so that the sewing start point (A) is laterally centered.
Zigzag with curves may be programmed.
1. Carry out steps 1 to 3 of "Procedure for
programming with icons".
2. Select
with
, and then press
.
3. Select
with
, and then press
.
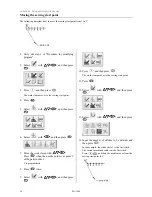
4. Select with
, and then press
.
5. Input the zigzag width and the stitch length, and
then press
.
Input "030" to make the stitch length 3.0 mm. To
switch input between the stitch length and the width,
use
.
6. Move the work clamp with
.
Press
when the needle point is at point B
of the pattern sheet.
To program curving zigzag, repeat this step.
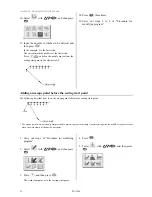
7. Press
again.
8. Press
three times.
9. Carry out step 5 to 7 of "Procedure for
programming with icons".
Zigzag width
Pitch
Summary of Contents for PD-3000
Page 8: ...PD 3000 ...
Page 9: ...PD 3000 Chapter 1 Read Me ...
Page 12: ...CHAPTER 1 READ ME 4 PD 3000 ...
Page 13: ...PD 3000 Chapter 2 Setting Up Your Programmer ...
Page 28: ...CHAPTER 2 SETTING UP YOUR PROGRAMMER 20 PD 3000 ...
Page 29: ...PD 3000 Chapter 3 Programming with Icons ...
Page 95: ...PD 3000 Chapter 4 Programming with Commands ...
Page 152: ...CHAPTER 4 PROGRAMMING WITH COMMANDS 144 PD 3000 ...
Page 153: ...PD 3000 Chapter 5 Extended Option Output ...
Page 181: ...PD 3000 Chapter 6 Reading Saving Deleting Program and Formatting Media ...
Page 190: ...CHAPTER6 READING SAVING DELETING PROGRAM AND FORMATTING MEDIA 182 PD 3000 ...
Page 191: ...Chapter 7 Checking Copying Moving Changing Program ...
Page 199: ...PD 3000 Chapter 8 Displaying Sewing Machine Program ...
Page 201: ...PD 3000 Chapter 9 Displaying a Clock ...
Page 204: ...CHAPTER 9 DISPLAY A CLOCK 196 PD 3000 ...
Page 205: ...PD 3000 Additional Information ...

