background image

6.

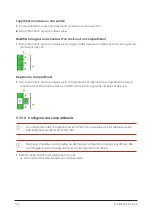
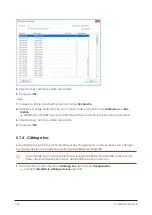
Si nécessaire, sélectionnez des racks et détachez-les de la SmartBox en cliquant sur

Supprimer

.

7.

Si nécessaire, adaptez l’affectation des articles dans l’onglet

Bus

pour les différents com-

partiments.

8.

Si nécessaire, sélectionnez un compartiment et dans l’onglet

Compartiment

, adaptez la con-

figuration du compartiment.

La configuration des compartiments et l’affectation des références d’article peuvent
être importées à partir d’un fichier CSV.

9.

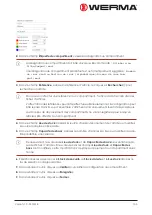
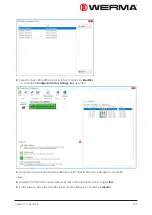
Dans la barre d’outils, cliquez sur

Vérifier

pour vérifier la configuration.

10.

Dans la barre d’outils, cliquez sur

Enregistrer

.

11.

Dans la barre d’outils, cliquez sur

Fermer

.

5.7.5    Paramètres

Dans les paramètres, vous pouvez ajuster les fonctions de WERMA-StockSAVER.

Les paramètres peuvent être protégés contre un accès non autorisé au moyen d’un mot
de passe.

Pour ouvrir les paramètres :

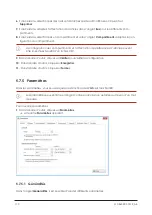
1.

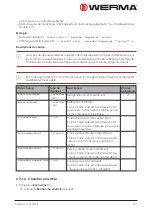
Dans la barre d’outils, cliquez sur

Paramètres

.

La fenêtre

Paramètres

apparaît.

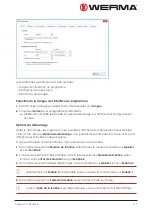
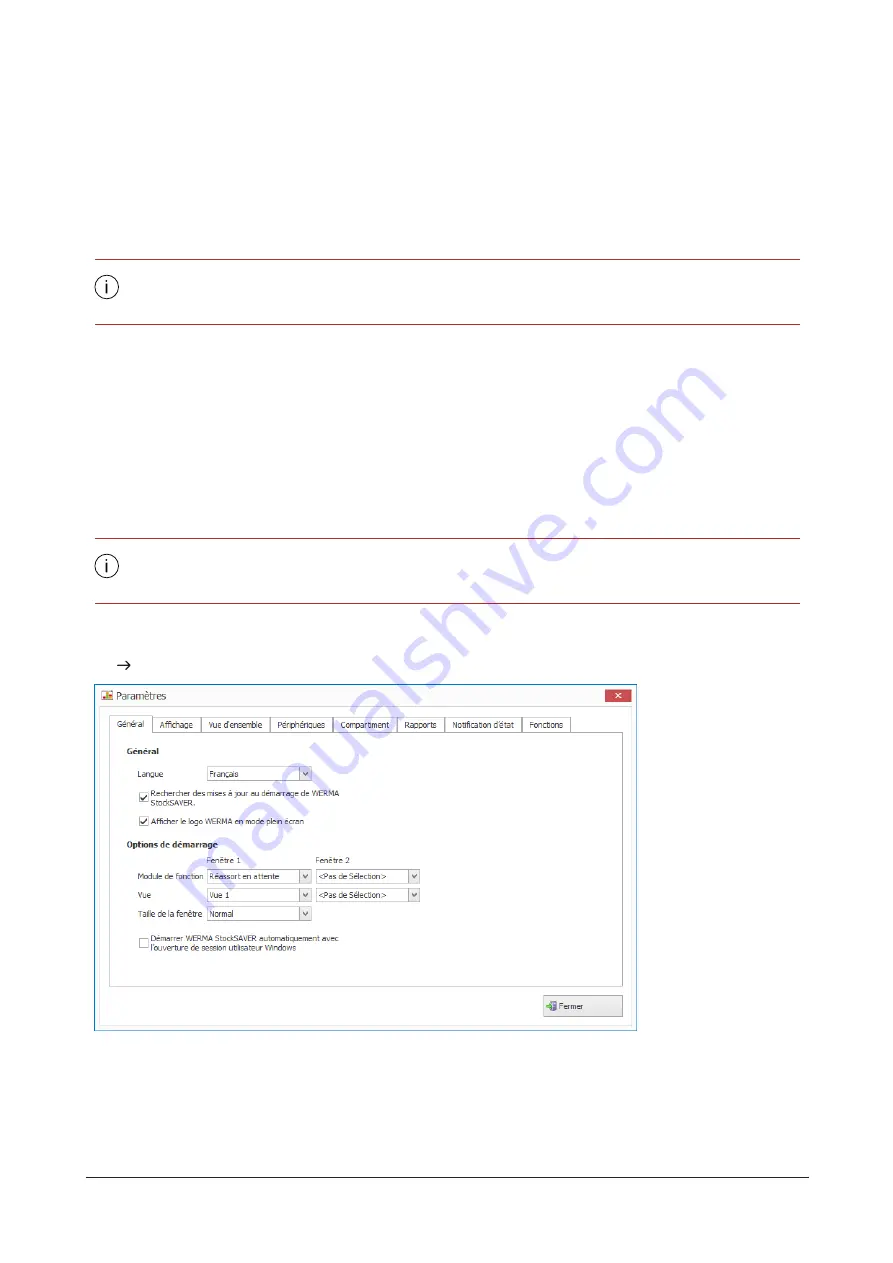
5.7.5.1    Généralités

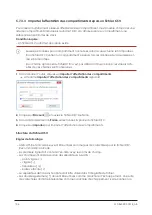
Dans l’onglet

Généralités

, il est possible d’ajuster différents paramètres.

110

310.865.005 0318_AB

Содержание WERMA-StockSAVER

Страница 1: ...Handbuch WERMA StockSAVER Version 1 0 03 2018 310 865 005 0318_AB ...

Страница 2: ...9 0 7424 9557 44 support werma com www werma com Impressum Betreiber und Adresse WERMA Signaltechnik GmbH Co KG Dürbheimer Str 15 D 78604 Rietheim Weilheim Telefon 49 0 7424 9557 0 Telefax 49 0 7424 44 support werma com www werma com Vertretungsberechtigter Geschäftsführer Matthias Marquardt Umsatzsteueridentnummer Ust IdNr DE815014872 Handelsregister HRA 723158 Jegliche Erwähnung von Firmennamen ...

Страница 3: ...7 Funktionstest 20 3 Installation 22 3 1 WERMA StockSAVER installieren 22 3 2 Server Anwendung installieren 23 3 2 1 Sprachen wählen 24 3 2 2 Erweiterte Installationsoptionen 25 3 3 Client Anwendung installieren 28 3 4 Firewall Konfiguration 30 3 5 WERMA StockSAVER deinstallieren 31 4 Inbetriebnahme 32 4 1 Konfigurationsassistent 32 4 1 1 Transceiver 33 4 1 2 SmartBox 40 4 1 3 SmartBox und Transce...

Страница 4: ...eren 75 5 3 5 Material suchen 77 5 4 Auswertungen 77 5 5 Report 81 5 5 1 Nach Excel exportieren 85 5 5 2 Wasserzeichen einfügen 85 5 5 3 Wasserzeichen löschen 86 5 5 4 Dateiformate 87 5 6 Systemstatus 87 5 6 1 Routing 87 5 6 2 Verbindungen 90 5 7 Konfiguration 90 5 7 1 Assistent 90 5 7 2 Geräte 91 5 7 3 Regale 101 5 7 4 Busverkabelung 107 5 7 5 Einstellungen 109 5 8 Schnittstellen Protokolle 119 6...

Страница 5: ...rwalten 145 7 Fehlerdiagnose 146 7 1 Transceiver 146 7 2 SmartBox 147 7 3 SensorBox 148 7 4 Sensoren 148 7 5 WERMA StockSAVER Software 149 7 6 Log Dateien 152 7 6 1 Auf Logdateien zugreifen 152 7 6 2 Detaillierte Protokollierung aktivieren 152 8 Software Update 154 9 Zeit umstellen und synchronisieren 155 10 Systemanforderungen 156 10 1 Netzwerkstabilität und sicherheit 157 10 2 Systemarchitektur ...

Страница 6: ...und die WERMA StockSAVER Software installiert und eingerichtet werden 1 Hardware am Regal montieren 2 WERMA StockSAVER Software installieren Server installieren Client installieren 3 Hardware mit dem Konfigurationsassistenten in Betrieb nehmen Transceiver konfigurieren SmartBox konfigurieren Geräte am Regal anschließen 4 Regal in Software konfigurieren 6 310 865 005 0318_AB ...

Страница 7: ... Beschreibung 1 Optischer Sensor Erfasst die Behälter und sendet die Zustandsinformationen an die SensorBox 2 SensorBox Empfängt die Zustandsinformationen von max 4 opti schen Sensoren pro Regalfach Sendet die Daten über das Bussystem an die SmartBox 3 SmartBox Empfängt Daten von max 50 SensorBoxen Falls ein Barcode Scanner eingesetzt und in der WERMA StockSAVER Software entsprechend konfiguriert ...

Страница 8: ...ückungen früh zeitig erkannt werden Die Systemkomponenten Sensor SmartBox SensorBox und das Befestigungsmaterial wurden für den Einbau in FIFO Rollenregale entwickelt Folgende Regaltypen wurden auf Kompatibilität getestet SSI Schäfer Kolli Durchlaufregale KDR Creform Rundrohrregal Serie Ø 28mm Bito Durchlaufregal Typ 36 33250 Bosch Rexroth Bereitstellregal XLEAN WERMA empfiehlt vor der Montage in ...

Страница 9: ...orgung Eingangsspannung 115 230 V 50 60 Hz Ausgangsspannung 24 V Imax 3 75 A 2 1 2 2 Bedienelemente Taste Beschreibung Ca 5 Sek gedrückt halten Lautstärkemenü öffnen Im Lautstärkemenü Lautstärkemenü schließen Im Lautstärkemenü Lautstärke erhöhen Im Lautstärkemenü Lautstärke verringern Bei Fehlbestückung Behebung der Fehlbestückung bestätigen 2 1 2 3 LED Anzeigen LED Beschreibung Leuchtet grün Funk...

Страница 10: ...e nicht erkannt Behebung SmartBox per USB konfigurieren S h e l f Regalfach wird ermittelt und angezeigt M a t e r i a ln o tr e a d a b l e Materialnummer entspricht nicht dem definiertem Aufbau E r r o r M a t e r i a lu n k n o w n Materialnummer ist nicht in den Material Stammdaten definiert E r r o r M a t e r i a ln o ta v a i l a b l e Materialnummer ist an dieser SmartBox nicht verfügbar E...

Страница 11: ...rgestellt Aus Keine Verbindung zur WERMA StockSAVER Software her gestellt Leuchtet grün Verbindung zum Netzwerk hergestellt Blinkt grün Netzwerkaktivität Aus Keine Verbindung zum Netzwerk möglich Status LED Leuchtet grün Funkverbindung zur SmartBox hergestellt Leuchtet rot Keine Funkverbindung zur SmartBox möglich 2 1 4 Barcode Scanner Optional kann ein Barcode Scanner verwendet werden um Fehlbest...

Страница 12: ...enthalten und kann nicht bei WERMA erworben werden 2 1 5 Technische Daten Sensor SensorBox SmartBox Transceiver Allgemein Abmessungen L xB x H 52 9 x 12 9 x 18 5 m m 61 x 38 x 20 5 m m 160 x 35 x 97 mm ohne Antenne 80 x 76 x 34 mm ohne Antenne Schutzart IP67 IP20 IP20 IP20 Gewicht 35 g 30 g 320 g 150 g Temperaturbereich 20 50 C 20 50 C 0 50 C 0 50 C Material PA PMMA PC ABS Blend PC ABS Blend ABS A...

Страница 13: ...er WERMA Homepage heruntergeladen wer den 2 2 1 Sicherheitshinweise Sicherstellen dass die Montage und Verkabelung der WERMA StockSAVER Geräte aus schließlich von einer Elektrofachkraft durchgeführt werden Ausschließlich die mitgelieferten Komponenten verwenden Sicherstellen dass die Konfiguration der WERMA StockSAVER Software ausschließlich von einem IT Fachmann durchgeführt wird Vor Wartungsarbe...

Страница 14: ...g die nicht im Handbuch beschrieben ist gilt als nicht bestimmungsgemäß Für dar aus entstandene Schäden haftet der Betreiber des Produktes 2 2 1 2 Verwendung der Daten Die Daten dürfen ausschließlich durch die WERMA StockSAVER Software verarbeitet werden Direkter Lese und Schreibzugriff auf Datenbankinhalte oder Änderungen der Daten bankstrukturen durch andere Software wird nicht unterstützt WERMA...

Страница 15: ...er Spediteur informieren 3 Lieferumfang anhand der Bestellung prüfen auf Liefermenge Gerätetyp und Ausführung laut Typenschild Zubehör Kurzanleitung 2 2 3 Sensoren montieren Falls eine einheitliche Behältergröße verwendet wird empfiehlt WERMA eine Vor konfektionierung Kabellänge und Steckermontage der Sensoren außerhalb des Regals und vor dem eigentlichen Montagevorgang 2 2 3 1 Benötigte Komponent...

Страница 16: ...schlusskabel der Sensoren am Regal befestigen Sicherstellen dass die Anschlusskabel nicht abge rissen oder beschädigt wer den 2 2 4 SensorBox montieren Um die Verlegung der Busverkabel zu ermöglichen wird zwischen der SensorBox und dem Querträger des Regals ein Abstand von 10 cm benötigt 2 2 4 1 Benötigte Komponenten 2 2 4 2 SensorBox verkabeln 1 Anschlusskabel von den Sen soren zur SensorBox verl...

Страница 17: ...ge kürzen Ca 20 mm am offenen Ende abisolieren 4 Anschlusskabel an Stecker montieren Korrekte Belegung beachten 5 Sensoren an SensorBox anschließen Korrekte Reihenfolge beach ten 2 2 4 3 Bus verkabeln 1 Mitgelieferte Kabel zur Bus verkabelung verwenden Version 1 0 03 2018 17 ...

Страница 18: ...ten 4 SensorBoxen mit Buskabeln verbinden Korrekte Anschlüsse beach ten 5 Buskabel am Regal befes tigen Sicherstellen dass die Bus kabel nicht abgerissen oder beschädigt werden 6 Busverkabelung im mit gelieferten Stock Template einzeichnen Das Stock Template kann auf der WERMA Homepage her untergeladen werden 18 310 865 005 0318_AB ...

Страница 19: ...tBox montieren 2 WERMA StockSAVER Software installieren SmartBox per mitgeliefertem USB Kabel an PC anschließen SmartBox in Betrieb nehmen und konfigurieren 3 SmartBox auf Augenhöhe am Regal befestigen 4 SmartBox an Bus anschließen SmartBox an Stromversorgung anschließen Version 1 0 03 2018 19 ...

Страница 20: ...PC anschließen Transceiver in Betrieb nehmen und konfigurieren 3 Transceiver an Netzwerk anschließen Transceiver per mit geliefertem USB Kabel und mitgeliefertem Ste ckernetzteil an Strom versorgung anschließen 2 2 7 Funktionstest 1 Sensoren abdecken Prüfen ob die LED an den Sen soren leuchen Prüfen ob die LED an der Sen sorBox leuchtet 20 310 865 005 0318_AB ...

Страница 21: ...2 Probebestückung am Regal durchführen und korrekte Funktion in der WERMA StockSAVER Software prüfen Version 1 0 03 2018 21 ...

Страница 22: ...n Für die Installation der WERMA StockSAVER Software werden Administratorrechte benö tigt Software zuerst auf Server dann auf Client installieren 3 1 WERMA StockSAVER installieren 1 Sicherstellen dass die notwendigen Systemanforderungen erfüllt werden 2 Aktuelle WERMA StockSAVER Version unter www werma com saver herunterladen 3 Heruntergeladene ZIP Datei entpacken 4 Installation mit Doppelklick au...

Страница 23: ...nstalliert werden z B mit abweichendem TCP IP Port oder einer abwei chenden Datenbank 1 Falls der WERMA StockSAVER Server mit abweichenden Einstellungen installiert werden soll Option Erweiterte Installationsoptionen anzeigen aktivieren 2 Auf Server installieren klicken 3 Auf Weiter klicken Falls die Option Erweiterte Installationsoptionen anzeigen aktiviert wurde erscheint das Fenster mit den erw...

Страница 24: ...Client Installationen benötigt werden Die ausgewählten Sprachen werden nach einem Update der Client Installation auto matisch bereitgestellt Das Installationsprogramm lädt weitere Sprachen vom WERMA Webserver Die Sprachen werden anzeigt sobald sie verfügbar sind Ggf muss über den Link HTTP Proxyserver konfigurieren ein Proxy Server für den Zugriff auf den WERMA Webserver konfiguriert werden 3 Auf ...

Страница 25: ...rzeichnis wählen Falls der standardmäßige TCP Port 9711 bereits von einem anderen Netzwerkdienst verwendet wird 1 TCP Port im Feld TCP Port anpassen 2 Auf Prüfen klicken WERMA StockSAVER prüft den eingegebenen TCP Port Nach Abschluss aller Änderungen 1 Auf Weiter klicken Das Fenster zur Installation der WERMA StockSAVER Datenbank erscheint Version 1 0 03 2018 25 ...

Страница 26: ...erk herstellen die bereits WERMA StockSAVER Daten enthält 3 2 2 1 Neue Datenbank 1 Option Neue Datenbank anlegen wählen 2 Auf Weiter klicken Das Fenster zur Auswahl der Sprachen erscheint 3 2 2 2 Leere SQL Datenbank Voraussetzungen Eine leere Datenbank ist auf dem Microsoft SQL Server angelegt Die Datenbank erfüllt folgende Anforderungen SQL Server Authentifizierungsmodus ist aktiviert Datenbank Z...

Страница 27: ...k wählen 2 Auf Weiter klicken 3 Zugangsdaten der leeren Datenbank in die entsprechenden Felder eingeben 4 Auf Prüfen klicken WERMA StockSAVER prüft die eingegebenen Daten und die Datenbank 5 Auf Weiter klicken Die Verbindung zur Datenbank wird hergestellt Das Fenster zur Auswahl der Sprachen erscheint 3 2 2 3 Vorhandene StockSAVER Datenbank 1 Option Microsoft SQL Server Datenbank mit WERMA StockSA...

Страница 28: ...nstallation und Aktualisierung der Client Anwenung kann mit einem Software Ver teilungssystem automatisch erfolgen Informationen dazu sind im Installationsverzeichnis der Server Anwendung im Unterverzeichnis D o c s zu finden 1 Auf Client installieren klicken Der Installationsassistent sucht im Netzwerk nach dem WERMA StockSAVER Serverdienst Falls der WERMA StockSAVER Serverdienst im Netzwerk gefu...

Страница 29: ...t einen Auswahldialog mit den gefundenen WERMA StockSAVER Serverdiensten 1 Gewünschten WERMA StockSAVER Serverdienste wählen und auf OK klicken 2 Auf Installieren klicken Der Installationsassistent installiert den Client und stellt eine Verbindung zum WERMA StockSAVER Serverdienst her Falls kein WERMA StockSAVER Serverdienst im Netzwerk gefunden wird Der Installationsassistent zeigt eine entsprech...

Страница 30: ...um WERMA StockSAVER Serverdienst her 3 4 Firewall Konfiguration Bei der Installation von WERMA StockSAVER werden in der Windows Firewall standardmäßig alle notwendigen Portfreigaben konfiguriert Falls andere oder zusätzliche Firewall oder Netz werkprodukte eingesetzt werden ist ggf eine manuelle Anpassung notwendig 1 Sicherstellen dass folgende Netzwerkverbindungen offen sind Quelle Ziel Typ Port ...

Страница 31: ... 27321 Abruf von Ver bindungsinformationen Server Client www werma com www werma stock saver com TCP 80 443 Update Prüfung Abruf der Online Hilfe und Kontakt bzw Update Webseite Kann in WERMA StockSAVER während der Inbetriebnahme der WERMA StockSAVER Geräte abweichend konfiguriert werden Für künftige Updates von WERMA StockSAVER empfiehlt WERMA den Zugriff auf weitere Sub domains nicht zu blockier...

Страница 32: ...n Hardware Komponenten unterstützt ein Kon figurationsassistent der nacheinander die einzelnen Schritte der Inbetriebnahme und Konfiguration durchläuft 4 1 Konfigurationsassistent 1 Falls der Konfigurationsassistent nach dem Start von WERMA StockSAVER nicht automatisch erscheint in der Symbolleiste auf Assistent klicken Der Konfigurationsassistent erscheint 2 Auf Weiter klicken 32 310 865 005 0318...

Страница 33: ...f Weiter klicken Das Fenster zur Konfiguration des Transceivers erscheint 4 1 1 Transceiver 1 Transceiver per USB Kabel an PC anschließen und auf Suchen klicken WERMA StockSAVER sucht nach einem angeschlossenen Transceiver Version 1 0 03 2018 33 ...

Страница 34: ...ss der Transceiver über eine geeignete aktuelle Firmware Version verfügen 3 Im Feld Transceiver Name die Bezeichnung des Transceivers eingeben Um eine bestmögliche Funkverbindung zu ermöglichen kann beim parallelen Betrieb mehrerer WERMA StockSAVER Transceiver der Funkkanal der einzelnen Transceiver geän dert werden WERMA empfiehlt pro Funkkanal nur einen Transceiver zu betreiben 4 Bei Bedarf in d...

Страница 35: ...TCP IP Verbindung vom Serverdienst zum Transceiver muss manuell konfiguriert wer den weil sich der Transceiver in einem anderen Subnetz befindet Die TCP IP Verbindung vom WERMA StockSAVER Serverdienst zum Transceiver soll mit Hilfe eines auf dem DNS Server hinterlegten DNS Namen A Record hergestellt wer den Die TCP IP Verbindung vom WERMA StockSAVER Serverdienst zum Transceiver soll über eine abwe...

Страница 36: ...ubnetz befinden UDP Broadcast muss erlaubt sein 1 Option IP Adresse per DHCP automatisch beziehen wählen 2 Auf Speichern klicken Die Konfiguration wird auf den Transceiver übertragen 3 Auf Weiter klicken Das Fenster zur Konfiguration der SmartBox erscheint 4 1 1 2 Statische IP Adresse verwenden 1 Option Folgende statische IP Adresse verwenden wählen 36 310 865 005 0318_AB ...

Страница 37: ...nistrator zur Verfügung WERMA empfiehlt die Konfigurationsdaten für eine statische IP Adresse hier einzutragen falls diese vorliegen 3 Auf Speichern klicken Die Konfiguration wird auf den Transceiver übertragen 4 Auf Weiter klicken Das Fenster zur Konfiguration der SmartBox erscheint Version 1 0 03 2018 37 ...

Страница 38: ...P Adresse verwenden wählen 2 Daten des Netzwerks in die entsprechenden Felder eingeben Die notwendigen Daten stellt der Netzwerk Administrator zur Verfügung 3 Kontrollkästchen Erweiterte Netzwerkeinstellungen anzeigen aktivieren 4 Auf Weiter klicken 38 310 865 005 0318_AB ...

Страница 39: ... Bedarf TCP Port im Feld TCP Port anpassen Die notwendigen Daten stellt der Netzwerk Administrator zur Verfügung 7 Auf Speichern klicken Die Konfiguration wird auf den Transceiver übertragen 8 Auf Weiter klicken Das Fenster zur Konfiguration der SmartBox erscheint Version 1 0 03 2018 39 ...

Страница 40: ...SmartBox per USB Kabel an PC anschließen und auf Suchen klicken WERMA StockSAVER sucht nach einer angeschlossenen SmartBox ca 5 Sekunden 2 Nachdem der Transceiver gefunden wurde auf Weiter klicken 40 310 865 005 0318_AB ...

Страница 41: ... Bestückung ohne Scan erlauben Material darf in ein Regalfach eingelagert werden ohne dass es vorher gescannt werden muss Das System kann Fehlbestückungen nicht erkennen und protokollieren Wählen falls kein Barcode Scanner benutzt wird oder falls das Material vor der Einlagerung nicht zwingend gescannt werden muss Falls das Material doch gescannt wird verhält sich das System wie bei der Option Bes...

Страница 42: ...erarbeitet werden soll Option Beschreibung Nicht konfigurieren Scan Konfiguaration überspringen Gescannter Code vollständig als Materialnummer auswerten Der komplette Barcode wird als Materialnummer über nommen Position und Länge der Mate rialnummer fest definiert Die Materialnummer ist Teil des Barcodes Die Materialnummer beginnt und endet an einer bestimmten Position des Barcodes Materialnummer ...

Страница 43: ...are keine Rück bestätigung der erfolgreichen Speicherung zurückgibt Die SmartBox gibt ein akustisches Signal aus Die SmartBox wird gesperrt Weitere Bestückungen sind nicht möglich bis die SmartBox in der WERMA StockSAVER Software ent sperrt wurde Falls ein Regal falsch bestückt wurde Die SmartBox gibt ein akustisches Signal aus Die SmartBox erwartet die Bestätigung des Benutzers dass die Fehlbestü...

Страница 44: ... entsprechende Meldung In diesem Fall muss die Inbetriebnahme der SmartBox abgebrochen und die Firmware des Transceivers aktualisiert werden Danach kann die SmartBox erneut konfiguriert werden 12 Auf Speichern klicken Die Konfiguration wird auf die SmartBox übertragen 13 SmartBox und Transceiver anschließen 4 1 3 SmartBox und Transceiver anschließen 1 SmartBox mit dem Buskabel der SensorBox verbin...

Страница 45: ...Sobald alle WERMA StockSAVER Geräte verbunden sind 1 Auf Weiter klicken Das Fenster zum Konfigurieren der Regale erscheint Version 1 0 03 2018 45 ...

Страница 46: ...egals eingeben 4 1 4 1 Struktur des Regals konfigurieren Das Regal wird in der Regaldarstellung von der Bestückerseite dargestellt Ein Feld entspricht einem Regalfach Abschnitt hinzufügen 1 In der Regaldarstellung auf klicken Ebene hinzufügen 1 In der Regaldarstellung auf klicken Regalfach hinzufügen 1 In der Regaldarstellung auf klicken 46 310 865 005 0318_AB ...

Страница 47: ... Regalfach verschieben 1 In der Regaldarstellung auf das Regalfach klicken und Regalfach mit gedrückter linker Maustaste auf eine freie Stelle im Regal verschieben 4 1 4 2 Regalfächer konfigurieren Die Konfiguration der Regalfächer und die Zuordnung der Materialnummern kann aus einer CSV Datei importiert werden In den Einstellungen kann eine Standard Regalkonfiguration festgelegt werden Diese wird...

Страница 48: ...werden Im Leitstand werden dann lediglich die Zustände der Sensoren ange zeigt Die Bewegungsdaten der Regalfächer werden erst aufgezeichnet sobald einem Regal fach ein Material zugeordnet wurde 4 Im Feld Quelle die Bezugsquelle zum Auffüllen des Materials eingeben oder bei Bedarf die vor gegebene Quelle anpassen 5 Im Feld Behältermenge die Stückzahl Material je Behälter eingeben oder bei Bedarf di...

Страница 49: ...ussetzung Eine CSV Datei im geeigneten Format liegt vor Es werden ausschließlich Daten für Regalfächer importiert die in der aktuellen Ansicht enthalten sind Falls ein Regalfach mehrfach in der CSV Datei enthalten ist werden die Daten des letz ten Eintrags übernommen Falls ein optionales Feld in der CSV Datei nicht als Spalte definiert ist werden die aktu ellen Werte für diese Felder beibehalten 1...

Страница 50: ...wendet werden Als Escape Zeichen müssen doppelte Anführungszeichen verwendet werden Eine Zei chenfolge muss escaped werden falls sie ein Semikolon oder doppelte Anführungszeichen enthält In einer Escape Zeichenfolge werden doppelte Anführungszeichen doppelt dargestellt Beispiel Zeichenfolge T S h i r tg r o ß l a n g eÄ r m e lu n d b u n t Ausgabe in CSV Datei T S h i r tg r o ß l a n g eÄ r m e ...

Страница 51: ...n i m u m B o x C o u n t t i n y i n t Sicherheitsbestand des Regalfachs Falls ein Leer String als Wert übergeben wird wird kein Sicherheitsbestand definiert R e o r d e r B o x C o u n t t i n y i n t Meldebestand des Regalfachs Falls ein Leer String als Wert übergeben wird wird kein Meldebestand definiert A b o v e M a x i m u m B o x C o u n t i n t Überbestand des Regalfachs Falls ein Leer St...

Страница 52: ...ergebnis an 3 Gewünschtes Material in der Liste wählen 4 Auf OK klicken 4 1 5 Busverkabelung angeben Im Fenster Konfiguration Busverkabelung wird die Busverkabelung von der Schablone aus der Installationsanleitung in der WERMA StockSAVER Software nachgebildet 1 In der Symbolleiste auf Hinzufügen klicken um alle Regale hinzuzufügen die mit der SmartBox verbunden sind Das Fenster Regal hinzufügen er...

Страница 53: ...uration Busverkabelung 3 Auf das Smart Box Symbol klicken um die Busverkabelung zwischen den SensorBoxen nach zuzeichnen 4 In der Symbolleiste auf Überprüfen klicken um die Konfiguration zu prüfen 5 In der Symbolleiste auf Speichern klicken 6 Auf Weiter klicken Version 1 0 03 2018 53 ...

Страница 54: ...nner wie folgt konfigurieren Der Barcode Scanner wird als USB HID erkannt Der String wird mit einem Carriage Return 0x0D oder mit einem Line Feed 0x0A abge schlossen Tastaturlayout Deutsch wählen Der Barcode Scanner ist nicht im Lieferumfang enthalten und kann nicht bei WERMA erworben werden Details zur Barcode Scanner Konfiguration können der Barcode Scanner Anleitung ent nommen werden 54 310 865...

Страница 55: ...d für weitere Einlagerungen gesperrt 1 Fehlbestückung im Regal beseitigen 2 An der SmartBox auf Taste drücken um die Fehlbestückung zu bestätigen Die vorherige Einlagerung wird rückgängig gemacht Das System steht für weitere Einlagerungen weiter zur Verfügung 4 3 Manuelle Treiberinstallation Die manuelle Treiberinstallation ist nur notwendig falls die Gerätetreibersoftware beim Anschluss eines WER...

Страница 56: ...bersoftware suchen klicken 3 Auf Durchsuchen klicken 4 In das Installationsverzeichnis von WERMA StockSAVER navigieren und den Ordner D r i v e r öff nen 5 Auf Weiter klicken Die Gerätetreiber werden installiert 56 310 865 005 0318_AB ...

Страница 57: ...Nach erfolgreicher Installation auf Schließen klicken um den Hardware Assistenten zu schlie ßen Das WERMA StockSAVER Gerät ist einsatzbereit 4 3 2 Windows 10 1 Geräte Manager öffnen Version 1 0 03 2018 57 ...

Страница 58: ...Das Fenster Geräte Manager erscheint 2 Mit der rechten Maustaste auf WIRELESS DEVICE klicken 3 Im Kontextmenü den Eintrag Treiber aktualisieren wählen 58 310 865 005 0318_AB ...

Страница 59: ...bersoftware suchen klicken 5 Auf Durchsuchen klicken 6 In das Installationsverzeichnis von WERMA StockSAVER navigieren und den Ordner D r i v e r öff nen 7 Auf Weiter klicken Die Gerätetreiber werden installiert Version 1 0 03 2018 59 ...

Страница 60: ...bindung zu ermöglichen kann beim parallelen Betrieb mehrerer WERMA StockSAVER Systeme der Funkkanal der einzelnen Transceiver geändert werden Es ste hen 4 verschiedene Funkkanäle zur Verfügung WERMA empfiehlt pro Funkkanal nur einen Transceiver zu betreiben 1 In der Symbolleiste auf Geräte klicken Der Assistent zur Inbetriebnahme eines WERMA StockSAVER Geräts erscheint 60 310 865 005 0318_AB ...

Страница 61: ...1 Frequenz 868 45 MHz Kanal 2 Frequenz 868 35 MHz Kanal 3 Frequenz 868 25 MHz Kanal 4 Frequenz 868 15 MHz 4 5 Firmware Update Bei einem Firmware Update sicherstellen dass die Stromversorgung stabil ist und keine anderen Programme aktiv sind 1 In der Symbolleiste auf Geräte klicken Der Assistent zur Inbetriebnahme eines WERMA StockSAVER Geräts erscheint Version 1 0 03 2018 61 ...

Страница 62: ...rneut in Betrieb nehmen 3 Während der Inbetriebnahme die Meldung zum Firmware Update mit Ja bestätigen Das Fenster Firmware Update erscheint 4 Auf Update starten klicken Das Firmware Update wird durchgeführt 62 310 865 005 0318_AB ...

Страница 63: ...llt Die Übersicht zeigt die Bestückung der Regale oder ob eine Störung vorliegt So können Reaktions und Stillstandzeiten effektiv verkürzt werden Regale können in verschiedenen Ansichten zusammengefasst werden um z B unterschiedliche Logistik Bereiche zu beobachten Die Ansichten können beliebig angepasst und mit einem Hin tergrundbild versehen werden 5 1 1 Darstellung Die Darstellung der Regale en...

Страница 64: ... der Mauszeiger über dem Regalfach befindet Die Anzeige der Materialnummer und der Quelle können in den Einstellungen aktiviert und deaktiviert werden Die Farben der einzelnen Zustände können in den Einstellungen individuell angepasst wer den Ein Regalfach kann folgende Zustände aufweisen Darstellung Beschreibung Sicherheitsbestand Zu wenig Behälter im Regal Meldebestand Mindestanzahl Behälter err...

Страница 65: ...obachten Die Ansichten können beliebig angepasst und mit einem Hintergrundbild versehen werden Jede Ansicht kann im Vollbild und ohne Menüleiste angezeigt werden 5 1 2 1 Ansicht benennen 1 In der Symbolleiste im Bereich Konfiguration auf Einstellungen klicken Das Fenster Einstellungen erscheint 2 Registerkarte Ansichten wählen 3 Gewünschte Ansicht wählen 4 Auf Bearbeiten klicken Das Fenster Ansich...

Страница 66: ...a g e r2 eingegeben werden 6 Auf OK klicken Der Name der Ansicht wurde geändert 7 Auf OK klicken um die Einstellungen zu übernehmen 5 1 2 2 Ansicht hinzufügen 1 In der Symbolleiste im Bereich Konfiguration auf Einstellungen klicken Das Fenster Einstellungen erscheint 2 Registerkarte Ansichten wählen 3 Auf Hinzufügen klicken Das Fenster Ansicht anlegen erscheint 66 310 865 005 0318_AB ...

Страница 67: ... 3 Ansicht löschen 1 In der Symbolleiste im Bereich Konfiguration auf Einstellungen klicken Das Fenster Einstellungen erscheint 2 Registerkarte Ansichten wählen 3 Zu löschende Ansicht in der Liste der Ansichten wählen 4 Auf Löschen klicken 5 Abfrage mit Ja bestätigen 5 1 2 4 Regal zu einer Ansicht hinzufügen 1 Gewünschte Ansicht aufrufen 2 In der Symbolleiste im Bereich Regal auf Hinzufügen klicke...

Страница 68: ...klicken 4 Abfrage mit Ja bestätigen Das Regal wurde aus der Ansicht entfernt 5 1 2 6 Regal drehen 1 Gewünschte Ansicht aufrufen 2 Regal markieren 3 In der Symbolleiste im Bereich Regal auf Links drehen oder Rechts drehen klicken 5 1 2 7 Regal verschieben Jedes Regal kann in der Ansicht beliebig verschoben werden 1 Mit der linken Maustaste auf den Namen des Regals klicken und die Maustaste gedrückt...

Страница 69: ... ein deaktiviertes Regalfach zu aktivieren 1 Regalfach in der Ansicht markieren 2 In der Symbolleiste im Bereich Regalfach auf Aktivieren klicken 5 1 2 9 Hintergrundbild einer Ansicht wählen 1 Gewünschte Ansicht aufrufen 2 In der Symbolleiste im Bereich Hintergrundbild auf Auswählen klicken 3 Das gewünschte Hintergrundbild öffnen Das Hintergrundbild muss auf dem lokalen PC gespeichert sein Empfohl...

Страница 70: ...Modul Bedarfsliste zeigt den aktuellen Bedarf von Regalfächern die den Sollbestand unter schritten haben Die angezeigten Listen berücksichtigen alle Regale die in der jeweiligen Ansicht enthalten sind Die Bedarfsliste kann im Vollbild und ohne Menüleiste angezeigt werden Für die Darstellung der Bedarfsliste stehen zwei Ansichten zur Verfügung Darstellung Beschreibung Einzelnes Regalfach Zeigt den ...

Страница 71: ... Anzahl der Behälter im einzelnen Regal Max Maximale Anzahl der Behälter im Sollbestand des Regalfachs Stk je Behälter Stückzahl pro Behälter im Regalfach 5 2 2 Summe Material 1 In der Symbolleiste auf Summe Material klicken Spalte Beschreibung Zustand Aktueller Füllstandstatus des Regalfachs mit der höchsten Dringlichkeit Dauer Dauer wie lange sich das Regalfach mit der höchsten Dringlichkeit in ...

Страница 72: ...le die in der jeweiligen Ansicht enthalten sind 1 Gewünschte Darstellung aufrufen 2 In der Symbolleiste auf Report klicken Die Druckvorschau der Auswertung erscheint 5 2 4 Vollbildansicht Um die Bedarfsliste im Vollbild und ohne Menüleiste anzuzeigen 1 Gewünschte Ansicht aufrufen 2 In der Symbolleiste im Bereich Weiteres auf Vollbild klicken Um die Vollbildansicht zu beenden 1 ESC Taste drücken 5 ...

Страница 73: ...hnung im Feld Bezeichnung eingeben 4 Stückzahl je Behälter im Feld Std Behältermenge eingeben 5 Im Feld Standard Quelle die Bezugsquelle zum Auffüllen des Materials eingeben oder bei Bedarf die vorgegebene Quelle anpassen Die Werte für Standard Quelle und Std Behältermenge können bei der Zuordnung eines Materials zu einem Regalfach für das jeweilige Regalfach separat geändert werden Version 1 0 03...

Страница 74: ...5 3 2 Material bearbeiten 1 Gewünschtes Material durch Klick auf Zurück oder Weiter in der Symbolleiste aufrufen oder 1 Gewünschtes Material durch Klick auf Suchen in der Symbolleiste suchen 2 In der Symbolleiste auf Anlegen klicken Der Bereich zur Eingabe der Materialdaten wird aktiviert 3 Materialdaten wie gewünscht ändern 4 In der Symbolleiste auf Speichern klicken 5 3 3 Material löschen 1 Gewü...

Страница 75: ...gelegt Falls ein Material mehrfach in der CSV Datei enthalten ist werden die Daten des letzten Eintrags übernommen Falls ein optionales Feld in der CSV Datei nicht als Spalte definiert ist werden die aktu ellen Werte für diese Felder beibehalten 1 In der Symbolleiste auf Import klicken Das Fenster Material Stammdaten importieren erscheint Auf Durchsuchen klicken und die gewünschte CSV Datei öffnen...

Страница 76: ...ibilität empfiehlt WERMA in Schnittstellen Daten typen zu verwenden die den gleichen Wertebereich haben Die Anzahl und Definition der Felder kann sich in künftigen Updates von WERMA StockSAVER ändern Feld ID Datentyp Beschreibung Pflichtfeld M a t e r i a l N a m e n v a r c h a r 3 2 Materialnummer M a t e r i a l D e s c r i p t i o n 1 n v a r c h a r 6 0 Bezeichnung des Materials P i e c e s P...

Страница 77: ...ntrollkästchen Material Nr oder Bezeichnung festlegen WERMA StockSAVER durchsucht die Liste der Materialien und zeigt das Suchergebnis an 3 Gewünschtes Material in der Liste wählen 4 Auf OK klicken 5 4 Auswertungen Verschiedene Auswertungen können erstellt werden die z B Lägerbestände oder Mate rialbewegungen tabellarisch zusammenfassen Auswertung Beschreibung Berechnungsbasis Materialstamm Aktuel...

Страница 78: ... Entnahmen Stk werden berechnet aus Anzahl Behälter x Menge Behälter Die Menge Behälter wird so verwendet wie sie zum jeweiligen Buchungszeitpunkt definiert war Spätere Änderungen in der Regal fachdefinition werden nicht berücksichtigt Sobald die Menge je Behälter in der Regal fachdefinition verringert wird wird dies als Ent nahme gewertet Somit können Regalfächer mit 0 entnommenen Behältern aber ...

Страница 79: ...s Falls keine Bestandsgrenze für ein Regal fach Material im gesamten Aus wertungszeitraum definiert war bleibt der Wert leer Die Summe der Werte ist 100 falls das Regalfach Material erst nach dem Beginn des Auswertungszeitraums definiert oder vor dem Ende des Auswertungszeitraums gelöscht wurde Rundung Die Werte werden kaufmännisch auf die erste Nachkommastelle gerundet Falls der Wert 0 und 0 1 is...

Страница 80: ... Bestückungen Anz Falls innerhalb von 60 Sekunden mehrere Behälter im gleichen Regalfach bestückt werden gilt dies als eine Bestückung Spalte Bestückungen Behälter Anzahl der Behälter die in dem aus gewählten Zeitraum bestückt wurden Spalte Wiederbeschaffungszeit Ø h Eine Wiederbeschaffung ist dann gegeben falls nach einer Bestückung der Sollbestand erreicht oder überschritten ist Die Wiederbescha...

Страница 81: ...n ist 1 In der Symbolleiste auf Auswertungen klicken und die gewünschte Auswertung wählen Die Druckvorschau der Auswertung erscheint Verbindungsunterbrechungen werden bei den Auswertungen nicht berücksichtigt Für die Auswertungen hat das Regalfach während einer Unterbrechung den gleichen Zustand wie vor der Unterbrechung Ein zwischenzeitlich geänderter Zustand wird erfasst und ausgewertet sobald e...

Страница 82: ...ungen der Regalfachdefinition werden nicht berücksichtigt Die Filter Ansicht Regal und Regalfach beziehen sich jeweils auf die aktuelle Regal konfiguration Falls einer diese Filter aktiviert ist werden nur Regalfächer ausgewertet die in der aktuellen Regalkonfiguration vorhanden sind Regalfächer werden nicht ange zeigt falls sie nach dem ausgewerteten Zeitpunkt raum gelöscht wurden Falls ein Regal...

Страница 83: ...hten Report prozentual oder auf Seitenbreite vergrößern oder verkleinern Seitenränder anpassen Seitenausrichtung Hochformat oder Querformat anpassen Papiergröße des Reports anpassen Hinweis Alle Reports sind auf A4 optimiert Navigation Text im Report suchen Miniaturansicht des Reports ein und ausblenden Zur ersten Seite wechseln Zur vorherigen Seite wechseln Version 1 0 03 2018 83 ...

Страница 84: ...mit einem Klick zu ver kleinern bzw zu vergrößern Mehrere Seiten in der Druckvorschau anzeigen Druckvorschau verkleinern Zoom auf einen festen Wert einstellen Druckvorschau vergrößern Hintergrund Wasserzeichen im Report einfügen Wasserzeichen im Report löschen Export Report exportieren Das Dateiformat des Exports kann gewählt werden Report als E Mail Anhang versenden Das Dateiformat des E Mail Anh...

Страница 85: ...xport wählen Option Beschreibung Nur Daten exportieren Wählen um die Tabelleninhalte nachträglich bearbeiten zu können Formatierte Ausgabe Wählen um die Standarddaten zu nutzen 3 Auf OK klicken um den Export zu starten 5 5 2 Wasserzeichen einfügen Als Wasserzeichen kann ein individueller Text ein Bild oder eine Kombination aus Text und Bild ver wendet werden 1 In der Symbolleiste auf Wasserzeichen...

Страница 86: ... 5 Im Bereich Seitenauswahl die Seiten wählen auf denen das Wasserzeichen eingefügt werden soll Mehrere Einzelseiten werden durch ein Semikolon getrennt z B 3 5 7 Seitenbereiche werden durch einen Bindestrich angegeben z B 3 5 6 Auf OK klicken um das Wasserzeichen einzufügen 5 5 3 Wasserzeichen löschen 1 In der Symbolleiste auf Wasserzeichen klicken Das Fenster Wasserzeichen erscheint 86 310 865 0...

Страница 87: ...ormat Export E Mail Anhang PDF Datei HTML Datei Excel Datei Bild Datei 5 6 Systemstatus Im Bereich Systemstatus können Informationen zum Verbindungsstatus der WERMA StockSAVER Geräte aufgerufen werden 5 6 1 Routing Das Fenster Routing zeigt eine Übersicht des WERMA StockSAVER Netzwerks Eine Baumstruktur zeigt den Aufbau und die Qualität der Funkverbindungen zwischen den einzelnen Geräten Version 1...

Страница 88: ...äten Um eine bestmögliche Funkverbindung sicherzustellen sucht sich jede SmartBox automatisch den besten Übertragungsweg zum Transmitter Um die Funkverbindung zu verbessern oder die Reichweite zu erhöhen können andere SmartBoxen als Repeater fungieren und das Funksignal weiterleiten Direkte Verbindung Verbindung über eine andere SmartBox als Repeater 88 310 865 005 0318_AB ...

Страница 89: ...ale Reichweite ggf gerin ger Falls vorhanden werden nicht verbundene aber konfigurierte WERMA StockSAVER Geräte im unteren Teil des Fensters angezeigt 5 6 1 1 Funkverbindung optimieren Folgende Maßnahmen verbessern die Funkverbindung Sichtverbindung zwischen den WERMA StockSAVER Geräten Möglichst wenig Metallflächen zwischen den WERMA StockSAVER Geräten Transceiver möglichst optimal positionieren ...

Страница 90: ...sstatus des WERMA StockSAVER Geräts 5 7 Konfiguration Im Bereich Konfiguration können verschiedene Einstellungen aufgerufen werden Konfigurationsassistent aufrufen Regale anpassen und verwalten Busverkabelung anpassen Verschiedene Einstellungen der WERMA StockSAVER Software anpassen 5 7 1 Assistent Der Konfigurationsassistent führt Schritt für Schritt durch die Inbetriebnahme und Konfigutation der...

Страница 91: ...oder 3 Auf den Link des gewünschten Schritts klicken 5 7 2 Geräte Falls die Konfiguration eines Transceivers oder einer SmartBox geändert oder weitere WERMA StockSAVER Geräte in Betrieb genommen werden sollen kann dies mit einem Assistenten erfol gen 1 In der Symbolleiste im Bereich Konfiguration auf Geräte klicken Das Fenster Geräte Inbetriebnahme erscheint Version 1 0 03 2018 91 ...

Страница 92: ...anden ist erscheint eine entsprechende Meldung Mit Klick auf Ja kann die neue Firmware Version installiert werden Falls die Buchungsbestätigung der SmartBox verwendet werden soll muss der Transceiver über eine geeignete aktuelle Firmware Version verfügen 4 Sobald das WERMA StockSAVER Gerät gefunden wurde auf Weiter klicken 5 Weitere Konfiguration des Transceivers oder der SmartBox durchführen 5 7 ...

Страница 93: ...868 25 MHz Kanal 4 Frequenz 868 15 MHz 3 Auf Weiter klicken Für die Verbindung mit dem Netzwerk stehen drei Möglichkeiten zur Verfügung IP Adresse automatisch per DHCP beziehen Statische IP Adresse verwenden Erweiterte Netzwerkeinstellungen Die Option Erweiterte Netzwerkeinstellungen muss in folgenden Fällen verwendet wer den UDP Broadcast ist nicht erlaubt Die TCP IP Verbindung vom Serverdienst z...

Страница 94: ...n Standardmäßig wird TCP IP Port 80 verwendet IP Adresse automatisch per DHCP beziehen Die Option IP Adresse per DHCP automatisch beziehen muss gewählt werden wenn sich Tran sceiver und Serverdienst im selben Subnetz befinden UDP Broadcast muss erlaubt sein 1 Option IP Adresse per DHCP automatisch beziehen wählen 2 Auf Speichern klicken Die Konfiguration wird auf den Transceiver übertragen Statisc...

Страница 95: ...or zur Verfügung WERMA empfiehlt die Konfigurationsdaten für eine statische IP Adresse hier einzutragen falls diese vorliegen 3 Auf Speichern klicken Die Konfiguration wird auf den Transceiver übertragen Erweiterte Netzwerkeinstellungen 1 Option Folgende statische IP Adresse verwenden wählen Version 1 0 03 2018 95 ...

Страница 96: ...Netzwerkeinstellungen anzeigen aktivieren 4 Auf Weiter klicken 5 Im Feld IP DNS Name die IP Adresse bzw den DNS Namen des Transceivers eingeben 6 Bei Bedarf TCP Port im Feld TCP Port anpassen Die notwendigen Daten stellt der Netzwerk Administrator zur Verfügung 7 Auf Speichern klicken Die Konfiguration wird auf den Transceiver übertragen 96 310 865 005 0318_AB ...

Страница 97: ...5 7 2 2 SmartBox 1 Im Feld SmartBox Name die Bezeichnung der SmartBox eingeben 2 SmartBox in der Auswahlliste Transceiver einem Transceiver zuordnen 3 Auf Weiter klicken Version 1 0 03 2018 97 ...

Страница 98: ... Material vor der Einlagerung nicht zwingend gescannt werden muss Falls das Material doch gescannt wird verhält sich das System wie bei der Option Bestückung nur mit vorherigen Scan Bestückung nur mit vorherigem Scan erlauben Material darf in ein Regalfach nur eingelagert werden falls es gescannt wurde Bestückungen ohne vorherigen Scan erkennt und protokolliert das System als Fehl bestückungen 5 I...

Страница 99: ... Materialnummer über nommen Position und Länge der Mate rialnummer fest definiert Die Materialnummer ist Teil des Barcodes Die Materialnummer beginnt und endet an einer bestimmten Position des Barcodes Materialnummer durch Trennzeichen identifizieren Die Materialnummer ist Teil des Barcodes Die Materialnummer beginnt und endet mit einem bestimmten Trennzeichen innerhalb des Barcodes 8 Auf Weiter k...

Страница 100: ...re keine Rück bestätigung der erfolgreichen Speicherung zurückgibt Die SmartBox gibt ein akustisches Signal aus Die SmartBox wird gesperrt Weitere Bestückungen sind nicht möglich bis die SmartBox in der WERMA StockSAVER Software ent sperrt wurde Falls ein Regal falsch bestückt wurde Die SmartBox gibt ein akustisches Signal aus Die SmartBox erwartet die Bestätigung des Benutzers dass die Fehlbestüc...

Страница 101: ...k auf Speichern eine entsprechende Meldung In diesem Fall muss die Inbetriebnahme der SmartBox abgebrochen und die Firmware des Transceivers aktualisiert werden Danach kann die SmartBox erneut konfiguriert werden 10 Auf Speichern klicken Die Konfiguration wird auf die SmartBox übertragen 5 7 3 Regale Bei Bedarf kann die Konfiguration der Regale und Regalfächer angepasst werden 1 In der Symbolleist...

Страница 102: ...stellt Ein Feld entspricht einem Regalfach Abschnitt hinzufügen 1 In der Regaldarstellung auf klicken Ebene hinzufügen 1 In der Regaldarstellung auf klicken Regalfach hinzufügen 1 In der Regaldarstellung auf klicken Regalfach löschen 1 Regalfach in der Regaldarstellung markieren 2 In der Symbolleiste auf Löschen klicken 102 310 865 005 0318_AB ...

Страница 103: ...as Regalfach klicken und Regalfach mit gedrückter linker Maustaste auf eine freie Stelle im Regal verschieben 5 7 3 2 Regalfächer konfigurieren Die Konfiguration der Regalfächer und die Zuordnung der Materialnummern kann aus einer CSV Datei importiert werden In den Einstellungen kann eine Standard Regalkonfiguration festgelegt werden Diese wird bei der Regalkonfiguration geladen und kann angepasst...

Страница 104: ...erden Im Leitstand werden dann lediglich die Zustände der Sensoren ange zeigt Die Bewegungsdaten der Regalfächer werden erst aufgezeichnet sobald einem Regal fach ein Material zugeordnet wurde 4 Im Feld Quelle die Bezugsquelle zum Auffüllen des Materials eingeben oder bei Bedarf die vor gegebene Quelle anpassen 5 Im Feld Behältermenge die Stückzahl Material je Behälter eingeben oder bei Bedarf die...

Страница 105: ... nicht als Spalte definiert ist werden die aktu ellen Werte für diese Felder beibehalten 1 In der Symbolleiste auf Fachzuordnung importieren klicken Das Fenster Fachzuordnung importieren erscheint 2 Auf Durchsuchen klicken und die gewünschte CSV Datei öffnen 3 In der Auswahlliste Zeichensatz den Zeichensatz der CSV Datei wählen 4 Auf Importieren klicken um die Fachzuordnung zu importieren Aufbau d...

Страница 106: ...ibung Pflichtfeld S h e l f F i e l d N a m e n v a r c h a r 4 0 Bezeichnung des Regalfachs M a t e r i a l N a m e n v a r c h a r 3 2 Materialnummer Falls ein Leer String als Wert übergeben wird wird die Materialzuordnung für das Regalfach entfernt P i e c e s P e r B o x i n t Behältermenge Stück pro Behälter Falls ein Leer String als Wert übergeben wird wird der bisherige Wert beibehalten M i...

Страница 107: ...in der Liste wählen 4 Auf OK klicken 5 7 4 Busverkabelung Falls die Busverkabelung am Regal durch Umbauten oder Erweiterungen geändert wurde muss die Busverkabelung in der WERMA StockSAVER Software ebenfalls angepasst werden Falls die Busverkabelung in der WERMA StockSAVER Software nicht angepasst wird kann dies zu falschen Ergebnissen und somit zu Produktionsausfällen führen 1 In der Symbolleiste...

Страница 108: ...erkabelung erscheint 3 Auf das Smart Box Symbol klicken um die geänderte Busverkabelung nachzuzeichnen oder 4 Zuordnung der Sensoren und Regalfächer in der Registerkarte Bus anpassen 5 Bei Bedarf weitere Regale durch Klick auf Hinzufügen mit der SmartBox verknüpfen 108 310 865 005 0318_AB ...

Страница 109: ...ert werden 9 In der Symbolleiste auf Überprüfen klicken um die Konfiguration zu prüfen 10 In der Symbolleiste auf Speichern klicken 11 In der Symbolleiste auf Schließen klicken 5 7 5 Einstellungen In den Einstellungen können die Funktionen von WERMA StockSAVER angepasst werden Die Einstellungen können mit einem Passwort vor unberechtigtem Zugriff geschützt wer den Um die Einstellungen aufzurufen 1...

Страница 110: ...und welche Ansicht im jeweiligen Fenster dargestellt werden sollen Falls nur ein Fenster dargestellt werden soll kann dessen Größe gewählt werden 1 In der Auswahlliste Funktionsmodul das gewünschte Modul für Fenster 1 und Fenster 2 wählen 2 Falls nur ein Fenster dargestellt werden soll in der Auswahlliste Funktionsmodul für Fenster 2 den Eintrag Keine Auswahl wählen 3 In der Auswahlliste Ansicht d...

Страница 111: ... WIN nach Produkt Updates suchen aktivieren 2 Auf OK klicken um die Einstellungen zu speichern Für die Suche nach Produktupdates muss der Rechner mit dem Internet verbunden sein und die Seite www werma com erreichen können 5 7 5 2 Ansichten In der Registerkarte Ansichten können die Ansichten für alle Module erstellt und angepasst wer den Folgende Funktionen sind möglich Ansicht hinzufügen Ansicht ...

Страница 112: ...nde Ansicht in der Liste der Ansichten wählen 2 Auf Kopieren klicken Das Fenster Ansicht kopieren erscheint 3 Im Feld Name den Namen der Ansicht anpassen 4 Auf OK klicken um die Ansicht zu kopieren Ansicht umbenennen 1 Gewünschte Ansicht in der Liste der Ansichten wählen 2 Auf Bearbeiten klicken Das Fenster Ansicht bearbeiten erscheint 3 Im Feld Name den Namen der Ansicht anpassen Falls der Name d...

Страница 113: ...ben angeordnet sind erscheinen in der Sym bolleiste zuerst Ansicht löschen 1 Zu löschende Ansicht in der Liste der Ansichten wählen 2 Auf Löschen klicken 3 Abfrage mit Ja bestätigen 5 7 5 3 Leitstand In der Registerkarte Leitstand kann festgelegt werden wann im Modul Leitstand die Mate rialnummer und die Quelle für ein Regalfach angezeigt wird 1 In der Auswahlliste Materialnummer wählen wann die M...

Страница 114: ...pannungsversorgung des zu löschenden WERMA StockSAVER Geräts trennen 2 Zu löschendes WERMA StockSAVER Gerät in der Liste der WERMA StockSAVER Geräte wählen Mehrere WERMA StockSAVER Geräte können durch Drücken der STRG Taste gewählt werden 3 Auf Löschen klicken 4 Abfrage mit Ja bestätigen 5 7 5 5 Regalfach Zur Erleichterung der Regalkonfiguration kann eine Vorbelegung als Standardkonfiguration ein ...

Страница 115: ...aterialnummer und der Quelle für die Meldezustände in den jeweiligen Aus wahllisten wählen Die Anzeige der Materialnummer und der Quelle kann in der Registerkarte Leitstand akti viert bzw deaktiviert werden 4 Auf Schließen klicken um die Einstellungen zu speichern 5 7 5 6 Reports Für Reports können individuelle Kopf und Fußzeilen hinterlegt werden Version 1 0 03 2018 115 ...

Страница 116: ...lb Meldebestand erfolgt Falls der Status innerhalb der Verzögerungszeit nicht zurück auf grün wechselt wird nach Ablauf der Verzögerungszeit die E Mail Meldebestand erreicht versendet Falls der Status innerhalb der Verzögerungszeit zurück auf grün wechselt wird keine E Mail versendet Falls der Status innerhalb der Verzögerungszeit auf rot Sicherheitsbestand wechselt startet die Verzögerungszeit Si...

Страница 117: ...stand unterschritten wechselt und die Ver zögerungszeit erreicht wird Falls sich der Zustand innerhalb der Verzögerungszeit erneut ändert wird keine E Mail gesendet Statusbenachrichtigung für Sicherheitsbestand konfigurieren 1 Kontrollkästchen Sicherheitsbestand unterschritten aktivieren 2 E Mail Empfänger im Feld Empfänger eingeben Mehrere Empfänger werden durch ein Semikolon getrennt 3 Verzögeru...

Страница 118: ... Funktionen oder Module aktivieren 1 In der Liste der Funktionen und Module das Kontrollkästchen in der Spalte Aktiviert aktivieren 2 Auf OK klicken um die Einstellungen zu speichern Funktionen oder Module deaktivieren 1 In der Liste der Funktionen und Module das Kontrollkästchen in der Spalte Aktiviert deak tivieren 2 Auf OK klicken um die Einstellungen zu speichern Einstellungen mit Passwort sch...

Страница 119: ...ung Materialstammimport Protokoll Alle Materialstammimporte inkl der importierten Datensätze Materialstammimport Fehlerprotokoll Nur die Materialstammimporte inkl der importierten Datensätze bei denen es zu Fehlern bei der Verarbeitung kam Materialbewegungen Protokoll Alle Materialbewegungsexporte inkl der exportierten Datensätze Materialbewegungen Fehlerprotokoll Alle Materialbewegungsexporte bei...

Страница 120: ...status der WERMA StockSAVER Geräte und des WERMA StockSAVER Serverdiensts überwacht werden Optional können die Daten über Kommandozeilen Programm verwaltet werden 6 1 Datenbank Zur Sicherung der aufgezeichneten Daten kann die WERMA StockSAVER Datenbank gesichert und wiederhergestellt werden Für einen detaillierten Zugriff auf die WERMA StockSAVER Datenbank kann durch Klick auf Management Studio da...

Страница 121: ...ank Sicherungsdateien regelmäßig manu ell zu bereinigen oder extern zu sichern 1 In der Symbolleiste im Bereich Datenbank auf Sicherung klicken Das Fenster Datenbank sichern erscheint 2 Auf Sicherung starten klicken Eine Kopie der WERMA StockSAVER Datenbank wird im Installationsverzeichnis gespei chert 3 Auf Schließen klicken Version 1 0 03 2018 121 ...

Страница 122: ...n Arbeitsplätzen beendet wurde 2 In der Symbolleiste im Bereich Datenbank auf Wiederherstellung klicken Das Fenster Datenbank wiederherstellen erscheint 3 Hinweistext lesen und durch Aktivieren des Kontrollkästchens bestätigen 4 Auf Weiter klicken 5 Auf Durchsuchen klicken und Sicherungsdatei öffnen 6 Falls die Sicherungsdatei lediglich validiert und nicht wiederhergestellt werden soll das Kon tro...

Страница 123: ... Sicherungsdatei wiederhergestellt 6 1 2 1 Erweiterte Wiederherstellungsoptionen Die erweiterten Wiederherstellungsoptionen bieten folgenden Möglichkeiten Sicherungsdatei validieren ohne dass die Datenbank wiederhergestellt wird Sicherungsdatei validieren und wiederherstellen Sicherungsdatei validieren 1 Option Datenbanksicherung nur validieren wählen 2 Auf Validieren klicken Die Sicherungsdatei w...

Страница 124: ...lkästchen Datenbank nach Wiederherstellung aktualisieren deaktivieren 3 Falls Daten wie Hintergrundbilder und Firmenlogos nicht wiederhergestellt werden sollen Kon trollkästchen Filestore wiederherstellen deaktivieren 4 Auf Wiederherstellen klicken Die Sicherungsdatei wird validiert Falls die Sicherungsdatei valide ist werden die Daten aus der Sicherungsdatei wie derhergestellt 124 310 865 005 031...

Страница 125: ... aktuelle Zustand dieser Regalfächer exportiert werden soll kann die XML Schnittstelle verwendet werden Der Export erfolgt in der Regel sofort mit einer Zeitverzögerung von unter einer Sekunde Durch verschiedene Fehler und Performancefaktoren kann der Export verzögert werden sodass keine Übertragungs bzw Reaktionszeit garantiert werden kann Falls mehrere neue Materialbewegungen vorliegen werden di...

Страница 126: ...n Der WERMA StockSAVER Serverdienst wird unter dem Windows Benutzerkonto N e t z w e r k d i e n s t ausgeführt 1 In der Symbolleiste im Bereich Schnittstellen auf CSV Export klicken Das Fenster CSV Export Schnittstelle erscheint 2 Pfad und Dateinamen der CSV Exportdatei im Feld Dateiname eingeben oder auf Durch suchen klicken 3 Auf Aktivieren klicken Alle Veränderungen des Lagerbestands werden in...

Страница 127: ...legt wurde 2 Exportdatei umbenennen Bei einem Dateizugriffsfehler muss dies wiederholt versucht werden Ein Dateizugriffsfehler tritt auf sobald der Serverdienst die Exportdatei geöffnet hat um weitere Einträge hin zuzufügen 3 Die umbenannte Exportdatei kann verarbeitet und ggf gelöscht oder archiviert werden Falls die Exportdatei archiviert wird empfiehlt WERMA die Archivdatei in ein anderes Ver z...

Страница 128: ...h haben Die Anzahl Reihenfolge und Definition der Felder kann sich in künftigen Updates von WERMA StockSAVER ändern Feld ID Datentyp Beschreibung I D bigint Interne Datenbank ID des M a t e r i a l L o g Datensatzes T i m e s t a m p d a t e t i m e 2 Zeitstempel wann der Datensatz in der Datenbank angelegt wurde Entspricht der lokalen Uhrzeit und Zeitzone auf dem Server M a t e r i a l I d i n t ...

Страница 129: ...ehältern oder weni ger ist der Meldebestand erreicht Falls kein Meldebestand für das Regalfach definiert ist wird ein Leer String exportiert A b o v e M a x i m u m B o x C o u n t i n t Überbestand Wert 3 ab dem 3 Behälter oder mehr ist der Überbestand erreicht Falls kein Überbestand für das Regalfach definiert ist wird ein Leer String exportiert R e s y n c b i t Mögliche Werte 0 Der Eintrag ist...

Страница 130: ... korrekten Import der Daten muss die XML Datei für den Materialstammsatz Import bestimmten Anforderungen entsprechen 6 2 2 1 XML Schnittstelle konfigurieren Die Einrichtung der XML Schnittstelle erfolgt auf dem Server PC auf dem der WERMA StockSAVER Serverdienst ausgeführt wird Import und Export werden durch den Schnittstellendienst durchgeführt der auf dem WERMA StockSAVER Serverdienst ausgeführt...

Страница 131: ...ge Dienst aktivieren aktivieren 2 Bei Bedarf im Feld System Kennung die System ID des WERMA StockSAVER Systems eingeben Durch Eingabe der System Kennung des WERMA StockSAVER Systems können die gene rierten XML Dateien anhand der gespeicherten S y s t e m I D identifiziert werden Falls die System ID gesetzt ist wird diese beim Materialstamm Import geprüft Falls in der Import Datei eine andere oder ...

Страница 132: ...der Verarbeitung verschoben werden sollen 4 Im Feld Prüfintervall sek eingeben in welchem Zeitintervall nach neuen Importdateien gesucht werden soll Der Import kann u U durch verschiedene Fehler und Performancefaktoren verzögert werden Deshalb kann keine Übertragungs und Reaktionszeit garantiert werden 5 Im Feld Anzahl Tage nach denen Dateien aus dem Archiv gelöscht werden sollen eingeben wie lang...

Страница 133: ...on anderen Anwendungen bereits verarbeitet wur den 3 Im Feld Prüfintervall sek eingeben nach welchem Zeitintervall eine neue XML Datei expor tiert werden soll Falls keine Materialbewegungen stattgefunden haben exportiert der Schnitt stellendienst dennoch die aktuellen Regalfachzustände Der Export kann u U durch verschiedene Fehler und Performancefaktoren verzögert wer den Deshalb kann keine Übertr...

Страница 134: ...at e x p o r t t i m e s t a m p A t t r i b u t d a t e t i m e 2 Zeitstempel wann der Export aus der ande ren Anwendung heraus durchgeführt wurde Format y y y y M M d dH H m m s s s y s t e m i d A t t r i b u t n v a r c h a r 2 5 Optional System Kennung mit welcher der Export aus der anderen Anwendung heraus durch geführt wurde Falls die System ID gesetzt ist wird diese beim Materialstamm Impo...

Страница 135: ...er chronologisch richtigen Rei henfolge importiert Die Sortierung der Dateien in der chronologischen Reihenfolge erfolgt über die Datums bzw Zeitangaben aus dem Dateinamen Sobald eine Datei von der Schnittstelle verarbeitet wird wird ihre Dateiendung auf l o c k geän dert Verarbeitete Dateien werden in das Archivverzeichnis verschoben Sobald die Ver arbeitung erfolgreich war wird die Dateiendung a...

Страница 136: ...ummer ist länger als 32 Zeichen Die Materialnummer ist leer Die Materialnummer enthält nur Leerzeichen Die Materialnummer enthält nicht druckbare Zeichen Leerzeichen am Anfang sowie am Ende der Materialnummer werden beim Import entfernt Materialbezeichnung Die Materialbezeichnung wird geprüft und der Datensatz in folgenden Fällen als fehlerhaft ange sehen Die Materialbezeichnung ist leer Die Mater...

Страница 137: ...termenge Stk je Behälter eines Regalfachs geändert wird wird ein Ein trag mit D e l t a B o x C o u n t 0 und entsprechendem Wert bei D e l t a A m o u n texportiert Falls ein Regalfach gelöscht oder die Buszuordnung aufgehoben wird wird ein Eintrag mit Menge 0 und ohne Bestandsgrenzen exportiert Falls Regalfächern kein Material zugeordnet ist kann WERMA StockSAVER keine Buchun gen durchführen Für...

Страница 138: ... t r i b u t d a t e t i m e 2 Zeitstempel wann der Datensatz in der Daten bank angelegt wurde Der Wert entspricht der lokalen Uhrzeit und Zeitzone auf dem Server s h e l f f i e l d E l e m e n t Element welches Detaildaten des Regalfachs enthält i d A t t r i b u t i n t Interne Datenbank ID des Regalfachs n a m e A t t r i b u t n v a r c h a r 4 0 Bezeichnung des zugeordneten Regalfachs Die Be...

Страница 139: ...e Positiv Bestückung d e l t a a m o u n t A t t r i b u t i n t Mengen Differenz zum vorherigen Log Eintrag für dieses Regalfach Material Negativ Entnahme Positiv Bestückung v a l u e A t t r i b u t i n t Die erkannte neue Anzahl an Behältern Dateibenennung Der Schnittstellendienst legt die XML Dateien im Exportverzeichnis ab und vergibt den Datein amen anhand folgendem Muster M a t e r i a l L ...

Страница 140: ...keitsüberwachung aktiviert ist wird der Verbindungsstatus der WERMA StockSAVER Geräte und des WERMA StockSAVER Serverdiensts überwacht Sobald sich der Ver bindungsstatus ändert wird nach einer eingestellten Verzögerungszeit eine E Mail an einen oder mehrere Empfänger gesendet Falls sich der Verbindungsstatus innerhalb der Verzögerungszeit erneut ändert wird keine E Mail versendet Dadurch können Da...

Страница 141: ...atus von Geräten oder Server Diensten benach richtigen aktivieren 7 E Mail Empfänger im Feld Empfänger eingeben Mehrere Empfänger werden durch ein Semikolon getrennt 8 Verzögerungszeit im Feld Verzögerungszeit festlegen Eine E Mail wird erst gesendet wenn der neue Zustand am Ende der Verzögerungszeit noch anliegt Falls sich der Zustand innerhalb der Verzögerungszeit erneut ändert wird keine E Mail...

Страница 142: ...on Geräten oder Server Diensten benach richtigen deaktivieren 4 Auf OK klicken 6 4 Verbindungsstatus bereinigen Ältere gespeicherte Verbindungsstatus können automatisch bereinigt werden Das Alter der Ver bindungsstatus die bereinigt werden sollen kann eingestellt werden 142 310 865 005 0318_AB ...

Страница 143: ...Bereinigung der gespeicherten Verbindungsstati durchführen aktivieren 4 Im Feld Anzahl Tage wählen nach wie vielen Tagen die gespeicherten Verbindungsstatus automatisch bereinigt werden sollen Falls im Feld Anzahl Tage 3 0 Tage gewählt werden werden alle Verbindungsstatus die älter als 30 Tage sind automatisch gelöscht 5 Auf OK klicken um die Einstellungen zu speichern und die Bereinigung zu start...

Страница 144: ...den zukünftig auto matisch bereinigt 6 4 2 Bereinigung deaktivieren 1 In der Symbolleiste im Bereich Konfiguration auf Einstellungen klicken Das Fenster Einstellungen erscheint 2 Registerkarte Verfügbarkeitsüberwachung wählen 3 Kontrollkästchen Automatische Bereinigung der gespeicherten Verbindungsstati durchführen deaktivieren 4 Auf OK klicken 144 310 865 005 0318_AB ...

Страница 145: ... unter dem angegebenen Datein amen Beispiel A d m i n C L I e x e b a c k u p C S t o c k S A V E R s t o c k b a k Optionen n o p r o g r e s s Unterdrückt die Ausgabe der Fort schrittsmeldungen auf der Konsole n o v e r i f y Erstellt eine Datensicherung ohne diese im Anschluss zu prüfen Rückgabe Werte 0 Befehl erfolgreich ausgeführt 1 Es wurde keine Funktion ausgeführt die Hilfe wurde angezeigt...

Страница 146: ...g Verbindung zum ist Tran sceiver unterbrochen Transceiver wird im Fenster Routing als nicht verbunden angezeigt Regale werden als nicht ver bunden angezeigt Netzwerkverbindung zwischen Transceiver und Server Dienst unterbrochen Stromversorgung und Ether net Verbindung des Tran scievers prüfen Sicherstellen dass Server Dienst läuft Prüfen ob der Transceiver in den Einstellungen im Rei ter Geräte a...

Страница 147: ...position anpas sen Repeater Funktion durch zusätzliche SmartBox rea lisieren oder zusätzlichen Transceiver einsetzen SmartBox wird in der WERMA StockSAVER Software nicht erkannt USB Treiber der SmartBox ist nicht installiert Manuelle Treiberinstallation durchführten Displaymeldung N oc o n n e c t i o n Keine Funkverbindung zum Transceiver Displaymeldung N o tc o n f i g u r e d SmartBox ist nicht...

Страница 148: ...ge in Software Busverkabelung Stecker belegung fehlerhaft Steckerbelegung prüfen und ggf neu verkabeln SensorBox defekt Funktion prüfen und ggf ersetzen 7 4 Sensoren Fehler Mögliche Ursache Behebung Sensoren reagieren nicht LED am Sensor leuchtet nicht Sensorverkabelung Stecker belegung fehlerhaft oder Kabelbruch Steckerbelegung prüfen und ggf neu verkabeln Blaue LED leuchtet nicht Anzeige in Soft...

Страница 149: ...abelung zwischen Regal und SmartBox ist in WERMA StockSAVER Software nicht möglich Regal wurde schon mit ande rer SmartBox verkabelt und wird grau als belegt ange zeigt Busverkabelung für die andere SmartBox öffnen und die vorhandene Zuord nung der SensorBox zum Regalfach aufheben Anschließend kann das Regalfach mit einer ande ren SmartBox SensorBox ver kabelt werden CSV Export in Admi nistrations...

Страница 150: ... der jewei ligen SensorBoxen prüfen Im Fenster Routing wird ange zeigt dass die Funkverbindung der SmartBox schwach oder schlecht ist SmartBox wird als nicht ver bunden angezeigt Funkverbindung wird beein trächtigt Konfiguration der SmartBox prüfen Prüfen ob dicke Wände o ä die Funkverbindung beeinträchtigen Im Fenster Routing wird ange zeigt dass der Transceiver häu fig die Verbindung zum WERMA S...

Страница 151: ...ere Geräte ist ein Firmware Update notwendig Firmeware Update not wendig Firmeware Update durch führen Fehlermeldung in der Sta tusleiste Datenerfassung gestoppt die Verbindung zu mindestens einer SmartBox ist unterbrochen Keine Verbindung zur Smar tBox Stromversorgung der Smar tBoxen prüfen Funkverbindung zwischen Transceiver und SmartBox prüfen Prüfen ob der Transceiver mit dem WERMA StockSAVER ...

Страница 152: ...k S e r v i c e A p p D a t a L o c a l T e m p WERMA StockSAVER Cli entanwendung C U s e r s u s e r A p p D a t a L o c a l T e m p bzw T E M P WERMA Exception x m l Dateien enthalten Informationen zu Client und Service Abstür zen WERMA l o g Dateien enthalten Protokolleinträge die während der Ausführung der Anwendung aufgezeichnet werden Für den Zugriff auf die Log Dateien werden ggf Administra...

Страница 153: ...chnet 0 Keine Aufzeichnung 1 Fehler 2 default Fehler Warnungen 3 Fehler Warnungen Informationen 4 Fehler Warnungen Informationen Debug Informationen 5 Fehler Warnungen Informationen Debug Informationen Datenbank Befehle L o g C o m m Detaillierungsgrad für Hardwaredaten 0 default Aufzeichnung von Hardwaredaten deaktiviert 1 Aufzeichnung von empfangenen Hardwaredaten 2 Aufzeichnung von Hardwaredate...

Страница 154: ...uf dem PC installieren Falls mehrere Arbeitsplätze auf eine gemeinsame WERMA StockSAVER Datenbank zugrei fen muss das Software Update zuerst auf dem PC mit der WERMA StockSAVER Daten bank Server PC installiert werden Falls die Installation zuerst auf einem Client PC gestartet wird erscheint eine entsprechende Meldung Das Software Update muss auf allen PCs durchgeführt werden die mit der gemeinsame...

Страница 155: ...Server installieren Bei der Umstellung von Sommer auf Winterzeit muss darauf achten dass die Umstellung mög lichst außerhalb der Betriebszeiten durchgeführt wird Daten die in der ersten Stunde nach der Zeitumstellung erfasst werden können nicht in der Datenbank gespeichert werden falls in der Stunde vor der Zeitumstellung Buchungen für das Regalfach erfolgt sind Version 1 0 03 2018 155 ...

Страница 156: ...Transceiver und SmartBox Die Konfiguration kann auch auf dem Client PC erfolgen Bildschirmauflösung Mindestens 1280 x 1024 Empfohlen 1920 x 1080 oder höher Skalierung der Textgröße DPI bis 200 192 DPI Microsoft NET Fra mework 4 5 2 Wird bei der Installation vonWERMA StockSAVER automatisch installiert falls nicht vorhanden Unterstützte Betriebssysteme Windows 7 SP1 Windows 8 Windows 8 1 Windows 10 ...

Страница 157: ...wer den unterstützt 10 1 Netzwerkstabilität und sicherheit WERMA empfiehlt den Betrieb von WERMA StockSAVER nur in einer zuverlässigen LAN Umgebung TCP IP Netzwerk In einem instabilen oder unsicheren Netzwerk können die Funktion oder die Performance von WERMA StockSAVER beeinträchtigt werden 10 2 Systemarchitektur Bei der Installation wird auf dem Server ein Server Dienst installiert Der Server Di...

Страница 158: ... liert Alternative A Serverdienst Client und Datenbank sind auf einem Arbeitsplatz PC installiert Für den Produktivbetrieb nicht empfohlen Alternative B Serverdienst und Datenbank sind auf zwei unter schiedlichen Servern installiert Dafür muss ein eigener SQL Server installiert werden z B Microsoft SQL Server Express Client Anwendung ist auf einem Arbeitsplatz PC instal liert 158 310 865 005 0318_...

Страница 159: ...Manual WERMA StockSAVER Version 1 0 03 2018 310 865 005 0318_AB ...

Страница 160: ...78604 Rietheim Weilheim Germany Phone 49 0 7424 9557 222 Fax 49 0 7424 9557 44 support werma com www werma com Legal Notices Operator and address WERMA Signaltechnik GmbH Co KG Dürbheimer Str 15 78604 Rietheim Weilheim Germany Phone 49 0 7424 9557 0 Fax 49 0 7424 44 support werma com www werma com Authorised representative Managing Director Matthias Marquardt VAT identification number VAT ID No DE...

Страница 161: ...2 7 Functional test 20 3 Installation 21 3 1 Installing WERMA StockSAVER 21 3 2 Installing the server application 22 3 2 1 Selecting languages 23 3 2 2 Advanced installation options 24 3 3 Installing the client application 27 3 4 Firewall configuration 30 3 5 Uninstalling WERMA StockSAVER 31 4 Commissioning 32 4 1 Configuration wizard 32 4 1 1 Transceiver 33 4 1 2 SmartBox 40 4 1 3 Connecting the ...

Страница 162: ...rial 72 5 3 4 Importing a material list 73 5 3 5 Finding a Material 74 5 4 Analysis 75 5 5 Report 79 5 5 1 Exporting to Excel 81 5 5 2 Pasting a watermark 82 5 5 3 Deleting a watermark 83 5 5 4 File formats 83 5 6 System status 84 5 6 1 Routing 84 5 6 2 Connections 86 5 7 Configuration 86 5 7 1 Wizard 87 5 7 2 Devices 87 5 7 3 Flow racks 97 5 7 4 Bus cabling 103 5 7 5 Settings 104 5 8 Interface lo...

Страница 163: ...e command line 141 7 Fault diagnostics 143 7 1 Transceiver 143 7 2 SmartBox 144 7 3 SensorBox 145 7 4 Sensors 145 7 5 WERMA StockSAVER software 146 7 6 Log files 149 7 6 1 Accessing log files 149 7 6 2 Enabling detailed logging 149 8 Software update 151 9 Changing and synchronising the time 152 10 System requirements 153 10 1 Network stability and security 154 10 2 System architecture 154 10 2 1 O...

Страница 164: ...MA StockSAVER software must be installed and configured 1 Fit the hardware on the flow rack 2 Install the WERMA StockSAVER software Install the server Install the client 3 Commission the hardware using the configuration wizard Configure the transceiver Configure the SmartBox Connect devices to the flow rack 4 Configure the flow rack in the software 6 310 865 005 0318_AB ...

Страница 165: ...ox Receives data from up to 50 SensorBoxes If a optional barcode scanner is used and is configured accordingly in the WERMA StockSAVER software the SmartBox displays placement errors 4 Transceiver Receives data from up to 20 SmartBoxes Transfers the data to the WERMA StockSAVER server ser vice in the network The server service stores the data in the WERMA StockSAVER database Up to 4 transceivers c...

Страница 166: ...for compatibility and installation feasibility before use in other rack types 2 1 1 SensorBox LED Description Steady blue Power supply and bus connection present Off No power supply and no bus connection Flashes blue Power supply present bus connection inter rupted Up to 4 sensors may be connected to a SensorBox 2 1 2 SmartBox 2 1 2 1 Connections Item Connection Description 1 Mini USB Connection o...

Страница 167: ...ification of placement error 2 1 2 3 LED displays LED Description Steady green Wireless connection available Flashes red Wireless connection not available Steady blue Bus is connected to following SensorBox Flashes blue Bus is not connected to following SensorBox No SensorBox connected Steady green Material known Flashes green Database query running Steady yellow Material not known Steady red sign...

Страница 168: ... r r o r M a t e r i a ln o ta v a i l a b l e Part number is not available in this Smar tBox E r r o r S m a r t B o xn o ti n i t i a l i s e d SmartBox is not initialised E r r o r S e n s o r b o xf u l l Location is full E r r o r U n k n o w nr e a s o n Unknown error Solution Repeat the process P l a c e m e n te r r o r Replenishment to incorrect location or material has been placed in sto...

Страница 169: ...red No connection possible to the SmartBox 2 1 4 Barcode scanner A barcode scanner optional can be used to identify and log placement errors To this end the SmartBox with Identification function must be activated and set up during commissioning of the SmartBox The following barcode scanners have been tested by WERMA for compatibility Manufacturer Connection Type I Keys RF ID USB Reader RF ID USB r...

Страница 170: ...BS blend PC ABS blend ABS Connection Power supply 24 V DC 24V Input voltage power supply unit 115 230 V AC 50 60 Hz Output voltage power supply unit 24 V DC Input voltage power supply unit 115 230 V AC 50 60 Hz Output voltage power supply unit 5 V DC Voltage range 10 30 V 10 12 24 V 10 115 230 V 10 115 230 V 10 Startup current 600 mA Max 250 mA leff 20 A leff 800 mA Operating cur rent 15 mA 15 mA ...

Страница 171: ...RMA to avoid irregularities during material requi sition and analysis If the WERMA StockSAVER system is not used store components in their original packaging 2 2 1 1 Operator s obligations Observe local safety regulations The connection must only be carried out by a qualified electrician in compliance with the operating instructions and with the standards and guidelines applicable in the area of u...

Страница 172: ... bin dimensions 75 x 165 x 100 mm 2 Remove all containers from the flow rack 3 Make sure that there is a suitable voltage supply for the devices nearby 4 Make sure that an Ethernet connection is available 5 Clean the flow rack with a cloth and if necessary a mild detergent 6 Have the following tools to hand for installation of the hardware Parallel spanner for attaching the plugs Stripping tool fo...

Страница 173: ...stallation 2 2 3 1 Required components 2 2 3 2 Installation 1 Clean the installation surface 2 Attach a maximum of 4 sen sors on the flow rack In the event of heavy soiling during operation Clean the sensors regularly 3 To avoid errors being detected as a result of reflections Install sensors at an angle of approx 5 4 Attach the connection cable of the sensors on the flow rack Make sure that the c...

Страница 174: ...m 2 2 4 1 Required components 2 2 4 2 Wiring a SensorBox 1 Lay the connection cable from the sensors to the Sen sorBox 2 Attach the SensorBox to the flow rack rails 3 Cut the connection cable to the required length Strip around 20 mm on the open end 4 Fit the connection cable to the plug Ensure the configuration is cor rect 16 310 865 005 0318_AB ...

Страница 175: ...us 1 Use the provided cable for bus cabling 2 Cut the bus cable to the requi red length Strip around 20 mm on the open end 3 Fit the bus cable to the plug Ensure the configuration is cor rect 4 Connect the SensorBoxes to the bus cables Ensure the connections are correct Version 1 0 03 2018 17 ...

Страница 176: ...emplate can be downloaded from the WERMA homepage 2 2 5 Installing a SmartBox 2 2 5 1 Required components 2 2 5 2 Installation 1 Fit the wireless antenna to the SmartBox 2 Install the WERMA StockSAVER software Use the supplied USB cable to connect the SmartBox to the computer Start up operation of the Smar tBox and perform con figuration 18 310 865 005 0318_AB ...

Страница 177: ...to the power supply 2 2 6 Installing the transceiver 2 2 6 1 Required components 2 2 6 2 Installation 1 Fit the wireless antenna to the transceiver 2 Use the supplied USB cable to connect the transceiver to the computer Start up operation of the tran sceiver and perform con figuration Version 1 0 03 2018 19 ...

Страница 178: ...transceiver to the power supply 2 2 7 Functional test 1 Cover sensors Check whether the LEDs are illuminated on the sensors Check whether the LED is illu minated on the SensorBox 2 Carry out test replenishment on the flow rack and check correct functioning in the WERMA StockSAVER software 20 310 865 005 0318_AB ...

Страница 179: ...R software Install the software on the server first and then on the client 3 1 Installing WERMA StockSAVER 1 Make sure that the necessary system requirements are met 2 Download the latest version of WERMA StockSAVER at www werma com saver 3 Extract the downloaded ZIP file 4 Double click the WERMA StockSAVER x x x xxx exe file to start the installation 5 Select the installation language The install...

Страница 180: ...nt to install the WERMA StockSAVER server with different settings enable Show advan ced installation options 2 Click Install Server 3 Click Next If you enabled Show advanced installation options the window containing the advanced installation options is displayed If you did not enable Show advanced installation options the window for selecting the lan guages is displayed 22 310 865 005 0318_AB ...

Страница 181: ...ate of the client installation the selected languages are provided auto matically The installation program loads further languages from the WERMA web server The lan guages are displayed as soon as they are available You may need to select Configure HTTP proxy server to configure a proxy server for access to the WERMA web server 3 Click Install The WERMA StockSAVER server service and database are i...

Страница 182: ...uired directory If the default TCP port 9711 is already being used by another network service 1 Change the TCP port in the TCP port field 2 Click Check WERMA StockSAVER checks the entered TCP port After you have made all the changes 1 Click Next The window for installing the WERMA StockSAVER database appears 24 310 865 005 0318_AB ...

Страница 183: ...the network already containing WERMA StockSAVER data 3 2 2 1 New database 1 Choose Create new database 2 Click Next The window for for selecting the languages appears 3 2 2 2 Empty SQL database Requirements An empty database has been set up on the Microsoft SQL server The database meets the following requirements SQL server authentication mode is enabled Database character set collation L a t i n ...

Страница 184: ... SQL Server database 2 Click Next 3 Enter the access data for the empty database in the appropriate fields 4 Click Check WERMA StockSAVER checks the entered data and the database 5 Click Next The connection to the database is created The window for for selecting the languages appears 3 2 2 3 Available StockSAVER database 1 Select Microsoft SQL Server database with WERMA StockSAVER data 2 Click Nex...

Страница 185: ...cation The client application can be installed and updated automatically with a software dis tribution system For information about this see subdirectory D o c s in the installation direc tory of the server application 1 Click Install Client The installation searches the network for the WERMA StockSAVER server service If the WERMA StockSAVER server service is found in the network The installation ...

Страница 186: ...ient and establishes a connection to the WERMA StockSAVER server service If several WERMA StockSAVER server services are found The installation wizard displays a selection dialogue containing the found WERMA StockSAVER server services 28 310 865 005 0318_AB ...

Страница 187: ...nstalls the client and establishes a connection to the WERMA StockSAVER server service If no WERMA StockSAVER server service is found in the network The installation wizard displays a message to this effect 1 Confirm the message with OK 2 Select the Manually configure Server data option Version 1 0 03 2018 29 ...

Страница 188: ...AVER server service 3 4 Firewall configuration All necessary port enables are configured in the Windows firewall by default when WERMA StockSAVER is installed If you are using other or additional firewall or network products it may be necessary to adapt them manually 1 Make sure that the following network connections are not blocked Source Destination Type Port Remark Server Microsoft SQL Server U...

Страница 189: ...iver Server Service UDP broadcast 7321 17321 27321 Retrieval of connection information Server Client www werma com www werma stocksaver com TCP 80 443 Update test retrieval of the Online Help and Contact or Update pages Can be configured differently in WERMA StockSAVER on commissioning of the WERMA StockSAVER devices WERMA recommends not blocking access to other subdomains for future updates of WE...

Страница 190: ...oning of the individual hardware components a configuration wizard is provided that performs the individual commissioning and configuration steps one after the other 4 1 Configuration wizard 1 If the configuration wizard does not automatically appear when you start WERMA StockSAVER click Wizard in the toolbar The configuration wizard appears 2 Click Next 32 310 865 005 0318_AB ...

Страница 191: ...bled click Next The window for configuring the transceiver appears 4 1 1 Transceiver 1 Use the USB cable to connect the transceiver to the computer and click Search WERMA StockSAVER searches for a connected transceiver Version 1 0 03 2018 33 ...

Страница 192: ...date firmware version 3 In the Transceiver name field enter the name of the transceiver The transmission channel of the individual transceivers can be changed to enable the best possible wireless connection when several WERMA StockSAVER transceivers are run in parallel WERMA recommends only operating one transceiver per transmission channel 4 If necessary select another transmission channel in the...

Страница 193: ...is in another subnet The TCP IP connection from the WERMA StockSAVER server service to the transceiver should be established with the help of a DNS name A record stored on the DNS ser ver The TCP IP connection from the WERMA StockSAVER server service to the transceiver should be established via a different IP address e g a router with port forwarding The TCP IP connection from the WERMA StockSAVER...

Страница 194: ...ress via DHCP 2 Click Save The configuration is transferred to the transceiver 3 Click Next The window for configuring the SmartBox appears 4 1 1 2 Using a static IP address 1 Select Use the following static IP address 36 310 865 005 0318_AB ...

Страница 195: ...r will provide the requisite data WERMA recommends entering the configuration data for a static IP address here if this is available 3 Click Save The configuration is transferred to the transceiver 4 Click Next The window for configuring the SmartBox appears Version 1 0 03 2018 37 ...

Страница 196: ...ct Use the following static IP address 2 Enter the network data into the corresponding fields Your network administrator will provide the requisite data 3 Enable the Show advanced network settings checkbox 4 Click Next 38 310 865 005 0318_AB ...

Страница 197: ...ield 6 You may need to change the TCP port in the TCP port field Your network administrator will provide the requisite data 7 Click Save The configuration is transferred to the transceiver 8 Click Next The window for configuring the SmartBox appears Version 1 0 03 2018 39 ...

Страница 198: ...1 Use the USB cable to connect the SmartBox to the computer and click Search WERMA StockSAVER searches for a connected SmartBox around 5 seconds 2 Once the transceiver has been found click Next 40 310 865 005 0318_AB ...

Страница 199: ...an The material can be placed in a location without having to be scanned first The system cannot detect or log placement errors Select this option if you do not use a barcode scanner or if the material does not have to be scanned before pla cement If the material must be scanned the system behaves in the same way as for option Allow Material Replenishment only after scan Allow Material Replenishme...

Страница 200: ...ned part numbers are to be processed Option Description Do not configure Skip scan configuration Evaluate entire scanned code as Part Number The complete barcode is adopted as the part number Position and length of the Part Num ber fixed The part number is part of the barcode The part number starts and ends at a certain position in the barcode Part Number delimiter The part number is part of the b...

Страница 201: ...a confirmation that saving was successful The SmartBox emits an acoustic signal The SmartBox is blocked Further replenishments are not possible until the Smar tBox has been unblocked in the WERMA StockSAVER software If placement in a flow rack was incorrect The SmartBox emits an acoustic signal The SmartBox expects a confirmation from the user that the placement error has been rectified The SmartB...

Страница 202: ...rs after you click Save In this case commissioning of the SmartBox must be ter minated and the firmware of the transceiver updated Configuration of the SmartBox can then continue 12 Click Save The configuration is transferred to the SmartBox 13 Connect the SmartBox and transceiver 4 1 3 Connecting the SmartBox and transceiver 1 Connect the SmartBox to the bus cable of the SensorBox 2 Connect the S...

Страница 203: ...As soon as all WERMA StockSAVER devices are connected 1 Click Next The window for configuring the flow racks appears Version 1 0 03 2018 45 ...

Страница 204: ...d enter the name of the flow rack 4 1 4 1 Configuring the structure of the flow rack In the flow rack display the flow rack is shown from the replenishment side A field corresponds to a location Add bay 1 In the flow rack display click Add shelf 1 In the flow rack display click Add location 1 In the flow rack display click 46 310 865 005 0318_AB ...

Страница 205: ...ne Move location 1 In the flow rack display click the location and holding the left mouse button down move the location to a free point in the flow rack 4 1 4 2 Configure locations The configuration of the locations and assignment of part numbers can be imported from a CSV file In the settings you can define a default flow rack configuration This is loaded during flow rack configuration and can be...

Страница 206: ...rs are then displayed The movement data of the locations are not recorded until a material has been assi gned to a location 4 In the Stores location field enter the stores location for replenishing the material or if necessary change the entered stores location 5 In the Bin quantity field enter the material piece number per bin or if necessary change the entered quantity If available the values fo...

Страница 207: ...file in a suitable format is available Data is only imported for locations that are contained in the current view If a location is contained in the CSV file multiple times the data of the last entry is used If an optional field in the CSV file is not defined as a column the current values for these fields are retained 1 In the toolbar click Import associated Locations The Import associated Locatio...

Страница 208: ...ughout the file A double quotation mark must be used as the escape character A character string must be escaped if it contains a semicolon or a double quotation mark In an escape character string double quotation marks are shown twice Example Character string T s h i r tl a r g e l o n g a r m e da n d c o l o u r f u l Output in CSV file T s h i r tl a r g e l o n g s l e e v e da n d c o l o u r...

Страница 209: ... n i m u m B o x C o u n t t i n y i n t Safety stock of the location If an empty string is transferred as a value no safety stock is defined R e o r d e r B o x C o u n t t i n y i n t Re order stock level of the location If an empty string is transferred as a value no re order stock level is defined A b o v e M a x i m u m B o x C o u n t i n t Excess stock level of the location If an empty stri...

Страница 210: ...rials and displays the search result 3 In the list select the material you want 4 Click OK 4 1 5 Specifying the bus cabling The Bus cabling configuration window maps the bus cabling from the template from the instal lation guide in the WERMA StockSAVER software 1 In the toolbar click Add to add all flow racks that are connected to the SmartBox The Add Flow rack window is displayed 52 310 865 005 0...

Страница 211: ... 3 Click the SmartBox icon to depict the bus cabling between the SensorBoxes 4 In the toolbar click Check to check the configuration 5 In the toolbar click Save 6 Click Next The configuration wizard has finished The WERMA StockSAVER system is ready for operation 7 Click Close Version 1 0 03 2018 53 ...

Страница 212: ... the SmartBox the correct location for stock placement is displayed The green LED is activated on the relevant SensorBox 2 Place the bin into the correct location The SmartBox beeps once If the bin was placed into the incorrect location The SmartBox beeps several times The system is blocked for further stock placement 1 Eliminate the placement error in the flow rack 2 On the SmartBox press to conf...

Страница 213: ...4 3 1 Windows 7 1 Click Change setting 2 Click Browse my computer for driver software 3 Click Browse Version 1 0 03 2018 55 ...

Страница 214: ...open the D r i v e r folder 5 Click Next The device drivers are installed 6 Once successfully installed click on Close to close the hardware wizard The WERMA StockSAVER device is now ready for operation 4 3 2 Windows 10 1 Open Device Manager 56 310 865 005 0318_AB ...

Страница 215: ...The Device Manager window appears 2 Right click WIRELESS DEVICE 3 Select Update driver in the pop up menu Version 1 0 03 2018 57 ...

Страница 216: ...rowse my computer for driver software 5 Click Browse 6 Navigate to the WERMA StockSAVER installation directory and open the D r i v e r folder 7 Click Next The device drivers are installed 58 310 865 005 0318_AB ...

Страница 217: ...the individual Transceiver can be changed to enable the best pos sible wireless connection when several WERMA StockSAVER systems are run in parallel Four dif ferent transmission channels are available WERMA recommends only operating one Transceiver per transmission channel 1 In the toolbar click Devices The commissioning wizard for a WERMA StockSAVER device appears Version 1 0 03 2018 59 ...

Страница 218: ...annel 4 Frequency 868 15 MHz 4 5 Firmware update In the event of a firmware update make sure that the power supply is stable and no other programs are running 1 In the toolbar click Devices The commissioning wizard for a WERMA StockSAVER device appears 2 Transceiver or SmartBox commission again 3 During commissioning confirm the firmware update message with Yes The Firmware update window appears 4...

Страница 219: ...l station module The overview shows the fill level of the flow racks or whether there is a fault This enables reaction times and downtimes to be effectively shortened Flow racks can be summarised in various views to enable different logistics areas to be observed for example The views can be adapted as required and be provided with a background image 5 1 1 Representation The representation of the ...

Страница 220: ...pear as soon as the mouse cursor is over the location The display of the part number and stores location can be enabled or disabled in the Set tings The colours of the individual statuses can be adapted individually in the Settings A location can have the following statuses Display Description Safety stock Not enough bins in the flow rack Re order stock level Minimum number of bins reached Nominal...

Страница 221: ...tics areas to be observed for example The views can be adapted as required and be provided with a background image Every view can be displayed in full screen mode and without the menu bar 5 1 2 1 Naming a view 1 In the Configuration area of the toolbar click Settings The Settings window appears 2 Select the Views tab 3 Select the required view 4 Click Edit The Edit view window appears Version 1 0 ...

Страница 222: ... s e2 for example must be entered as W a r e h o u s e1 W a r e h o u s e2 6 Click OK The name of the view has been changed 7 Click OK to apply the settings 5 1 2 2 Adding a view 1 In the Configuration area of the toolbar click Settings The Settings window appears 2 Select the Views tab 3 Click Add The Create view window appears 64 310 865 005 0318_AB ...

Страница 223: ...Click OK to add the view 5 1 2 3 Deleting a view 1 In the Configuration area of the toolbar click Settings The Settings window appears 2 Select the Views tab 3 In the list of views select the view to be deleted 4 Click Delete 5 Confirm the prompt with Yes 5 1 2 4 Adding a flow rack to a view 1 Call up the required view 2 In the Flow rack area of the toolbar click Add The Add Flow rack window is di...

Страница 224: ...k Remove 4 Confirm the prompt with Yes The flow rack has been removed from the view 5 1 2 6 Rotating the flow rack 1 Call up the required view 2 Select the flow rack 3 In the Flow rack area of the toolbar click Rotate left or Rotate right 5 1 2 7 Moving a flow rack Every flow rack can be repositioned anywhere in the view 1 Left click the name of the flow rack and hold down the mouse button 66 310 ...

Страница 225: ...ation 1 Select the location in the view 2 In the Location area of the toolbar click Enable 5 1 2 9 Selecting the background image of a view 1 Call up the required view 2 In the Background image area of the toolbar click Select 3 Open the required background image The background image needs to be saved on the local PC Recommended file format PNG If more than one computer is accessing a WERMA StockS...

Страница 226: ...t List module displays the current requirement of locations that have fal len below the nominal stock level The displayed lists take account of all flow racks contained in the respective view The material requirement list can be displayed in full screen and without the menu bar Two views are available for displaying the material requirement list Display Description Single location Displays the mat...

Страница 227: ...ack Max Maximum number of bins with nominal stock of the location Pcs per Bin Number of pieces per bin in the location 5 2 2 Total material 1 In the toolbar click Total material Column Description Status Current fill level status of the location with the highest urgency Duration How long the location with the highest urgency has been in this status Stores location Place where the material to top u...

Страница 228: ...ew 1 Call up the required display 2 In the toolbar click Report The print preview of the analysis appears 5 2 4 Full screen mode To display the material requirement list in full screen mode and without a menu bar 1 Call up the required view 2 In the More area of the toolbar click Full screen To close the full screen view 1 Press ESC 5 3 Material master data The Material master data module displays...

Страница 229: ...d enter the material description 4 In the Std Bin qty field enter the piece number per bin 5 In the Std stores location field enter the stores location for replenishing the material or if necessary change the entered stores location The values for Std stores location and Std Bin qty can be changed separately for a loca tion when the material is assigned to that location Version 1 0 03 2018 71 ...

Страница 230: ...the toolbar click Save 5 3 2 Editing a material 1 Call up the material by clicking Back or Next in the toolbar or 1 Search for the material by clicking Search in the toolbar 2 In the toolbar click Set up The area for inputting the material data is enabled 3 Modify the material data as required 4 In the toolbar click Save 5 3 3 Deleting a material 1 Call up the material by clicking Back or Next in ...

Страница 231: ...atabase If a material is contained in the CSV file multiple times the data of the last entry is used If an optional field in the CSV file is not defined as a column the current values for these fields are retained 1 In the toolbar click Import The Import material master data window appears Click Browse and open the CSV file you require 2 In the Character set dropdown list select the character set ...

Страница 232: ...s using data types that have the same value range The number and definition of the fields can change in future WERMA StockSAVER upda tes Field ID Data type Description Required field M a t e r i a l N a m e n v a r c h a r 3 2 Part Number M a t e r i a l D e s c r i p t i o n 1 n v a r c h a r 6 0 Description of the material P i e c e s P e r B o x i n t Bin quantity pieces per bin If an empty str...

Страница 233: ... want 4 Click OK 5 4 Analysis Various analyses can be created that summarise e g the stock levels or material movements in tabular form Analysis Description Calculation basis Material Master Material master data currently created in the sys tem Stock level by Location Stock level for each location at the selected time The Stock Level pcs is calculated from Number of bins x Bin quantity The bin qua...

Страница 234: ...cs 0 Usage by Part No Withdrawn mate rials in the selected period A location can be listed multiple times if the assigned material was changed or the location was deleted and created again The Material Withdrawal pcs is calculated from Num ber of bins x Bin quantity The bin quantity is used as defined at the booking time Later changes to the location definition are not taken into consideration As ...

Страница 235: ...The sum of the total averages can therefore be more than 100 Material availa bility by Flow rack Totals up the values from report Material availa bility by Location and outputs the average per flow rack The average per flow rack is calculated from Total of values per location Number of locations If no stock limit is defined for a location 0 is used as the value The total average is not weighted by...

Страница 236: ...nformation is displayed The following placement errors are possible Placement in an incorrect location after a part num ber was scanned Material Replenishment carried out without scan Material Replenishment carried out while SmartBox not operational Material Replenishment could not be booked because there already is a booking with a newer time stamp 1 In the toolbar click Analysis and select the a...

Страница 237: ...ctive analysis period Later changes to the location definition are not taken into consideration The View Flow rack and Location filters relate to the current flow rack configuration If one of these filters is enabled only the locations that exist in the current flow rack con figuration are analysed Locations are not displayed if they were deleted after the time of analysis analysis period If a loc...

Страница 238: ...on portrait or landscape Adapt paper size of the report Note All reports are optimised for A4 Navigation Search for text in the report Show and hide miniature view of the report Move to first page Move to previous page Move to next page Move to last page Zoom Enable default cursor Enable the hand cursor to drag the print preview of the report with the mouse Select the zoom cursor to zoom out of or...

Страница 239: ...port Delete a watermark in a report Export Export report The export file format can be selected Send report as e mail attachment The e mail attachment file format can be selected More Open report again in new window Close print preview 5 5 1 Exporting to Excel 1 In the toolbar click Export to and choose Excel document The XSLX export options window appears Version 1 0 03 2018 81 ...

Страница 240: ...ividual text an image or a combination of text and image can be used as a watermark 1 Click Watermark in the toolbar The Watermark window appears 2 Enter the text on the Text Watermark tab and format it as required 3 Upload a picture on the Picture Watermark tab and format it as required 4 Select the position of the watermark in the Position area 5 In the Page range area select the pages on which ...

Страница 241: ...eleting a watermark 1 Click Watermark in the toolbar The Watermark window appears 2 Click Delete to delete the watermark 3 Click OK to apply the settings 5 5 4 File formats The following file formats are available for export and as e mail attachment File format Export E mail attachment PDF file HTML file Excel file Image file Version 1 0 03 2018 83 ...

Страница 242: ...s Display Description Transceiver SmartBox Good wireless connection between the devices Weak wireless connection between the devices Poor wireless connection between the devices To ensure the best possible wireless connection every SmartBox automatically looks for the best transmission path to the transmitter Other SmartBoxes can act as repeaters and forward the wire less signal to improve the wir...

Страница 243: ...em is used the maximum range that can be achieved in practice may be smaller If there are any unconnected but configured WERMA StockSAVER devices these are dis played in the lower part of the window 5 6 1 1 Optimising wireless communication Wireless communication can be improved by implementing the following measures Position the WERMA StockSAVER devices within sight of each other Remove as many m...

Страница 244: ...he WERMA StockSAVER devices saved in the WERMA StockSAVER database As soon as the cursor is positioned over an entry in the Message column a history of the connec tion status of the WERMA StockSAVER device is displayed 5 7 Configuration In the Configuration area you can access various settings Call up the configuration wizard Adjust and manage the flow racks Adjust the bus cabling Change various s...

Страница 245: ...he configuration wizard step by step 1 Click Next 2 Carry out all the commissioning steps or 3 Click the link for the step you require 5 7 2 Devices If you want to change the configuration of a transceiver or SmartBox or commission additional WERMA StockSAVER devices you can do this using a wizard 1 In the Configuration area of the toolbar click Devices The Device commissioning window appears Vers...

Страница 246: ...firmware version for the WERMA StockSAVER device is availa ble Click Yes to install the new firmware version If you want to use the booking confirmation of the SmartBox the transceiver must have a suitable up to date firmware version 4 Once the WERMA StockSAVER device has been found click Next 5 Carry out further configuration of the transceiver or SmartBox 5 7 2 1 Transceiver 88 310 865 005 0318_...

Страница 247: ...equency 868 25 MHz Channel 4 Frequency 868 15 MHz 3 Click Next There are three options available to connect to the network Automatically obtaining an IP address via DHCP Using a static IP address Advanced network settings The Advanced network settings option must be used in the following cases UDP broadcast is not allowed The TCP IP connection from the server service to the transceiver must be con...

Страница 248: ...ed by default Automatically obtaining an IP address via DHCP You must select the Automatically obtain an IP address via DHCP option if the transceiver and ser ver service are in the same subnet UDP broadcast must be permitted 1 Select Automatically obtain an IP address via DHCP 2 Click Save The configuration is transferred to the transceiver Using a static IP address 1 Select Use the following sta...

Страница 249: ...l provide the requisite data WERMA recommends entering the configuration data for a static IP address here if this is available 3 Click Save The configuration is transferred to the transceiver Advanced network settings 1 Select Use the following static IP address Version 1 0 03 2018 91 ...

Страница 250: ...w advanced network settings checkbox 4 Click Next 5 Enter the IP address or DNS name of transceiver in the IP DNS name field 6 You may need to change the TCP port in the TCP port field Your network administrator will provide the requisite data 7 Click Save The configuration is transferred to the transceiver 92 310 865 005 0318_AB ...

Страница 251: ...5 7 2 2 SmartBox 1 In the SmartBox Name field enter the name of the SmartBox 2 In the Transceiver dropdown list assign the SmartBox to a transceiver 3 Click Next Version 1 0 03 2018 93 ...

Страница 252: ... to be scanned before pla cement If the material must be scanned the system behaves in the same way as for option Allow Material Replenishment only after scan Allow Material Replenishment only after scan The material can only be placed in a location if it has been scanned If placements are made without the material first being scanned the system detects and logs this as a placement error 5 In the ...

Страница 253: ...e barcode is adopted as the part number Position and length of the Part Num ber fixed The part number is part of the barcode The part number starts and ends at a certain position in the barcode Part Number delimiter The part number is part of the barcode The part number starts and ends with a particular deli miter within the barcode 8 Click Next Version 1 0 03 2018 95 ...

Страница 254: ... a confirmation that saving was successful The SmartBox emits an acoustic signal The SmartBox is blocked Further replenishments are not possible until the Smar tBox has been unblocked in the WERMA StockSAVER software If placement in a flow rack was incorrect The SmartBox emits an acoustic signal The SmartBox expects a confirmation from the user that the placement error has been rectified The Smart...

Страница 255: ...ion a message to this effect appears after you click Save In this case commissioning of the SmartBox must be ter minated and the firmware of the transceiver updated Configuration of the SmartBox can then continue 10 Click Save The configuration is transferred to the SmartBox 5 7 3 Flow racks If necessary the configuration of the flow racks and locations can be adjusted 1 In the Configuration area ...

Страница 256: ...k is shown from the replenishment side A field corresponds to a location Add Bay 1 In the flow rack display click Add Shelf 1 In the flow rack display click Add Location 1 In the flow rack display click Delete location 1 Select the location in the flow rack display 2 In the toolbar click Delete 98 310 865 005 0318_AB ...

Страница 257: ...ick the location and holding the left mouse button down move the location to a free point in the flow rack 5 7 3 2 Configure locations The configuration of the locations and assignment of part numbers can be imported from a CSV file In the settings you can define a default flow rack configuration This is loaded during flow rack configuration and can be adjusted 1 Select the flow rack in the flow r...

Страница 258: ...ber per bin or if necessary change the entered quantity If available the values for Stores location and Bin quantity are taken from the material master data If the values in the Stores location and Bin quantity fields are changed this change applies only for the selected location 6 Select values for Safety stock Re order stock level and Excess Stock Level from the respective dropdown lists 7 In th...

Страница 259: ...ughout the file A double quotation mark must be used as the escape character A character string must be escaped if it contains a semicolon or a double quotation mark In an escape character string double quotation marks are shown twice Example Character string T s h i r tl a r g e l o n g a r m e da n d c o l o u r f u l Output in CSV file T s h i r tl a r g e l o n g s l e e v e da n d c o l o u r...

Страница 260: ... n i m u m B o x C o u n t t i n y i n t Safety stock of the location If an empty string is transferred as a value no safety stock is defined R e o r d e r B o x C o u n t t i n y i n t Re order stock level of the location If an empty string is transferred as a value no re order stock level is defined A b o v e M a x i m u m B o x C o u n t i n t Excess stock level of the location If an empty stri...

Страница 261: ...g If the bus cabling on the flow rack was changed as a result of modifications or extensions the bus cabling in the WERMA StockSAVER software must also be changed If the bus cabling is not changed in the WERMA StockSAVER software this can lead to incorrect results and thus to production downtimes 1 In the Configuration area of the toolbar click Bus cabling The Edit bus cabling window appears 2 Sel...

Страница 262: ...ry change the assignment of materials for the respective locations on the Bus tab 8 If necessary select a location and on the Location tab change the configuration of the loca tion The configuration of the locations and assignment of part numbers can be imported from a CSV file 9 In the toolbar click Check to check the configuration 10 In the toolbar click Save 11 In the toolbar click Close 5 7 5 ...

Страница 263: ... to prevent unauthorised access To call up Settings 1 Click Settings in the toolbar The Settings window appears 5 7 5 1 General Various settings can be adapted on the General tab The following settings can be adapted Version 1 0 03 2018 105 ...

Страница 264: ...unction module drop down list for Window 2 3 In the View dropdown list select the view you want for Window 1 and Window 2 A selection for Window 2 is only possible if you have already made a selection for Window 1 4 From the Window size dropdown list select the size you want The Window size option is only available if you only want to display one window 5 If WERMA StockSAVER is to be launched auto...

Страница 265: ...f the view in the Name field If the name of the view contains a then it must be entered as The name W a r e h o u s e 1 W a r e h o u s e2 for example must be entered as W a r e h o u s e1 W a r e h o u s e2 3 Click OK to add the view Copy view 1 In the list of views select the view to be copied 2 Click Copy The Copy view window appears Version 1 0 03 2018 107 ...

Страница 266: ... r e h o u s e 1 W a r e h o u s e2 for example must be entered as W a r e h o u s e1 W a r e h o u s e2 4 Click OK to save the setting Sort views You can adapt the order of the views in the toolbar 1 In the list of views select the desired view 2 Click Move up or Move down to move the view Views arranged at the top of the list of view appear first in the toolbar Delete view 1 In the list of views...

Страница 267: ...ocation dropdown list select when the source is to be displayed for a loca tion 3 If necessary change the Font Size 5 7 5 4 Devices The Devices tab displays all WERMA StockSAVER devices that were configured and saved in the WERMA StockSAVER database WERMA StockSAVER devices can only be deleted if they are no longer in the WERMA StockSAVER network Only the connection settings are deleted Data recor...

Страница 268: ...ockSAVER devices can be selected by pressing CTRL 3 Click Delete 4 Confirm the prompt with Yes 5 7 5 5 Location To simplify flow rack configuration you can set up configuration defaults This default con figuration is applied automatically during flow rack configuration but can then be changed The colours of the individual re order stock levels can also be selected 110 310 865 005 0318_AB ...

Страница 269: ...pdown lists 3 From the dropdown lists select the text colours for the part number and stores location for the stock levels The display of the part number and stores location can be enabled or disabled on the Control station tab 4 Click Close to save the settings 5 7 5 6 Reports Individual headers and footers can be saved for reports Version 1 0 03 2018 111 ...

Страница 270: ...on tab you can configure notifications for reaching the re order stock level and falling below the safety stock for a location If status notification is enabled a message is sent as soon as a location is in the respective status for longer than the defined e mail delay time E mail delay time The Re order level has been reached e mail delay time begins as soon as a status changes from green nominal...

Страница 271: ...status changes back to green The Safety stock level has been breached e mail delay time is also stopped as soon as the status changes from red to yellow For the status notification to be sent a mail server must be configured in the admi nistration console Configuring status notifications for the re order stock level 1 Enable the Re order level has been reached checkbox 2 Enter e mail recipients in...

Страница 272: ...changed during the defined e mail delay time No e mail is sent if the status has changed again within the e mail delay time 5 7 5 8 Functions On the Functions tab the modules and functions to be available on a workstation can be ena bled or disabled Settings can also be protected by a password to prevent unauthorised access Enabling and disabling functions Enable functions or modules 1 Enable the ...

Страница 273: ...ame across the whole system 3 Enter a new password in the New password field and in the Repeat field 4 Click OK to protect the settings with the password entered Deleting a password 1 Click Delete 2 Confirm the prompt with Yes 5 8 Interface logs You can use various logs to check whether interface exports and imports were successful or whe ther errors occurred Analysis Description Material Master i...

Страница 274: ...material movement exports for which an error occurred System availa bility overview Overview of the availability of the individual system components System availa bility log Detailed information about the availability of the individual system com ponents 1 In the XML interface area of the toolbar click Logs and select the log you require The print preview of the log appears 116 310 865 005 0318_AB...

Страница 275: ...to be monitored The data can be managed using a command line program optional 6 1 Database To back up recorded data the WERMA StockSAVER database can be backed up and restored For detailed access to the WERMA StockSAVER database you can click Management Studio to start Microsoft SQL Server Management Studio Manual changes can lead to program errors incorrect displays or the loss of data 6 1 1 Back...

Страница 276: ...ved in the installation directory 3 Click Close 6 1 2 Restoring the database As soon as the database is restored all content of the current database is irrevocably overwritten As a result data entered in the meantime may be lost The WERMA StockSAVER server service is stopped for the restoration 1 Make sure that WERMA StockSAVER has been closed on all workstations 118 310 865 005 0318_AB ...

Страница 277: ...ckup file 6 If you merely want to validate the backup file and not perform a restore select the Show advanced restore options checkbox 7 Click Restore or Next If you enabled the Show advanced restore options checkbox the window containing the advanced restore options appears If you did not enable the Show advanced restore options checkbox the data from the backup file is restored Version 1 0 03 20...

Страница 278: ... options Validate the backup file without restoring the database Validate the backup file and restore Validate backup file 1 Choose the Validate database backup option 2 Click Validate The backup file is validated and the validation result is displayed 120 310 865 005 0318_AB ...

Страница 279: ...store checkbox 3 If you do not want to restore data such as background images and company logos disable the Restore Filestore checkbox 4 Click Restore The backup file is validated If the backup file is valid the data from the backup file is restored 6 2 Interfaces WERMA StockSAVER provides two interfaces via which the data can be exchanged with other applications Version 1 0 03 2018 121 ...

Страница 280: ...ctors so a par ticular transfer and response time cannot be guaranteed If there are several new material movements these are exported chronologically If there are several bookings for the same location these are not grouped together If the material number of a location was changed the stock with the old part number is first withdrawn The stock with the new part number is then replenished Correspon...

Страница 281: ...path and file name of the CSV export file in the File name field or click Browse 3 Click Enable All changes to stock are incrementally written to the CSV file As soon as the CSV export has been enabled you can click Export to export the current stock of all locations 6 2 1 2 Disabling CSV export 1 In the Interfaces area of the toolbar click CSV export The CSV export interface window appears Versio...

Страница 282: ...le access error try again A file access error occurs as soon as the server service has opened the export file in order to add more entries 3 The renamed export file can be processed and if required deleted or archived If the export file is archived WERMA recommends moving the archive file to another directory or subdirectory so that the number of files in the actual export directory does not becom...

Страница 283: ...ing data types that have the same value range The number sequence and definition of the fields can change in future WERMA StockSAVER updates Field ID Data type Description I D bigint Internal database ID of the M a t e r i a l L o g data record T i m e s t a m p d a t e t i m e 2 Timestamp for when the data record was created in the database Corresponds to the local time and time zone on the serve...

Страница 284: ...ock level value 2 if there are 2 bins or less the re order stock level has been reached If no re order stock level is defined for the location an empty string is exported A b o v e M a x i m u m B o x C o u n t i n t Excess stock level value 3 if there are 3 bins or more the excess stock level has been reached If no excess stock level is defined for the location an empty string is exported R e s y...

Страница 285: ...abling To ensure correct data import the XML file must meet particular requirements for the material master record import 6 2 2 1 Configuring the XML interface The XML interface is set up on the server PC on which the WERMA StockSAVER server ser vice is executed Import and export are performed by the interface service which is executed on the WERMA StockSAVER server service For optimum availabilit...

Страница 286: ...change Service checkbox 2 In the System ID field enter the system ID of the WERMA StockSAVER system if required If you enter the system ID of the WERMA StockSAVER system the generated XML files can be identified by the saved S y s t e m I D If the system ID is set this is checked during material master import If a different or no sys tem ID is defined in the import file the data is not processed 1...

Страница 287: ...ed after they have been processed 4 In the Check interval sec field enter the time interval after which the system is to search for new import files In some cases the import may be delayed as a result of various error and performance factors Therefore a particular transfer and response time cannot be guaranteed 5 In the Number of days after which archive files are deleted field specify how long ar...

Страница 288: ...fter which the system is to search for a new XML file Even if no material movements have taken place the interface service still exports the current location statuses In some cases the export may be delayed as a result of various error and performance factors Therefore a particular transfer and response time cannot be guaranteed 4 Click Save 6 2 2 2 Requirements for the XML file for the material m...

Страница 289: ...the other application was carried out Format y y y y M M d dH H m m s s s y s t e m i d A t t r i b u t e n v a r c h a r 2 5 Optional System ID used to carry out the export from the other application If the system ID is set this is checked during material master import If a dif ferent or no system ID is defined in the import file the data is not processed m a t e r i a l E l e m e n t Element tha...

Страница 290: ...ame of the provided XML file must correspond to the following pattern M a t e r i a l Y Y Y Y M M D D h h m m s s Z Z Z x m l Checks during import Various checks are carried out during the data import System ID If the system ID is set a check is carried out to determine whether a system ID is entered in the import file If a different or no system ID is defined in the import file the data is not pr...

Страница 291: ...l configured locations are also exported regardless of whether a material movement has actually taken place since the last export In some cases the export may be delayed as a result of various error and performance factors Therefore a particular transfer and response time cannot be guaranteed In each export the material movements not yet transported up to the start of the export are exported The f...

Страница 292: ...o r t t i m e s t a m pA t t r i b u t e d a t e t i m e 2 Timestamp indicating when the export was carried out The value corresponds to the local time and time zone on the server a p p v e r s i o n A t t r i b u t e n v a r c h a r 2 0 Program version number used to create the export file s y s t e m i d A t t r i b u t e n v a r c h a r 2 5 System ID of the WERMA StockSAVER system on which the ...

Страница 293: ... e i n t Safety stock of the location If no safety stock is defined an empty string is exported r e o r d e r A t t r i b u t e i n t Re order stock level of the location If no re order stock level is defined an empty string is exported m a x A t t r i b u t e i n t Excess stock level of the location If no excess stock level is defined an empty string is exported s e n s o r s A t t r i b u t e i ...

Страница 294: ...es in the actual export directory does not become too large 6 3 Availability monitoring As soon as availability monitoring is enabled the connection status of the WERMA StockSAVER devices and WERMA StockSAVER server service is monitored As soon as the connection status changes an e mail is sent to one or more recipients after a defined E Mail time delay delay period No e mail is sent if the connec...

Страница 295: ...lds in the Your E Mail server data and Access data if necessary areas Clicking on Send test E Mail sends a test e mail to test the settings entered 5 Select the Availability monitoring tab 6 Enable the Send notification of change in connection status of devices or server services option 7 Enter e mail recipients in the Recipient field Version 1 0 03 2018 137 ...

Страница 296: ...ew status still exists at the end of the e mail delay time No e mail is sent if the status has changed again within the e mail delay time 9 Click OK 6 3 2 Disabling availability monitoring 1 In the Configuration area of the toolbar click Settings The Settings window appears 2 Select the Availability monitoring tab 138 310 865 005 0318_AB ...

Страница 297: ...ning up the connection status Old saved connection statuses can be automatically cleaned up It is possible to configure the age of the connection statuses to be cleaned up 6 4 1 Cleaning up the connection status 1 In the Configuration area of the toolbar click Settings The Settings window appears Version 1 0 03 2018 139 ...

Страница 298: ...y cleaned up If 3 0 is entered in the Number of days field all connection statuses that are more than 30 days old are automatically deleted 5 Click OK to save your settings and start the clean up The connection statuses are cleaned up This may take some time depending on the volume of data involved All connection statuses that are older than the specified number of days will be auto matically clea...

Страница 299: ...ngs window appears 2 Select the Availability monitoring tab 3 Disable the Perform automatic clean up of stored connection status data checkbox 4 Click OK 6 5 Managing data via the command line The data can be managed using the command line program AdminCLI exe optional Version 1 0 03 2018 141 ...

Страница 300: ...xample A d m i n C L I e x e b a c k u p C S t o c k S A V E R s t o c k b a k Options n o p r o g r e s s Suppresses the output of the pro gress messages on the console n o v e r i f y Backs up automatically without veri fication Return values 0 Command successfully executed 1 No Function performed Help was displayed 1 An error occurred during execution e x p o r t d b s c h e m a f i l e n a m e...

Страница 301: ...or Possible cause Solution Connection to transceiver is interrupted In the Routing window the transceiver is shown as not connected Flow racks are shows as not connected Network connection bet ween transceiver and server service interrupted Check the power supply and Ethernet connection of the transceiver Make sure that the server service is running In the Settings check whe ther the transceiver i...

Страница 302: ...g additional SmartBox or additional tran sceiver SmartBox is not detected in the WERMA StockSAVER soft ware USB driver of SmartBox is not installed Manually install the driver Display message N oc o n n e c t i o n No wireless connection to the transceiver Display message N o tc o n f i g u r e d SmartBox has not been con figured and is not recognised in the WERMA StockSAVER soft ware Configure Sm...

Страница 303: ...ctioning and replace if necessary 7 4 Sensors Error Possible cause Solution Sensors do not respond LED on the sensor does not come on Sensor cabling Plug con figuration incorrect or broken cable Check plug configuration and re cable if necessary Blue LED does not come on Display in software SensorBox defective Check functioning and replace if necessary Sensor does not detect bins Angle of inclinat...

Страница 304: ...w rack has already been wired to another SmartBox and is displayed greyed out to indicate it is occupied Open the bus cabling for the other SmartBox and cancel the existing assi gnment of the SensorBox to the location The location can then be wired to ano ther SmartBox SensorBox CSV export in administration console cannot be executed CSV export is executed by the WERMA StockSAVER server ser vice a...

Страница 305: ...Box is not displayed as being connected Wireless connection is dis rupted Check the SmartBox con figuration Check whether thick walls or similar are disrupting the wireless connection The Routing window shows that the transceiver often loses the connection to the WERMA StockSAVER server ser vice Two server services are instal led for a transceiver e g as a result of a prior test instal lation Remo...

Страница 306: ...ta collection stopped connection to SmartBox bro ken No connection to the Smar tBox Check power supply on the SmartBoxes Check the wireless connec tion between the tran sceiver and SmartBox Check whether the tran sceiver is connected to the WERMA StockSAVER server service Check the connection sta tus of all devices Error message in the status bar The CSV export on the server could not be started T...

Страница 307: ... and service crashes WERMA l o g files contain log entries that are recorded during application execution Administrator rights may be needed to access the log files Hidden files must be shown 7 6 2 Enabling detailed logging 1 Open Windows Explorer 2 Go to directory L o c a l A p p D a t a W E R M A W E R M A S t o c k S A V E R 1 0 3 Open file C o n f i g u r a t i o n i n i 4 In S e t t i n g s m...

Страница 308: ...atabase commands L o g C o m m Level of detail for hardware data 0 default Recording of hardware data disabled 1 Received hardware data is recorded 2 Hardware data is recorded with timestamp and further infor mation 5 Save and close the file 6 Restart the WERMA StockSAVER software and if applicable the server service 150 310 865 005 0318_AB ...

Страница 309: ...load the update file and install on the PC If several workplaces are accessing a common WERMA StockSAVER database you first need to install the software update on the PC with the WERMA StockSAVER database server PC An appropriate message appears if the installation is first started on a client PC The software update must be run on all PCs connected to the common WERMA StockSAVER database Version 1...

Страница 310: ...all automatic time synchronisation between client and server When changing from summertime to wintertime try to make this change outside of working hours if possible Data entered in the first hour after the clocks change cannot be saved in the database if postings were made for the location in the hour before the time was changed 152 310 865 005 0318_AB ...

Страница 311: ...SmartBox The configuration can also be used on the Client PC Screen resolution At least 1280 x 1024 Recommended 1920 x 1080 or higher Scaling of font size DPI up to 200 192 DPI Microsoft NET Fra mework 4 5 2 Automatically installed during installation of WERMA StockSAVER if not already installed Supported ope rating systems Windows 7 SP1 Windows 8 Windows 8 1 Windows 10 Windows Server 2008 R2 SP1 ...

Страница 312: ... 10 1 Network stability and security WERMA recommends that you only operate WERMA StockSAVER in a reliable LAN envi ronment TCP IP network The function or performance of WERMA StockSAVER could be impaired in an unstable or insecure network 10 2 System architecture During installation a server service is installed on the server The server service starts automatically and runs in the background As l...

Страница 313: ... workstation PC Alternative A Server service client and database are installed on a work station PC Not recommended for productive operation Alternative B Server service and database are installed on two different servers A separate SQL server must be installed for this e g Microsoft SQL Server Express Client application is installed on a workstation PC Version 1 0 03 2018 155 ...

Страница 314: ...Manuel WERMA StockSAVER Version 1 0 03 2018 310 865 005 0318_AB ...

Страница 315: ... Tél 49 0 7424 9557 222 Fax 49 0 7424 9557 44 support werma com www werma com Mentions légales Exploitant et adresse WERMA Signaltechnik GmbH Co KG Dürbheimer Str 15 D 78604 Rietheim Weilheim Téléphone 49 0 7424 9557 0 Télécopie 49 0 7424 44 support werma com www werma com Représentant légal Directeur général Matthias Marquardt Numéro de TVA intracommunautaire N de TVA DE815014872 Registre de comm...

Страница 316: ...e bon fonctionnement 20 3 Installation 22 3 1 Installation de WERMA StockSAVER 22 3 2 Installer l application Serveur 23 3 2 1 Sélectionner les langues 24 3 2 2 Options d installation avancées 25 3 3 Installer l application client 28 3 4 Configuration du pare feu 31 3 5 Désinstaller WERMA StockSAVER 32 4 Mise en service 33 4 1 Assistant de configuration 33 4 1 1 Transceiver 34 4 1 2 SmartBox 41 4 ...

Страница 317: ...ne liste d articles 77 5 3 5 Rechercher un article 79 5 4 Analyses 80 5 5 Rapport 83 5 5 1 Exporter vers Excel 86 5 5 2 Ajouter un filigrane 86 5 5 3 Supprimer un filigrane 87 5 5 4 Formats de fichier 88 5 6 État du système 88 5 6 1 Routage 88 5 6 2 Connexions 91 5 7 Configuration 91 5 7 1 Assistant 92 5 7 2 Périphériques 92 5 7 3 Racks 102 5 7 4 Câblage bus 108 5 7 5 Paramètres 110 5 8 Journal d ...

Страница 318: ...8 7 Diagnostic d erreurs 149 7 1 Transceiver 149 7 2 SmartBox 150 7 3 SensorBox 151 7 4 Capteurs 151 7 5 Logiciel WERMA StockSAVER 152 7 6 Fichiers journaux 155 7 6 1 Accéder aux fichiers journaux 155 7 6 2 Activer la journalisation détaillée 156 8 Mise à jour du logiciel 157 9 Changer et synchroniser l heure 158 10 Configuration système requise 159 10 1 Stabilité et sécurité du réseau 160 10 2 Ar...

Страница 319: ...staller et configurer le logiciel WERMA StockSAVER 1 Montez le matériel sur le rack 2 Installez le logiciel WERMA StockSAVER Installez le serveur Installez le client 3 Réalisez la mise en service du matériel à l aide de l assistant de configuration Configurez le Transceiver Configurez la SmartBox Raccordez les périphériques au rack 4 Configurez le rack dans le logiciel 6 310 865 005 0318_AB ...

Страница 320: ...posant Description 1 Capteur optique Détecte les bacs et envoie les informations d état à la SensorBox 2 SensorBox Reçoit les informations d état provenant de max 4 cap teurs optiques par compartiment Envoie les données à la SmartBox via le système de bus 3 SmartBox Reçoit les données provenant de max 50 SensorBox Si un lecteur de codes barres est utilisé et configuré dans le logiciel WERMA StockS...

Страница 321: ...t les composants du système ainsi que le matériel de fixation ont été conçus pour être montés sur des rayonnages dynamiques FIFO La compatibilité avec les types de rayonnages suivants a été testée Rayonnages dynamiques pour colis KDR de SSI Schäfer Gammes de rayonnages tubulaires Ø 28mm de Creform Rayonnages dynamiques type 36 33250 de Bito Rayonnages de mise à disposition XLEAN de Bosch Rexroth P...

Страница 322: ...60 Hz Tension en sortie 24 V Imax 3 75 A 2 1 2 2 Éléments de commande Touche Description Maintenez appuyée pendant env 5 s ouvrez le menu du volume Dans le menu du volume fermez le menu du volume Dans le menu du volume augmentez le volume Dans le menu du volume réduisez le volume En cas d erreur d affectation confirmez la suppression de l erreur d affectation 2 1 2 3 Indications des LED LED Descri...

Страница 323: ...el WERMA StockSAVER Remède Configurez la SmartBox par USB S h e l f Détermination et affichage du com partiment M a t e r i a ln o tr e a d a b l e La référence ne correspond pas à la structure définie E r r o r M a t e r i a lu n k n o w n La référence n est pas définie dans la fiche article E r r o r M a t e r i a ln o ta v a i l a b l e La référence n est pas disponible sur cette SmartBox E r r...

Страница 324: ... de fonctionnement Tension d entrée 115 230 V CA 50 60 Hz Tension en sortie 5 V CC Imax 2 1 A 2 1 3 2 Indications des LED LED Description LED du port Ethernet Allumée en jaune Connexion établie avec le logiciel WERMA StockSAVER Éteinte Aucune connexion établie avec le logiciel WERMA StockSAVER Allumée en vert Connexion au réseau établie Clignote en vert Activité du réseau Éteinte Aucune connexion ...

Страница 325: ... Codes barres Honeywell Quantum MS3580 Lecteur intégré Codes barres DataLogic QuickScan QBT2131 Lecteur bluetooth Codes barres Une liste actuelle est disponible sur demande Il n est pas possible de garantir le bon fonctionnement avec d autres appareils Le lecteur de codes barres n est pas fourni et ne peut pas être obtenu auprès de WERMA 2 1 5 Caractéristiques techniques Capteur SensorBox SmartBox...

Страница 326: ...ence 868 0 868 6 MHz 868 0 868 6 MHz Portée Max 300 m champ libre Autorisé uni quement pour les pays de l UE Autres pays sur demande Max 300 m champ libre Autorisé uni quement pour les pays de l UE Autres pays sur demande Débit de trans mission HF 38 4 kbit s 76 8 kbit s 38 4 kbit s 76 8 kbit s 2 2 Monter le matériel Avant de monter les composants matériels lisez et observez les consignes de sécur...

Страница 327: ...e prendre les mesures adaptées si le système ne fonctionne pas correctement en par tie ou intégralement p ex la sauvegarde des données la documentation de l utilisation des logiciels le diagnostic des pannes le contrôle régulier des résultats la planification des mesures en cas d urgence Il relève de sa responsabilité de s assurer que l environnement de travail du système est parfaitement fonction...

Страница 328: ...Si la construction des racks le permet WERMA recommande de démonter les rails de rack avant de monter les composants 2 2 2 1 Déballer les périphériques et les composants 1 Déballez les périphériques et les composants et vérifiez qu ils sont en bon état 2 En cas de dommages informez en WERMA Signaltechnik ou bien le transporteur 3 Vérifiez les fournitures par rapport à la commande quantité livrée t...

Страница 329: ...ec tion dues à des reflets montez les capteurs à un angle d env 5 4 Fixez les câbles de rac cordement des capteurs au rack Assurez vous de ne pas arra cher ni endommager les câbles de raccordement 2 2 4 Monter la SensorBox Pour pouvoir poser les câbles bus il faut prévoir une distance de 10 cm entre la SensorBox et la traverse du rack 2 2 4 1 Composants nécessaires 16 310 865 005 0318_AB ...

Страница 330: ...x sur le rail du rack 3 Raccourcissez les câbles de raccordement à la longueur nécessaire Dénudez l extrémité libre sur env 20 mm 4 Montez le câble de rac cordement sur la fiche Veillez à l affectation cor recte du câble 5 Raccordez les capteurs à la SensorBox Veillez à respecter l ordre cor rect Version 1 0 03 2018 17 ...

Страница 331: ...ur la fiche Veillez à l affectation cor recte du câble 4 Raccordez les SensorBoxes à l aide de câbles de bus Veillez à respecter les rac cordements corrects 5 Fixez les câbles de bus au rack Assurez vous de ne pas arra cher ni endommager les câbles de bus 6 Tracez le câblage bus sur la fiche Stock Template fournie Cette fiche peut être téléchargée sur le site Internet WERMA 18 310 865 005 0318_AB ...

Страница 332: ...Installez le logiciel WERMA StockSAVER Raccordez la SmartBox au PC à l aide du câble USB fourni Effectuez la mise en service et la configuration de la Smar tBox 3 Fixez la SmartBox sur le rack à hauteur du regard 4 Raccordez la SmartBox au bus Raccordez la SmartBox à l alimentation électrique Version 1 0 03 2018 19 ...

Страница 333: ...z la mise en service et la configuration du Tran sceiver 3 Raccordez le Transceiver au réseau Raccordez le Transceiver à l alimentation électrique à l aide du câble USB fourni et de l alimentation secteur four nie 2 2 7 Test de bon fonctionnement 1 Recouvrez les capteurs Vérifiez si toutes les LED des capteurs s allument Vérifiez si la LED de la Sen sorBox s allume 20 310 865 005 0318_AB ...

Страница 334: ...2 Lancez une alimentation test sur le rack et vérifiez le bon fonctionnement dans le logi ciel WERMA StockSAVER Version 1 0 03 2018 21 ...

Страница 335: ...ciel WERMA StockSAVER il est nécessaire de disposer des droits d administrateur Installez d abord le logiciel sur le serveur puis sur le client 3 1 Installation de WERMA StockSAVER 1 Assurez vous que la configuration système requise est satisfaite 2 Téléchargez la version actuelle de WERMA StockSAVER sur le site www werma com saver 3 Décompressez le fichier ZIP téléchargé 4 Démarrez l installation...

Страница 336: ...res différents p ex avec un port TCP IP différent ou une base de données différente 1 Si le serveur WERMA StockSAVER doit être installé avec des paramètres autres que ceux par défaut cocher l option Afficher les options d installation avancées 2 Cliquez sur Installer le serveur 3 Cliquez sur Suivant Si l option Afficher les options d installation avancées a été cochée la fenêtre avec les Options d...

Страница 337: ...ns des cli ents Les langues sélectionnées seront disponibles automatiquement après une mise à jour de l installation du client Le programme d installation télécharge des langues supplémentaires du serveur Web WERMA Les langues s affichent dès qu elles sont disponibles Le cas échéant il peut être nécessaire de configurer un serveur proxy avec le lien Con figurez le serveur Proxy HTTP pour accéder a...

Страница 338: ...uhaité Si le port TCP par défaut 9711 est déjà utilisé par un autre service de réseau 1 Corrigez le port TCP dans le champ Port TCP 2 Cliquez sur Vérifier WERMA StockSAVER vérifie le port TCP saisi Une fois toutes les modifications terminées 1 Cliquez sur Suivant La fenêtre d installation de la base de données WERMA StockSAVER apparaît Version 1 0 03 2018 25 ...

Страница 339: ...nnées WERMA StockSAVER 3 2 2 1 Nouvelle base de données 1 Sélectionnez l option Créer une nouvelle base de données 2 Cliquez sur Suivant La fenêtre de sélection des langues apparaît 3 2 2 2 Base de données SQL vide Conditions requises Une base de données vide a été créée sur le Microsoft SQL Server La base de données répond aux exigences suivantes Le mode d authentification du SQL Server est activ...

Страница 340: ...sur Suivant 3 Dans les champs correspondants saisissez les informations d accès à la base de données vide 4 Cliquez sur Vérifier WERMA StockSAVER vérifie les données saisies et la base de données 5 Cliquez sur Suivant La connexion à la base de données est établie La fenêtre de sélection des langues apparaît 3 2 2 3 Base de données StockSAVER disponible 1 Sélectionnez l option Base de données Micro...

Страница 341: ...ion et la mise à jour de l application client peuvent être réalisées de manière automatique avec un système de distribution de logiciel Pour plus d informations à ce sujet voir le dossier D o c s dans le dossier d installation de l application du serveur 1 Cliquez sur Installer le client L assistant d installation recherche un service serveur WERMA StockSAVER sur le réseau Si le service serveur WE...

Страница 342: ...établit une connexion avec le service serveur WERMA StockSAVER Si plusieurs services serveur WERMA StockSAVER sont trouvés l assistant d installation affiche une boîte de dialogue de sélection qui contient les services serveurs WERMA StockSAVER trouvés Version 1 0 03 2018 29 ...

Страница 343: ...stalle le client et établit une connexion avec le service serveur WERMA StockSAVER Si aucun service serveur WERMA StockSAVER n est trouvé sur le réseau l assistant d installation affiche un message correspondant 1 Confirmez le message avec OK 2 Sélectionnez l option Configurer manuellement les données du serveur 30 310 865 005 0318_AB ...

Страница 344: ...ERMA StockSAVER 3 4 Configuration du pare feu Lors de l installation de WERMA StockSAVER tous les partages de port nécessaires sont con figurés par défaut dans le pare feu Windows Si vous utilisez un autre pare feu ou un autre dis positif sur le réseau il peut être nécessaire de les paramétrer manuellement 1 Assurez vous que les connexions réseau suivantes sont ouvertes Source Cible Type Port Rema...

Страница 345: ... mations de connexion Serveur Client www werma com www werma stocksaver com TCP 80 443 Vérification des mises à jour consultation de l aide en ligne et du site Internet de contact ou de mise à jour Peut être configuré différemment dans WERMA StockSAVER pendant la mise en service des périphériques WERMA StockSAVER Pour pouvoir effectuer les futures mises à jour de WERMA StockSAVER WERMA recommande ...

Страница 346: ...rents composants matériels un assistant de con figuration accompagne les différentes étapes de la mise en service et de la con figuration 4 1 Assistant de configuration 1 Si l assistant de configuration n apparaît pas automatiquement après le démarrage de WERMA StockSAVER cliquez sur Assistant dans la barre d outils L assistant de configuration apparaît 2 Cliquez sur Suivant Version 1 0 03 2018 33...

Страница 347: ...és cliquez sur Suivant La fenêtre de configuration du Transceiver apparaît 4 1 1 Transceiver 1 Raccordez le Transceiver au PC par un câble USB puis cliquez sur Rechercher WERMA StockSAVER recherche un Transceiver raccordé 34 310 865 005 0318_AB ...

Страница 348: ... sa propre version actuelle et appropriée de son firmware 3 Dans le champ Nom du Transceiver saisissez la désignation du Transceiver Pour permettre une connexion sans fil optimale il est possible de modifier le canal radio des différents Transceivers lorsque plusieurs Transceivers WERMA StockSAVER sont utilisés en parallèle WERMA recommande d exploiter un seul Transceiver par canal 4 Si nécessaire...

Страница 349: ...s réseau La connexion TCP IP entre le service serveur WERMA StockSAVER et le Transceiver doit être établie à l aide d un nom de DNS enregistré sur le serveur DNS A Record La connexion TCP IP entre le service serveur WERMA StockSAVER et le Transceiver doit être établie via une adresse IP différente p ex un routeur avec redirection de port La connexion TCP IP entre le service serveur WERMA StockSAVE...

Страница 350: ...Cliquez sur Enregistrer La configuration est transférée sur le Transceiver 3 Cliquez sur Suivant La fenêtre de configuration de la SmartBox apparaît 4 1 1 2 Utiliser une adresse IP statique 1 Sélectionnez l option Utiliser l adresse IP statique suivante Version 1 0 03 2018 37 ...

Страница 351: ...inistrateur du réseau WERMA recommande de saisir ici les données de configuration pour une adresse IP sta tique si ces données sont connues 3 Cliquez sur Enregistrer La configuration est transférée sur le Transceiver 4 Cliquez sur Suivant La fenêtre de configuration de la SmartBox apparaît 38 310 865 005 0318_AB ...

Страница 352: ...r l adresse IP statique suivante 2 Saisissez les données du réseau dans les champs correspondants Les données nécessaires sont fournies par l administrateur du réseau 3 Cochez la case Afficher les paramètres de réseau avancés 4 Cliquez sur Suivant Version 1 0 03 2018 39 ...

Страница 353: ...essaire corrigez le port TCP dans le champ Port TCP Les données nécessaires sont fournies par l administrateur du réseau 7 Cliquez sur Enregistrer La configuration est transférée sur le Transceiver 8 Cliquez sur Suivant La fenêtre de configuration de la SmartBox apparaît 40 310 865 005 0318_AB ...

Страница 354: ...ccordez la SmartBox au PC par un câble USB puis cliquez sur Rechercher WERMA StockSAVER recherche une SmartBox raccordée env 5 secondes 2 Une fois que le Transceiver a été trouvé cliquez sur Suivant Version 1 0 03 2018 41 ...

Страница 355: ...m partiment Option Description Autoriser le réapprovisionnement sans scan L article peut être entreposé dans un compartiment sans devoir être scanné au préalable Le système ne peut pas détecter ni consigner les erreurs d affectations Sélectionnez si aucun lecteur de codes barres n est uti lisé ou si l article ne doit pas être obligatoirement scanné avant l entreposage Si l article est quand même s...

Страница 356: ...eur de codes barres 8 Cliquez sur Suivant 9 Sélectionnez comment une référence scannée doit être traitée Option Description Ne pas configurer Ignorer la configuration avec le scan Exploiter entièrement le code barres scanné comme une référence Le code barres complet est accepté comme référence Définir la position et longueur de la référence La référence fait partie du code barres La référence comm...

Страница 357: ...t a réussi La SmartBox émet un signal sonore La SmartBox est verrouillée Il est impossible de faire des réassorts tant que la Smar tBox n est pas débloquée dans le logiciel WERMA StockSAVER Si un rack a été réapprovisionné de manière incorrecte La SmartBox émet un signal sonore La SmartBox attend que la suppression de l erreur d affection soit confirmée par l utilisateur La SmartBox est verrouillé...

Страница 358: ...nregistrer Dans ce cas il faut interrompre la mise en service de la SmartBox et actualiser le firmware du Transceiver La SmartBox peut ensuite être reconfigurée 12 Cliquez sur Enregistrer La configuration est transférée vers la SmartBox 13 Raccordez la SmartBox et le Transceiver 4 1 3 Raccorder la SmartBox et le Transceiver 1 Reliez la SmartBox au câble bus de la SensorBox 2 Raccordez la SmartBox ...

Страница 359: ...Dès que tous les périphériques WERMA StockSAVER sont reliés 1 Cliquez sur Suivant La fenêtre de configuration des racks apparaît 46 310 865 005 0318_AB ...

Страница 360: ...r la structure du rack Sur l illustration le rack est représenté côté remplissage réapprovisionnement Un champ correspond à un compartiment Ajouter une section d étagère 1 Dans l illustration du rack cliquez sur Ajouter un niveau d étagère 1 Dans la représentation du rack cliquez sur Ajouter un compartiment 1 Dans la représentation du rack cliquez sur Version 1 0 03 2018 47 ...

Страница 361: ...a souris appuyé Déplacer le compartiment 1 Dans l illustration du rack cliquez sur le compartiment et déplacer le compartiment vers un emplacement libre du rack en maintenant le bouton gauche de la souris appuyé 4 1 4 2 Configurer des compartiments La configuration des compartiments et l affectation des références d article peuvent être importées à partir d un fichier CSV Dans les paramètres il es...

Страница 362: ...rs Les données de déplacement des compartiments ne sont enregistrées que lorsqu un article a été affecté à un compartiment 4 Dans le champ Lieu de stock saisissez la source d approvisionnement de l article ou modifiez la source indiquée si nécessaire 5 Dans le champ Capacité des bacs saisissez le nombre d articles par bac ou modifiez la quan tité prédéfinie si nécessaire Si elles existent les vale...

Страница 363: ...ichier CSV au format approprié existe Seules les données pour compartiment contenues dans la vue actuelle sont importées Si un fichier CSV contient un compartiment plusieurs fois les données de la dernière ent rée sont importées Si un champ optionnel du fichier CSV n est pas défini comme colonne les valeurs actu elles de ces champs sont conservées 1 Dans la barre d outils cliquez sur Importer l af...

Страница 364: ... utilisés comme caractère d échappement Une suite de caractères doit être interprétée comme caractère d échappement si elle contient un point virgule ou un double guillemet Dans une suite de caractères d échappement les doubles guillemets sont représentés en double Exemple Suite de caractères G r a n dt s h i r t m a n c h e sl o n g u e se t c o l o r é Affichage dans le fichier CSV G r a n dt s ...

Страница 365: ... valeur indiquée jusqu à pré sent est conservée M i n i m u m B o x C o u n t t i n y i n t Stock de sécurité du compartiment Si une chaine vide est transmise comme valeur aucun stock de sécurité n est défini R e o r d e r B o x C o u n t t i n y i n t Stock d alerte du compartiment Si une chaine vide est transmise comme valeur aucun stock d alerte n est défini A b o v e M a x i m u m B o x C o u ...

Страница 366: ...ence ou Des cription WERMA StockSAVER parcourt la liste des articles et affiche le résultat de la recherche 3 Sélectionnez l article souhaité dans la liste 4 Cliquez sur OK 4 1 5 Indiquer le câblage bus Dans la fenêtre Configuration du câblage bus le câblage bus est reproduit dans le logiciel WERMA StockSAVER comme dessiné sur le modèle qui figure dans la notice d installation Version 1 0 03 2018 ...

Страница 367: ...iés à la SmartBox La fenêtre Ajouter un rack apparaît 2 Sélectionnez un rack et cliquez sur Ajouter Le rack apparaît dans la fenêtre Configuration du câblage bus 3 Cliquez sur le symbole de la SensorBox pour reproduire le câblage bus entre les SensorBoxes 54 310 865 005 0318_AB ...

Страница 368: ...cteur de codes barres au port USB de la SmartBox 2 Configurez le lecteur de codes barres comme suit le lecteur de codes barres est reconnu comme HID USB La chaîne se termine par un retour de chariot 0x0D ou un saut de ligne 0x0A Sélectionnez la disposition de clavier Français Le lecteur de codes barres n est pas fourni et ne peut pas être obtenu auprès de WERMA Pour plus d informations sur la conf...

Страница 369: ...nements suivants 1 Remédiez à l erreur d affectation dans le rack 2 Appuyez sur la touche de la SmartBox pour confirmer l erreur d affectation L entreposage précédent est annulé Le système est à nouveau disponible pour d autres entreposages 4 3 Installation manuelle des pilotes L installation manuelle des pilotes est uniquement nécessaire lorsque les pilotes de péri phériques n ont pas été install...

Страница 370: ...2 Cliquez sur Rechercher un pilote sur mon ordinateur Version 1 0 03 2018 57 ...

Страница 371: ... Cliquez sur Parcourir 4 Allez dans le dossier d installation de WERMA StockSAVER et ouvrez le dossier D r i v e r 5 Cliquez sur Suivant Les pilotes du périphérique sont installés 58 310 865 005 0318_AB ...

Страница 372: ...6 Une fois l installation réussie cliquez sur Fermer pour fermer l assistant d installation du nou veau matériel Le périphérique WERMA StockSAVER est opérationnel Version 1 0 03 2018 59 ...

Страница 373: ...4 3 2 Windows 10 1 Ouvrez le Gestionnaire de périphériques La fenêtre Gestionnaire de périphériques apparaît 60 310 865 005 0318_AB ...

Страница 374: ...uez avec le bouton droit de la souris sur WIRELESS DEVICE 3 Dans le menu contextuel sélectionnez l entrée Mettre à jour les pilotes 4 Cliquez sur Rechercher des pilotes sur l ordinateur Version 1 0 03 2018 61 ...

Страница 375: ... et ouvrez le dossier D r i v e r 7 Cliquez sur Suivant Les pilotes du périphérique sont installés 8 Une fois l installation réussie cliquez sur Fermer pour fermer l assistant d installation du nou veau matériel Le périphérique WERMA StockSAVER est opérationnel 62 310 865 005 0318_AB ...

Страница 376: ...ansceiver par canal radio 1 Dans la barre d outils cliquez sur Périphériques L assistant de mise en service d un appareil WERMA StockSAVER apparaît 2 Procédez à une nouvelle mise en service de Transceiver 3 Pendant la mise en service sélectionnez le canal radio souhaité dans la liste de sélection Canal d émission Les canaux occupent les fréquences suivantes Canal 1 fréquence 868 45 MHz Canal 2 fré...

Страница 377: ...r Périphériques L assistant de mise en service d un appareil WERMA StockSAVER apparaît 2 Transceiver Ou bien recommencez la mise en service de la SmartBox 3 Pendant la mise en service validez le message de mise à jour du logiciel en cliquant sur Oui La fenêtre Mise à jour du logiciel apparaît 4 Cliquez sur Démarrer la mise à jour La mise à jour du logiciel est exécutée 64 310 865 005 0318_AB ...

Страница 378: ...ans une seule vue d ensemble La vue d ensemble affiche le réassort des racks et l éventuelle existance d un défaut Cela permet de raccourcir efficacement les temps de réac tion et d immobilisation Les racks peuvent être regroupés en différentes vues p ex pour observer différentes zones logisti ques Les vues peuvent être modifiées librement et avoir une image d arrière plan 5 1 1 Vue La vue des rac...

Страница 379: ...raissent dès que le curseur de la souris se situe au dessus du compartiment L affichage de la référence et du lieu de stock peut être activé et désactivé dans les paramètres Les couleurs des différents états peuvent être personnalisées dans les paramètres Un compartiment peut présenter les états suivants Vue Description Stock de sécurité trop peu de bacs dans le rack Stock d alerte nombre minimum ...

Страница 380: ... logistiques Les vues peuvent être modifiées au choix et avoir une image d arrière plan Chaque vue peut être affichée en plein écran et sans barre de menus 5 1 2 1 Nommer une vue 1 Dans la barre d outils cliquez sur Paramètres dans la zone Configuration La fenêtre Paramètres apparaît 2 Sélectionnez l onglet Affichage 3 Sélectionnez la vue souhaitée 4 Cliquez sur Modifier La fenêtre Modifier la vue...

Страница 381: ...isi comme suit M a g a s i n1 M a g a s i n2 6 Cliquez sur OK Le nom de la vue a été modifié 7 Cliquez sur OK pour valider les paramètres 5 1 2 2 Ajouter une vue 1 Dans la barre d outils cliquez sur Paramètres dans la zone Configuration La fenêtre Paramètres apparaît 2 Sélectionnez l onglet Affichage 3 Cliquez sur Ajouter La fenêtre Création d une vue apparaît 68 310 865 005 0318_AB ...

Страница 382: ...OK pour ajouter la vue 5 1 2 3 Supprimer une vue 1 Dans la barre d outils cliquez sur Paramètres dans la zone Configuration La fenêtre Paramètres apparaît 2 Sélectionnez l onglet Affichage 3 Dans la liste des vues sélectionnez la vue à supprimer 4 Cliquez sur Supprimer 5 Répondez Oui à la question 5 1 2 4 Ajouter un rack à une vue 1 Ouvrez la vue souhaitée 2 Dans la barre d outils cliquez sur Ajou...

Страница 383: ... dans la zone Rack 4 Répondez Oui à la question Le rack a été supprimé de la vue 5 1 2 6 Tourner le rack 1 Ouvrez la vue souhaitée 2 Sélectionnez le rack 3 Dans la barre d outils dans la zone Rack cliquez sur Tourner à gauche ou Tourner à droite 5 1 2 7 Déplacer le rack Chaque rack peut être déplacé librement dans la vue 1 Cliquez avec le bouton gauche de la souris sur le nom du rack et maintenez ...

Страница 384: ...iment désactivé 1 sélectionnez le compartiment dans la vue 2 Dans la barre d outils cliquez sur Activer dans la zone Compartiment 5 1 2 9 Sélectionnez l image d arrière plan d une vue 1 Ouvrez la vue souhaitée 2 Dans la barre d outils cliquez sur Sélectionner dans la zone Arrière plan 3 Ouvrez l image d arrière plan souhaitée L image d arrière plan doit être préalablement enregistrée sur l ordinat...

Страница 385: ...en attente affiche le stock manquant dans les compartiments qui n atteignent pas le stock nominal Les listes affichées incluent tous les racks contenus dans la vue correspondante La liste du réassort en attente peut être affichée en plein écran et sans barre de menus Pour l affichage de la liste du réassort en attente deux vues sont disponibles Vue Description Par compartiment Affiche les besoins ...

Страница 386: ...t du stock Nombre actuel de bacs dans le rack Max Nombre max de bacs dans le stock nominal du compartiment Pcs par bac Nombre de pièces par bac dans le compartiment 5 2 2 Ensemble des bacs manquants 1 Dans la barre d outils cliquez sur Ensemble des bacs manquants Colonne Description État État de remplissage actuel du compartiment avec la priorité la plus élevée Durée Durée pendant laquelle le comp...

Страница 387: ...t inclut tous les racks contenus dans la vue correspondante 1 Ouvrez la vue souhaitée 2 Dans la barre d outils cliquez sur Rapport L aperçu avant impression de l analyse apparaît 5 2 4 Vue en plein écran Pour afficher le réassort en attente en plein écran et sans barre de menu 1 Ouvrez la vue souhaitée 2 Dans la barre d outils cliquez sur Plein écran dans la zone Plus Pour fermer la vue en plein é...

Страница 388: ...signation souhaitée pour l article 4 Dans le champ Capacité standard saisissez le nombre par bacs 5 Dans le champ Lieu de stock standard saisissez la source d approvisionnement de l article ou si nécessaire adaptez la source indiquée Les valeurs pour Lieu de stock standard et Capacité standard peuvent être modifiées séparément pour un compartiment spécifique lors de l affectation d un article à ce...

Страница 389: ...nnées d article ont été saisies 1 Dans la barre d outils cliquez sur Enregistrer 5 3 2 Modifier un article 1 Accédez à l article souhaité en cliquant sur Précédent ou Suivant dans la barre d outils ou 1 Recherchez l article souhaité en cliquant sur Rechercher dans la barre d outils 2 Dans la barre d outils cliquez sur Ajouter La zone de saisie des données d article apparaît 3 Modifiez les données ...

Страница 390: ... qui existent déjà les articles existants sont écrasés par les données provenant du fichier CSV Si un article a été supprimé ou réimporté un nouvel article avec cette référence est créé dans la base de données Si un fichier CSV contient plusieurs fois le même article les données de la dernière entrée sont importées Si un champ optionnel du fichier CSV n est pas défini comme colonne les valeurs act...

Страница 391: ...e fichier CSV G r a n dt s h i r t m a n c h e sl o n g u e se t c o l o r é Descriptions de champ Les types de données indiqués correspondent aux types de données du SQL Server pour les colon nes correspondantes Pour une compatibilité optimale WERMA recommande d utiliser dans les interfaces des types de données ayant la même plage de valeurs Le nombre et la définition des champs peuvent changer d...

Страница 392: ...her La fenêtre Recherche d article apparaît 2 Sélectionnez l article souhaité dans la liste 3 Cliquez sur OK ou 1 Saisissez un terme à rechercher dans le champ Recherche 2 Définissez la plage de recherche en cochant ou décochant les cases Référence ou Des cription WERMA StockSAVER parcourt la liste des articles et affiche le résultat de la recherche 3 Sélectionnez l article souhaité dans la liste ...

Страница 393: ...urée sélectionnée Un compartiment peut être mentionné à plusieurs repri ses si l article associé a été modifié ou si le com partiment a été supprimé puis recréé Les Retraits d articles pcs sont calculés à partir de nombre de bacs x capacité des bacs La capacité des bacs est utilisée telle qu elle a été définie au moment de l enregistrement Les modi fications ultérieures apportées à la définition d...

Страница 394: ...du pourcentage durée du compartiment dans cet état durée de la période d analyse Si aucune limite d état n a été définie pour un com partiment article sur la durée d analyse totale la valeur reste vide Le total des valeurs est 100 si le com partiment l article a été défini après le com mencement de la période d analyse ou avant la fin de la période d analyse Arrondi les valeurs sont arrondies à la...

Страница 395: ...existe lorsqu après un réassort le stock nominal a été atteint ou dépassé La durée de réassort est la durée écoulée entre le moment de non atteinte du stock nominal stock d alerte ou de sécurité et le réassort La durée de réassort peut uniquement être évaluée si le retrait qui a entraîné la non atteinte du minimum du stock nominal et le réassort se situent dans la période éva luée L évaluation aff...

Страница 396: ...sente pendant une interruption le même état qu avant l interruption Un état qui aurait changé entre temps est détecté et analysé dès que la réception des données provenant du compartiment a repris Les interruptions de connexion suivantes sont possibles Interruption du signal radio Interruption du câblage capteur bus Interruption de la connexion TCP IP vers le Transceiver Perte de tension alimentan...

Страница 397: ...con figuration de rack actuelle sont évalués Les compartiments ne sont pas affichés s ils ont été supprimés après la période le moment de l analyse Si un compartiment a été renommé les entrées sont affichées avec l ancienne désignation de compartiment Le nom de la société et le logo peuvent être modifiés dans les paramètres Taille d image recommandée 590 x 165 pixels Fonction Description Impressio...

Страница 398: ...me de loupe pour réduire ou augmenter d un clic l aperçu avant impression Afficher plusieurs pages dans l aperçu avant impression Réduire l aperçu avant impression Définir une valeur fixe pour le zoom Augmenter la taille de l aperçu avant impression Arrière plan Ajouter un filigrane dans le rapport Supprimer un filigrane dans le rapport Export Exporter le rapport Il est possible de sélectionner le...

Страница 399: ...tion pour l export Excel Option Description Export de données uni quement Sélectionnez pour pouvoir modifier ultérieurement les contenus des tableaux Sortie formatée Sélectionnez pour utiliser les données par défaut 3 Cliquez sur OK pour lancer l export 5 5 2 Ajouter un filigrane Le filigrane peut être un texte personnalisé une image ou une combinaison de texte et d image 1 Dans la barre d outils ...

Страница 400: ...igrane 5 Dans la zone Sélectionner la page sélectionnez les pages sur lesquelles le filigrane doit être inséré Séparez les pages individuelles par un point virgule p ex 3 5 7 Indiquez les suites de pages par un tiret p ex 3 5 6 Cliquez sur OK pour ajouter le filigrane 5 5 3 Supprimer un filigrane 1 Dans la barre d outils cliquez sur Filigrane La fenêtre Filigrane apparaît Version 1 0 03 2018 87 ...

Страница 401: ...ort PJ d e mail Fichier PDF Fichier HTML Fichier Excel Fichier image 5 6 État du système Dans la zone État du système il est possible de consulter les informations sur l état de connexion des périphériques WERMA StockSAVER 5 6 1 Routage La fenêtre Routage affiche une vue d ensemble du réseau WERMA StockSAVER Une arbo rescence montre la structure et la qualité des connexions sans fil entre les diff...

Страница 402: ...rantir la meilleure liaison sans fil possible chaque SmartBox recherche automatiquement la meilleure trajectoire de transmission avec l émetteur Pour améliorer la connexion sans fil ou pour augmenter la portée d autres SmartBoxes peuvent faire office de répéteurs et transmettre le signal radio Connexion directe Connexion via une autre Smar tBox servant de répéteur Version 1 0 03 2018 89 ...

Страница 403: ...fonction de l environnement d utilisation la portée maximale effective peut être moindre Le cas échéant les périphériques WERMA StockSAVER configurés mais non connectés sont affichés dans la partie inférieure de la fenêtre 5 6 1 1 Optimiser la connexion sans fil Les mesures suivantes améliorent la connexion sans fil Liaison visuelle entre des appareils WERMA StockSAVER Le moins possible de surface...

Страница 404: ... tous les péri phériques WERMA StockSAVER enregistrés dans la base de données WERMA StockSAVER Dès que le curseur est placé sur une entrée de la colonne Message un historique de l état de connexion du périphérique WERMA StockSAVER s affiche 5 7 Configuration Dans la zone Configuration différents paramètres sont accessibles Ouvrir l Assistant Configuration Adapter et gérer les racks Adapter le câbl...

Страница 405: ...tion pas à pas 1 Cliquez sur Suivant 2 Effectuez toutes les autres étapes de la mise en service ou 3 Cliquez sur le lien de l étape souhaitée 5 7 2 Périphériques La configuration d un Transceiver ou d une SmartBox doit être modifiée ou la mise en service de périphériques WERMA StockSAVER supplémentaires peuvent être réalisées à l aide d un assi stant 1 Dans la barre d outils cliquez sur Périphériq...

Страница 406: ...tockSAVER un message correspondant s affiche Cliquez sur Oui pour installer la nouvelle version du logi ciel Si la confirmation d enregistrement de la SmartBox doit être utilisée le Transceiver doit disposer de sa propre version actuelle et appropriée de son firmware 4 Une fois que le périphérique WERMA StockSAVER a été trouvé cliquez sur Suivant 5 Continuez la configuration du Transceiver ou de l...

Страница 407: ...MHz Canal 4 fréquence 868 15 MHz 3 Cliquez sur Suivant Il existe trois possibilités de connexion au réseau Obtenir automatiquement une adresse IP via DHCP Utilisation d une adresse IP statique Paramètres de réseau avancés L option Paramètres de réseau avancés doit être utilisée dans les cas suivants La diffusion UDP n est pas autorisée La connexion TCP IP du service serveur au Transceiver doit êtr...

Страница 408: ...IP via DHCP L option Obtenir automatiquement une adresse IP via DHCP doit être sélectionnée lorsque le Tran sceiver et le service serveur se situent sur le même sous réseau La diffusion UDP doit être auto risée 1 Sélectionnez l option Obtenir automatiquement une adresse IP via DHCP 2 Cliquez sur Enregistrer La configuration est transférée sur le Transceiver Utilisation d une adresse IP statique 1 ...

Страница 409: ...ur du réseau WERMA recommande de saisir ici les données de configuration pour une adresse IP sta tique si ces données sont connues 3 Cliquez sur Enregistrer La configuration est transférée sur le Transceiver Paramètres de réseau avancés 1 Sélectionnez l option Utiliser l adresse IP statique suivante 96 310 865 005 0318_AB ...

Страница 410: ... paramètres de réseau avancés 4 Cliquez sur Suivant 5 Dans le champ IP nom de DNS saisissez l adresse IP ou le nom de DNS du Transceiver 6 Si nécessaire corrigez le port TCP dans le champ Port TCP Les données nécessaires sont fournies par l administrateur du réseau 7 Cliquez sur Enregistrer La configuration est transférée sur le Transceiver Version 1 0 03 2018 97 ...

Страница 411: ... 2 SmartBox 1 Dans le champ Nom de SmartBox saisissez la désignation de la SmartBox 2 Affectez la SmartBox à un Transceiver dans la liste de sélection Transceiver 3 Cliquez sur Suivant 98 310 865 005 0318_AB ...

Страница 412: ...atoirement être scanné avant l entreposage Si l article est quand même scanné le système se comporte alors comme pour l option Réapprovisionnement uniquement avec scan préalable Autoriser le réapprovisionnement uni quement avec un scan préalable L article ne peut être entreposé dans un compartiment que s il a été scanné Le système identifie et consigne les réapprovisionnements sans scan préalable ...

Страница 413: ...arres complet est accepté comme référence Définir la position et longueur de la référence La référence fait partie du code barres La référence commence et finit à une position définie du code barres Définir la référence avec des sépa rateurs La référence fait partie du code barres La référence commence et finit avec un séparateur défini contenu dans le code barres 8 Cliquez sur Suivant 100 310 865...

Страница 414: ...t a réussi La SmartBox émet un signal sonore La SmartBox est verrouillée Il est impossible de faire des réassorts tant que la Smar tBox n est pas débloquée dans le logiciel WERMA StockSAVER Si un rack a été réapprovisionné de manière incorrecte La SmartBox émet un signal sonore La SmartBox attend la confirmation de l utilisateur que l erreur d affectation a été supprimée La SmartBox est verrouillé...

Страница 415: ...après le clic sur Enregistrer Dans ce cas il faut interrompre la mise en service de la SmartBox et actualiser le firmware du Transceiver La SmartBox peut ensuite être reconfigurée 10 Cliquez sur Enregistrer La configuration est transférée vers la SmartBox 5 7 3 Racks Si nécessaire il est possible de modifier la configuration des racks et des compartiments 1 Dans la barre d outils cliquez sur Câbla...

Страница 416: ... à un compartiment Ajouter une section d étagère 1 Dans l illustration du rack cliquez sur Ajouter un niveau d étagère 1 Dans l illustration du rack cliquez sur Ajouter un compartiment 1 Dans l illustration du rack cliquez sur Supprimer un compartiment 1 Dans l illustration du rack cliquez sur le compartiment 2 Dans la barre d outils cliquez sur Supprimer Version 1 0 03 2018 103 ...

Страница 417: ...liquez sur le compartiment et déplacez le compartiment vers un emplacement libre dans le rack en maintenant le bouton gauche de la souris appuyé 5 7 3 2 Configurer des compartiments La configuration des compartiments et l affectation des références d article peuvent être importées à partir d un fichier CSV Dans les paramètres il est possible de définir une configuration de rack par défaut Elle est...

Страница 418: ...capteurs Les données de déplacement des compartiments ne sont enregistrées que lorsqu un article a été affecté à un compartiment 4 Dans le champ Lieu de stock saisissez la source d approvisionnement de l article ou modifiez la source indiquée si nécessaire 5 Dans le champ Capacité des bacs saisissez le nombre d articles par bac ou modifiez la quan tité prédéfinie si nécessaire Si elles existent le...

Страница 419: ...rter l affectation des compartiments La fenêtre Importer l affectation des compartiments apparaît 2 Cliquez sur Parcourir et ouvrez le fichier CSV souhaité 3 Dans la liste de sélection Police sélectionnez la police du fichier CSV 4 Cliquez sur Importer pour importer l affectation des compartiments Structure du fichier CSV Règles de formatage ANSI UTF 8 et Unicode peuvent être utilisés comme jeux d...

Страница 420: ...a m e n v a r c h a r 4 0 Désignation du compartiment M a t e r i a l N a m e n v a r c h a r 3 2 Référence d article Si une chaîne vide est transmise en tant que valeur l affectation d article pour le compartiment est supprimée P i e c e s P e r B o x i n t Capacité du bac pièces par bac Si une chaîne vide est transmise en tant que valeur la valeur indiquée jusqu à pré sent est conservée M i n i ...

Страница 421: ... l article souhaité dans la liste 4 Cliquez sur OK 5 7 4 Câblage bus Si le câblage bus sur le rack a été modifié par des changements ou des extensions le câblage bus doit également être adapté dans le logiciel WERMA StockSAVER Si le câblage bus n est pas adapté dans le logiciel WERMA StockSAVER cela peut ent raîner des résultats erronés et donc des défaillances de production 1 Dans la barre d outi...

Страница 422: ...du câblage bus apparaît 3 Cliquez sur le symbole de la SmartBox pour rectifier le tracé du câblage bus modifié ou 4 Adaptez l affectation des capteurs et des compartiments dans l onglet Bus 5 Si nécessaire associez d autres racks à la SmartBox en cliquant sur Ajouter Version 1 0 03 2018 109 ...

Страница 423: ...ortées à partir d un fichier CSV 9 Dans la barre d outils cliquez sur Vérifier pour vérifier la configuration 10 Dans la barre d outils cliquez sur Enregistrer 11 Dans la barre d outils cliquez sur Fermer 5 7 5 Paramètres Dans les paramètres vous pouvez ajuster les fonctions de WERMA StockSAVER Les paramètres peuvent être protégés contre un accès non autorisé au moyen d un mot de passe Pour ouvrir...

Страница 424: ...odule et la vue à afficher dans la fenêtre correspondante Si une seule fenêtre doit être affichée il est possible de choisir sa taille 1 Dans la liste de sélection Module de fonction sélectionnez le module souhaité pour Fenêtre 1 et pour Fenêtre 2 2 Si une seule fenêtre doit être affichée dans la liste de sélection Module de fonction sélec tionnez l entrée Pas de Sélection pour la Fenêtre 2 3 Dans...

Страница 425: ... du démarrage de WERMA WIN rechercher les mises à jour du logiciel 2 Cliquez sur OK pour enregistrer les paramètres Pour pouvoir rechercher les mises à jour du produit l ordinateur doit être connecté à Internet et pouvoir accéder à la page www werma com 5 7 5 2 Vues Dans l onglet Affichage il est possible de créer et de modifier des vues pour tous les modules Les fonctions suivantes sont possibles...

Страница 426: ...ans la liste des vues sélectionnez la vue à copier 2 Cliquez sur Copier La fenêtre Copier la vue apparaît 3 Dans le champ Nom saisissez le nom de vue souhaité 4 Cliquez sur OK pour copier la vue Modifier la vue 1 Dans la liste des vues sélectionnez la vue souhaitée 2 Cliquez sur Modifier La fenêtre Modifier la vue apparaît 3 Dans le champ Nom saisissez le nom de vue souhaité Si le nom de la vue co...

Страница 427: ...ffichent en premier dans la barre d outils Supprimer la vue 1 Dans la liste des vues sélectionnez la vue à supprimer 2 Cliquez sur Supprimer 3 Répondez Oui à la question 5 7 5 3 Vue d ensemble Dans l onglet Vue d ensemble il est possible de définir quand afficher la référence et le lieu de stock d un compartiment dans la vue d ensemble 1 Dans la liste de sélection Référence sélectionnez quand la r...

Страница 428: ...1 Débranchez l alimentation électrique du périphérique WERMA StockSAVER à supprimer 2 Dans la liste des appareils WERMA StockSAVER sélectionnez l appareil WERMA StockSAVER à supprimer Il est possible de supprimer plusieurs appareils WERMA StockSAVER en appuyant sur la tou che CTRL 3 Cliquez sur Supprimer 4 Répondez Oui à la question 5 7 5 5 Compartiment Pour faciliter la configuration du compartim...

Страница 429: ...Dans les listes de sélection correspondantes sélectionnez les couleurs du texte de la référence et du lieu de stock pour les états signalés L affichage de la référence et du lieu de stock peut être activé ou désactivé dans l onglet Vue d ensemble 4 Cliquez sur Fermer pour enregistrer les paramètres 5 7 5 6 Rapports Il est possible d enregistrer des en têtes et pieds de page personnalisés pour les ...

Страница 430: ...at Dans l onglet Notification d état il est possible de configurer les notifications émises quand le stock d alerte est atteint ou quand le stock de sécurité n est plus atteint dans un compartiment Si la notification d état est activée un message est envoyé dès qu un compartiment se trouve dans l état correspondant pendant une durée qui dépasse le temps de retard paramétré Temps de retard Le temps...

Страница 431: ... plus envoyé Le temps de retard d En dessous du stock de sécurité s arrête également dès que l état passe de rouge à jaune Pour que la notification d état puisse être envoyée un serveur d email doit être con figuré dans la console d administration Configurer la notification d état pour le stock d alerte 1 Cochez la case Stock d alerte atteint 2 Saisissez le destinataire de l e mail dans le champ D...

Страница 432: ...éfini Si l état change à nouveau pendant le temps de retard aucun e mail n est envoyé 5 7 5 8 Fonctions Dans l onglet Fonctions il est possible d activer et de désactiver les modules et la fonction qui doivent être disponibles pour un poste de travail En outre les paramètres peuvent être protégés par un mot de passe contre tout accès non autorisé Activer et désactiver des fonctions Activer des fon...

Страница 433: ...e champ Ancien mot de passe vide Le mot de passe est le même pour tout le système 3 Saisissez le nouveau mot de passe dans le champ Nouveau mot de passe et dans le champ Répétition 4 Cliquez sur OK pour protéger les paramètres avec le mot de passe saisi Supprimer le mot de passe 1 Cliquez sur Supprimer 2 Répondez Oui à la question 5 8 Journal d interface Différents journaux permettent de vérifier ...

Страница 434: ...d erreurs des mouvements d articles Tous les mouvements d articles au cours desquels une erreur est sur venue Vue d ensemble de la disponibilité du système complet Vue d ensemble de la disponibilité des différents composants du système Journal de dis ponibilité du système Informations détaillées sur la disponibilité des différents composants du système 1 Dans la barre d outils dans la zone Interfa...

Страница 435: ...RMA StockSAVER et du service serveur WERMA StockSAVER En option les données peuvent être gérées via le programme de lignes de commande 6 1 Base de données Pour sauvegarder les données enregistrées il est possible de sauvegarder et de restaurer la base de données WERMA StockSAVER Pour un accès détaillé à la base de données WERMA StockSAVER il est possible de démarrer le Management Studio de Microso...

Страница 436: ...ichiers de sauve garde de base de données enregistrés ou de les sauvegarder sur un support externe 1 Dans la barre d outils cliquez sur Sauvegarder dans la zone Base de données La fenêtre Sauvegarder la base de données apparaît 2 Cliquez sur Démarrer la sauvegarde Une copie de la base de données WERMA StockSAVER est enregistrée dans le dossier d installation 3 Cliquez sur Fermer Version 1 0 03 201...

Страница 437: ...ockSAVER a été fermé sur tous les postes de travail 2 Dans la barre d outils cliquez sur Restaurer dans la zone Base de données La fenêtre Restaurer base de données apparaît 3 Lisez la remarque et confirmez en cochant la case 4 Cliquez sur Suivant 5 Cliquez sur Parcourir et ouvrez le fichier de sauvegarde 6 Si le fichier de sauvegarde doit être simplement validé sans être restauré cochez la case A...

Страница 438: ...sauvegarde 6 1 2 1 Options de restauration avancées Les options de restauration avancées offrent les possibilités suivantes valider le fichier de sauvegarde sans restaurer la base de données valider et restaurer le fichier de sauvegarde Valider le fichier de sauvegarde 1 Sélectionnez l option Valider la sauvegarde de la base de données 2 Cliquez sur Valider Le fichier de sauvegarde est validé et l...

Страница 439: ...tauration décochez la case Mise à jour de base de données après la restauration 3 Si des données comme les images d arrière plan et les logos d entreprise ne doivent pas être restaurées décochez la case Restaurer Filestore 4 Cliquez sur Restaurer Le fichier de sauvegarde est validé Si le fichier de sauvegarde est valide les données du fichier de sauvegarde sont restaurées 126 310 865 005 0318_AB ...

Страница 440: ...t être exporté il est possible d utiliser l inter face XML En règle générale l export a lieu immédiatement avec un temps de retard de moins d une seconde Différents facteurs d erreur et de performance peuvent retarder l export le temps de transfert et de réaction ne peut donc pas être garanti Si plusieurs nouveaux mouvements d articles existent ceux ci sont exportés par ordre chronologique Si plus...

Страница 441: ...kSAVER est exécuté sous le compte utilisateur Windows S e r v i c er é s e a u 1 Dans la barre d outils cliquez sur Interfaces dans la zone Export CSV La fenêtre Interface d export CSV apparaît 2 Saisissez le chemin et le nom de fichier du fichier export CSV dans le champ Nom de fichier ou cliquez sur Parcourir 3 Cliquez sur Activer Tous les changements du stock sont inscrits par incréments dans l...

Страница 442: ...rt En cas d erreur d accès au fichier refaites une tentative Une erreur d accès au fichier a lieu dès que le service serveur a ouvert le fichier export pour ajouter des entrées sup plémentaires 3 Le fichier export renommé peut être modifié et le cas échéant être supprimé ou archivé Si le fichier export a été archivé WERMA recommande de déplacer le fichier d archive vers un autre dossier ou sous do...

Страница 443: ... du SQL Server pour les colonnes correspondantes Pour une compatibilité optimale WERMA recommande d utiliser dans les interfaces des types de données présentant la même plage de valeurs Le nombre l ordre et la définition des champs peuvent changer dans les mises à jour ultérieures de WERMA StockSAVER ID de champ Type de données Description I D bigint ID interne dans la base de données pour l enreg...

Страница 444: ...comme non atteint Si aucun stock de sécurité n est défini pour le com partiment une chaîne vide est exportée R e o r d e r B o x C o u n t i n t Stock d alerte valeur 2 à partir de 2 bacs ou moins le stock d alerte est atteint Si aucun stock d alerte n est défini pour le com partiment une chaîne vide est exportée A b o v e M a x i m u m B o x C o u n t i n t Sur stock valeur 3 à partir du 3e bac o...

Страница 445: ...con figuration p ex changement du câblage bus une entrée cor respondant est également exportée Pour que l import des données des fichiers d articles soit correct le fichier XML doit répondre à certaines exigences 6 2 2 1 Configurer l interface XML La configuration de l interface XML a lieu sur le PC du serveur sur lequel le service ser veur WERMA StockSAVER est exécuté L import et l export sont ef...

Страница 446: ...Si l interface XML doit être activée 1 cochez la case Activer le service Data Exchange de WERMA StockSAVER 2 Si nécessaire dans le champ ID système saisissez l ID du système WERMA StockSAVER La saisie de l ID du système WERMA StockSAVER permet d identifier les fichiers XML générés au moyen de l I Ds y s t è m e enregistrée Si l ID système est définie elle est vérifiée lors de l import des fiches d...

Страница 447: ...uel les fichiers impor tés doivent être déplacés après traitement 4 Dans le champ Intervalle de contrôle s saisissez l intervalle de temps de recherche de nou veaux fichiers d importation L import peut être retardé par différents facteurs d erreurs et de performances Il est par conséquent impossible de garantir un temps de transfert et un temps de réaction 5 Dans le champ Nombre de jours après leq...

Страница 448: ...contrôle s saisissez l intervalle de temps entre les différents exports de nouveaux fichiers XML Si aucun mouvement d articles n a eu lieu le service d interface exporte quand même les états de compartiments actuels L export peut être retardé par différents facteurs d erreurs et de performances Il est par conséquent impossible de garantir un temps de transfert et un temps de réaction 4 Cliquez sur...

Страница 449: ...de l exécution de l export à partir de l autre application Format a a a a M M j jH H m m s s s y s t e m i d A t t r i b u t n v a r c h a r 2 5 Option ID du système avec lequel a été effectué l export à partir de l autre application Si l ID système est définie elle est vérifiée lors de l import des fiches d articles Si une autre ID de système voire aucune est enregistrée dans le fichier import le...

Страница 450: ... son extension change en l o c k Les fichiers traités sont déplacés dans le répertoire d archive Dès qu un traitement s est terminé avec succès l extension du fichier change en i m p o r t e d x m l ou en e r r o r x m l s il y a eu des erreurs Le nom du fichier XML fourni doit correspondant au schéma suivant M a t e r i a l A A A A M M J J h h m m s s Z Z Z x m l Contrôles lors de l import Lors d...

Страница 451: ...ignation d article contient plusieurs lignes Les espaces situés en début et en fin de désignation d article sont supprimés lors de l import 6 2 2 3 Description du fichier XML pour l export des mouvements d articles L export des mouvements d articles exporte chaque modification du stock dans un fichier XML En règle générale il s agit du retrait ou de l approvisionnement d un bac dans le compartimen...

Страница 452: ...esquels le câblage bus est incor rect Structure du fichier XML Les types de données indiqués correspondent aux types de données du SQL Server pour les colonnes correspondantes Pour une compatibilité optimale WERMA recommande d utiliser dans les interfaces des types de données présentant la même plage de valeurs Le fichier XML est toujours généré avec tous les attributs et éléments définis Le nombr...

Страница 453: ...contient des données détaillées du compartiment i d A t t r i b u t i n t ID interne de la base de données du com partiment n a m e A t t r i b u t n v a r c h a r 4 0 Désignation du compartiment affecté La dési gnation du compartiment est déterminée au moment de l enregistrement m a t e r i a l É l é m e n t Élément qui contient des données détaillées de l article affecté i d A t t r i b u t i n ...

Страница 454: ... o u n t A t t r i b u t i n t Différence de quantité par rapport à l entrée de journal précédente pour ce com partiment cet article négative retrait positive réassort v a l u e A t t r i b u t i n t Nouveau nombre de bacs nombre de bacs détectés Attribution d un nom de fichier Le service d interface dépose les fichiers XML dans le répertoire d exports et attribue les noms de fichier selon le modè...

Страница 455: ...6 3 Analyse de la disponibilité Dès que l analyse de la disponibilité est activée l état de connexion des périphériques WERMA StockSAVER et du service serveur WERMA StockSAVER est surveillé Dès que l état de connexion change un e mail est envoyé à un ou plusieurs destinataires une fois qu un temps de retard paramétré s est écoulé Si l état de connexion change à nouveau pendant le temps de retard a...

Страница 456: ...tre serveur d e mail et Données d accès si nécessaire Cliquez sur le bouton de commande Envoyer un e mail de test pour envoyer un e mail de test et vérifier ainsi les paramètres effectués 5 Sélectionnez l onglet Analyse de la disponibilité 6 Cochez l option Envoyez une notification des changements d état des périphériques ou des services serveur 7 Saisissez le destinataire de l e mail dans le cham...

Страница 457: ...te encore au bout du temps de retard Si l état change à nouveau pendant le temps de retard aucun e mail n est envoyé 9 Cliquez sur OK 6 3 2 Désactiver l analyse de la disponibilité 1 Dans la barre d outils cliquez sur Paramètres dans la zone Configuration La fenêtre Paramètres apparaît 2 Sélectionnez l onglet Analyse de la disponibilité 144 310 865 005 0318_AB ...

Страница 458: ...yer l état de connexion Les anciens états de connexion enregistrés peuvent être nettoyés automatiquement L ancienneté des états de connexion à supprimer peut être paramétré 6 4 1 Nettoyer l état de connexion 1 Dans la barre d outils cliquez sur Paramètres dans la zone Configuration La fenêtre Paramètres apparaît Version 1 0 03 2018 145 ...

Страница 459: ...oyés Si 3 0 jours est sélectionné dans le champ Nombre de jours tous les états de connexion antérieurs à 30 jours sont automatiquement effacés 5 Cliquez sur OK pour enregistrer les paramètres et démarrer le nettoyage Les états de connexion sont nettoyés Cette opération peut prendre un certain temps en fonction du volume de données Tous les états de connexion antérieurs aue nombre de jours paramétr...

Страница 460: ...ils cliquez sur Paramètres dans la zone Configuration La fenêtre Paramètres apparaît 2 Sélectionnez l onglet Analyse de la disponibilité 3 Décochez la case Faire un règlement automatique des connexions enregistré 4 Cliquez sur OK Version 1 0 03 2018 147 ...

Страница 461: ...WERMA de sauvegarde et enregistre la sauvegarde sous le nom de fichier indi qué Exemple A d m i n C L I e x e b a c k u p C S t o c k S A V E R s t o c k b a k Options n o p r o g r e s s Supprime la sortie des messages d avancement sur la console n o v e r i f y Créé une sauvegarde sans vérification Valeurs de retour 0 Commande réussie 1 Aucune fonction accomplie l aide a été affichée 1 Une erreu...

Страница 462: ...possible Remède La liaison avec le Transceiver est interrompue Le Transceiver est affiché comme non connecté dans la fenêtre Routage Les racks sont affichés comme étant non connectés La connexion réseau entre le Transceiver et le service ser veur a été interrompue Vérifiez l alimentation élec trique et la connexion Ether net du Transceiver Assurez vous que le service serveur est en cours d exécuti...

Страница 463: ...SmartBox n est pas cor rectement montée ou ori entée Ajustez la position de mon tage Installez une SmartBox sup plémentaire qui servira de répéteur ou utilisez un Tran sceiver supplémentaire La SmartBox n est pas recon nue dans le logiciel WERMA StockSAVER Le pilote USB de la SmartBox n est pas installé Effectuez une installation manuelle du pilote Affichage du message N o c o n n e c t i o n Aucu...

Страница 464: ...rrecte ou a été entreposé sans avoir été scanné préalablement 1 Retirez l article du com partiment 2 Appuyez sur la touche 3 Scannez une nouvelle fois le bac et entreposez le cor rectement 7 3 SensorBox Erreur Cause possible Remède La LED bleue n est pas allumée Affichage dans le logiciel Câblage bus connecteur mal câblé Vérifiez l affectation du connecteur et le cas échéant refaites le câblage Se...

Страница 465: ...l WERMA StockSAVER Capteur défectueux Vérifiez le bon fonc tionnement et le cas échéant procédez au rem placement 7 5 Logiciel WERMA StockSAVER Erreur Cause possible Remède Message Impossible d écraser le fichier terminer le service Windows Microsoft NET Framework NGEN L installation a été répétée sur un laps de temps trop court Terminez le service Micro soft NET Framework NGEN et recommencez l in...

Страница 466: ...rveur présente des mes sages d erreur de WERMA StockSAVER Si un serveur de base de données spécifique est utilisé assurez vous que le serveur de la base de données est démarré et qu il est pos sible d établir une conne xion réseau au serveur de base de données Assurez vous que la conne xion réseau n est pas blo quée par un pare feu ou un antivirus Le nombre de capteurs affiché par SensorBox est er...

Страница 467: ...us Modifiez le câblage bus dans le logiciel WERMA StockSAVER Message d erreur dans la barre d état Le service ser veur a été déconnecté Connexion au service serveur impossible Assurez vous qu une conne xion réseau a été établie avec le serveur Assurez vous que le service serveur WERMA StockSAVER a été démarré sur le serveur Contrôlez si l affichage des événements Windows sur le serveur présente de...

Страница 468: ... lan gues souhaités 2 Effectuez une mise à jour sur le PC client 7 6 Fichiers journaux Les fichiers journaux consignent les processus dans WERMA StockSAVER et peuvent donner des informations utiles pour les diagnostics de pannes Si nécessaire il est possible de modifier le nom bre de fichiers journaux enregistrés et le niveau de détail des informations enregistrées 7 6 1 Accéder aux fichiers journ...

Страница 469: ... 5 0 0 Jusqu à 500 fichiers journaux sont enregistrés L o g L e v e l Niveau de détail des informations contenues dans les fichiers journaux Les messages de niveaux suivants sont enregistrés 0 Pas d enregistrement 1 Erreur 2 par défaut Erreur Avertissements 3 Erreur Avertissements Informations 4 Erreur Avertissements Informations Informations de débogage 5 Erreur Avertissements Informations Inform...

Страница 470: ... et installez le sur l ordinateur Si plusieurs postes de travail ont accès à une base de données WERMA StockSAVER com mune la mise à jour du logiciel doit d abord être installée sur l ordinateur avec la base de données WERMA StockSAVER ordinateur serveur Si l installation est d abord réalisée sur un ordinateur client un message correspondant s affiche La mise à jour du logiciel doit être effectuée...

Страница 471: ...ient et le serveur Lors du passage à l heure d hiver il faut veiller à ce que ce changement soit effectué si pos sible en dehors des heures d exploitation Les données qui sont saisies pendant l heure qui suit le changement d heure ne peuvent pas être enregistrées dans la base de données si des enregistrements pour le compartiment ont été effectués dans l heure qui a précédé le chan gement d heure ...

Страница 472: ...r et la SmartBox La configuration peut également être effectuée sur l ordinateur client Résolution de l écran Minimum 1280 x 1024 Recommandée 1920 x 1080 ou supérieure Mise à l échelle de la taille du texte dpi jusqu à 200 192 dpi Microsoft NET Fra mework 4 5 2 Si absent est automatiquement installé lors de l installation de WERMA StockSAVER Systèmes d exploitation pris en charge Windows 7 SP1 Win...

Страница 473: ...ver est assurée 10 1 Stabilité et sécurité du réseau WERMA recommande d exploiter WERMA StockSAVER uniquement dans un envi ronnement LAN fiable réseau TCP IP Dans un réseau instable ou non sécurisé la fonc tion ou les performances de WERMA StockSAVER peuvent être affectées 10 2 Architecture du système Lors de l installation un service serveur est installé sur le serveur Le service serveur démarre ...

Страница 474: ...native A Le service serveur le client et la base de données sont installés sur un PC de poste de travail Non recommandé pour une exploitation de pro duction Alternative B Le service serveur et la base de données sont installés sur deux serveurs différents Pour ce faire un SQL Ser ver dédié doit être installé p ex Microsoft SQL Server Express L application client est installée sur un PC d un poste ...

Отзывы: