Controller and System Test
UM353-1B
April
2012
9-2
If a power-up diagnostic test fails, an error code will be displayed on the alphanumeric display. Refer to
Sections 10.3 and 10.4 for troubleshooting error codes.
If WAIT remains displayed for more than 1 minute, the controller is not powering up correctly and power
connections should be checked for loose wiring.
9.1.2 Configuration
1.
Determine the current configuration; refer to Section 9.0 above. Then perform one of the following steps.
To load FCO101, go to step 2.
IMPORTANT
Loading FCO101 will overwrite the current configuration and any entries made
since shipment.
Skip step 2 if the installed configuration is to be retained
.
To proceed with the installed configuration, go to Section 9.1.3.
2.
To load FCO101 locally or to download it from a PC running the Graphical Configuration Utility, refer to
Section 2.5 Configuration Procedure as necessary and to Section 4 Factory Configured Options for the block
diagram and parameter values.
3.
Edit the configuration as desired. Refer to Section 9.1.5 Modifying an FCO.
9.1.3 Input/Output
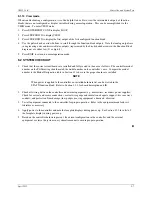
Press the D button on the faceplate to scroll through Loop01.S (Setpoint), Loop01.V (Valve Output), and Loop01.P
(Process Input). Note from the FCO101 block diagram, that INPUT P is configured as the output from function
block AIN1, INPUT S is configured as the output of function block SETPT, and INPUT V is configured as the
output of function block A/M.
9.1.4 Auto/Manual
In FCO101, the A/M block is configured to switch Valve control from the PID controller in AUTO, to the Pulser
Knob in Manual. Press the A/M button to toggle the display between the (Loop01.S) setpoint parameter and the
(Loop01.V) valve parameter. Turn the pulser knob while displaying the valve parameter in manual to change the
value on the numeric display as well as the horizontal bargraph; turn the pulser knob while displaying the setpoint
parameter in Auto to change the numeric value and the vertical S bargraph.
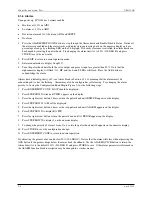
9.1.5 Modifying an FCO
In addition to FCO101, Single Loop Control, there are several other factory configured options available, such as
Ratio Set Control (FCO105) and Cascade Control (FCO121). To download another FCO, follow the steps in
Section 2.5.
Changes to an FCO may be made either by adding and deleting function blocks or by changing the default
parameter values. A Configuration Road Map is shown in Figure 2-1. Note that an X represents pressing the STEP
DOWN or STEP UP button and a <> represents turning the pulser knob. For example, to add a function block you
would do the following steps:
1.
Press ENTER/EXIT CONF.
2.
Press STEP DOWN until VIEW is displayed.
3.
Turn the pulser knob until ADD FB is displayed.
4.
Press STEP DOWN for the function block menu.
5.
Turn the pulser knob to scroll through the available function blocks and press STORE to add the function block
to the configuration.
6.
To make changes to a function block parameter turn the Pulser Knob to EDIT FB.
Содержание 353
Страница 12: ...Contents UM353 1B x April 2012 ...
Страница 22: ...Introduction UM353 1B April 2012 1 10 ...
Страница 30: ...Configuration Overview UM353 1B April 2012 2 8 ...
Страница 122: ...Function Blocks UM353 1B April 2012 3 92 ...
Страница 168: ...Data Mapping UM353 1B April 2012 6 28 ...
Страница 204: ...Controller and System Test UM353 1B April 2012 9 8 ...
Страница 222: ...Calibration UM353 1B April 2012 11 4 ...
Страница 226: ...Circuit Description UM353 1B April 2012 12 4 ...
Страница 238: ...Model Designation and Specifications UM353 1B April 2012 13 12 EC Declaration of Conformity ...
Страница 239: ...UM353 1B Model Designation and Specifications April 2012 13 13 Annex A to the EC Declaration of Conformity ...
Страница 240: ...Model Designation and Specifications UM353 1B April 2012 13 14 ...
Страница 244: ...Abbreviations And Acronyms UM353 1B 14 4 April 2012 ...


