Scanning
_ 3
page 1.)
•
Back:
Returns to the previous screen.
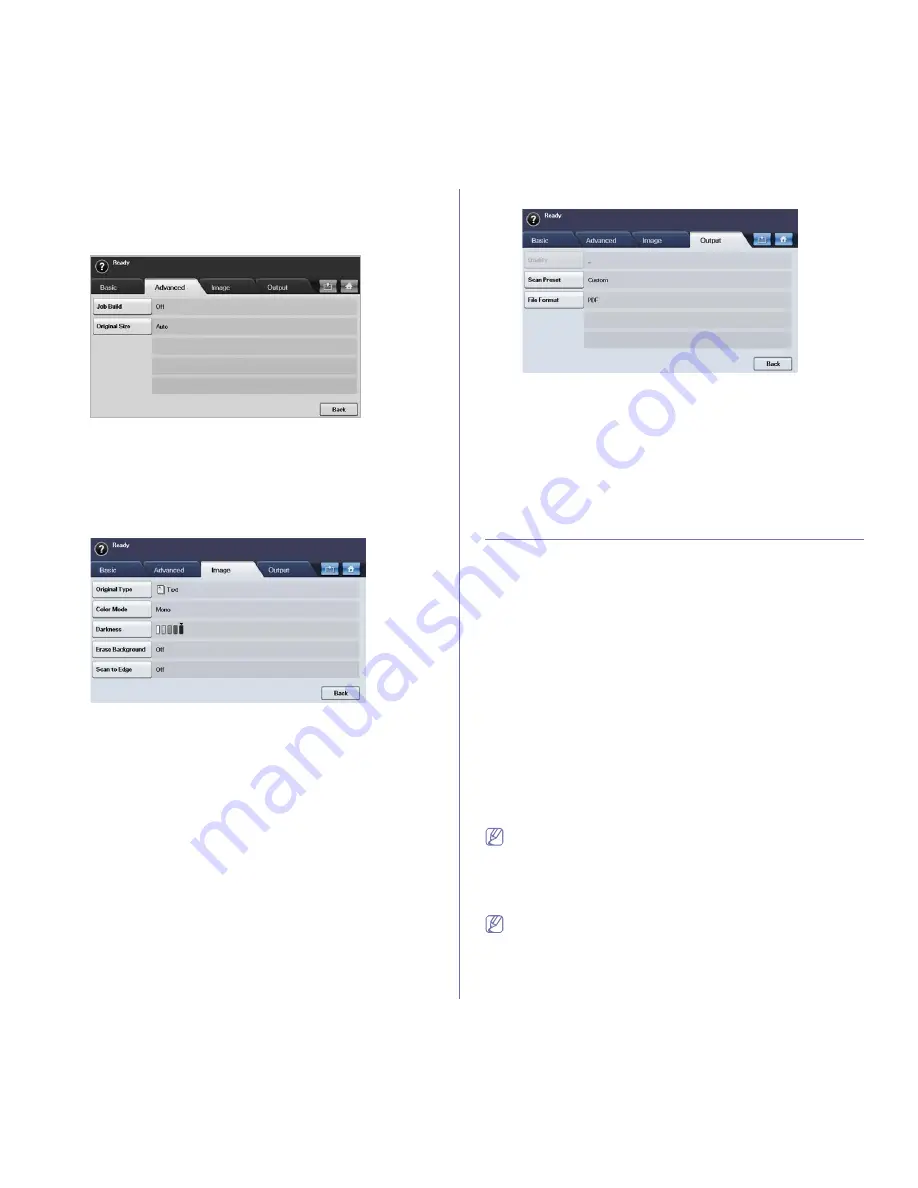
Advanced tab
•
Job Build:
Allows you to scan several originals, and then send them in
a single email or send them to a server(s) at once. (See "Scanning and
sending multiple documents in a single email" on page 4 or see
"Scanning and sending to SMB/FTP server" on page 6.)
•
Original Size:
Selects the size of originals.
•
Back:
Returns to the previous screen.
Image tab
•
Original Type:
Selects whether the original is text or photo. (See
"Original Type" on page 8.)
•
Color Mode:
Adjusts the color options of the scan output. If the original
is color and you want to scan in color, press
Color Mode
. (See "Color
Mode" on page 8.)
•
Darkness:
Adjusts the degree of darkness of the scan output. Use
left/right arrow to adjust the values. (See "Darkness" on page 9.)
•
Erase Background:
Erases backgrounds like paper patterns. (See
"Erase Background" on page 9.)
•
Scan to Edge:
Scans originals from edge-to-edge. (See "Scan to
Edge" on page 9.)
•
Back:
Returns to the previous screen.
Output tab
•
Quality:
Adjusts the display quality of the scan output. (See "Quality" on
page 9.)
•
Scan Preset:
Automatically changes some scan options, such as file
format, resolution, and more. You can adjust options to fit each specific
purpose. (See "Scan Preset" on page 10.)
•
File Format:
Selects the file format of the scan output. (See "File
Format" on page 9.)
•
Back:
Returns to the previous screen.
SCANNING ORIGINALS AND SENDING
THROUGH EMAIL (SCAN TO EMAIL)
You can scan the originals and email the scanned image to several
destinations from the machine by email.
Setting up an email account
To scan and send an image as an email attachment, you need to set up
network parameters using SyncThru™ Web Service.
1.
Turn your networked computer on and open the web browser.
2.
Enter your machine's IP address as the URL in a browser.
3.
Click
Go
to access the SyncThru™ Web Service.
4.
Log in to the SyncThru™ Web Service as an administrator. (See "Using
SyncThru™ Web Service" on page 1)
5.
Click
Settings
>
Network Settings
>
Outgoing Mail Server(SMTP)
.
6.
Enter the server address in dotted decimal notation or a host name.
7.
Enter the server port number, from 1 to 65535.
The default port number is 25.
8.
Check the box next to
SMTP Requires Authentication
to require
authentication.
9.
Enter the SMTP server login name and password.
10.
Click
Apply
.
If the authentication method of SMTP server is POP3beforeSMTP,
check the box next to
SMTP Requires POP3 Before SMTP
Authentication
.
a)
Enter the IP address in dotted decimal notation or as a host name.
b)
Enter the server port number, from 1 to 65535. The default port
number is 25.
If SMTP server requires SSL/TLS connection, enable Secure E-mail
Connection with SSL/TLS
Содержание SCX-5835 Series
Страница 14: ...Regulatory information_ 22 CHINA ONLY ...


