Management tools
_ 3
Changing the Smart Panel Program Settings
Right-click (in Windows or Linux) or click (in Mac OS X) the Smart Panel
icon and select
Options
. Select the settings you want from the
Options
window.
SMARTHRU OFFICE
The supplied software CD provides you with
SmarThru Office. SmarThru
Office
offers you convenient features to use with your machine.
Starting SmarThru Office
Follow the steps below
to start SmarThru Office:
1.
Make sure that your machine and computer are turned on and properly
connected to each other.
2.
Once you have installed SmarThru Office, you will see the SmarThru
Office icon on your desktop.
3.
Double-click the SmarThru Office icon.
4.
The SmarThru Office appears.
For more information, click
Help
>
SmarThru Office help
.
Quick Start Guide
This menu displays direct buttons for some features. The direct buttons
include:
Categories
,
Binder
,
Life Cycle
,
Scan and OCR
,
Fix and
Enhance
, and
Samsung Website
. You can disable this menu by checking
“
Do not show this diaglog again
”.
Using SmarThru Office
Scanning
1.
Click scan icon.
•In Windows XP operating system, you can use SmarThru
Office launcher, which is on the right end of taskbar, to
easily open the
Scan Setting
window.
•In other operating systems beside Windows XP, click the
SmarThru icon
in the tray area of the windows taskbar
to activate the SmarThru Office
launcher.
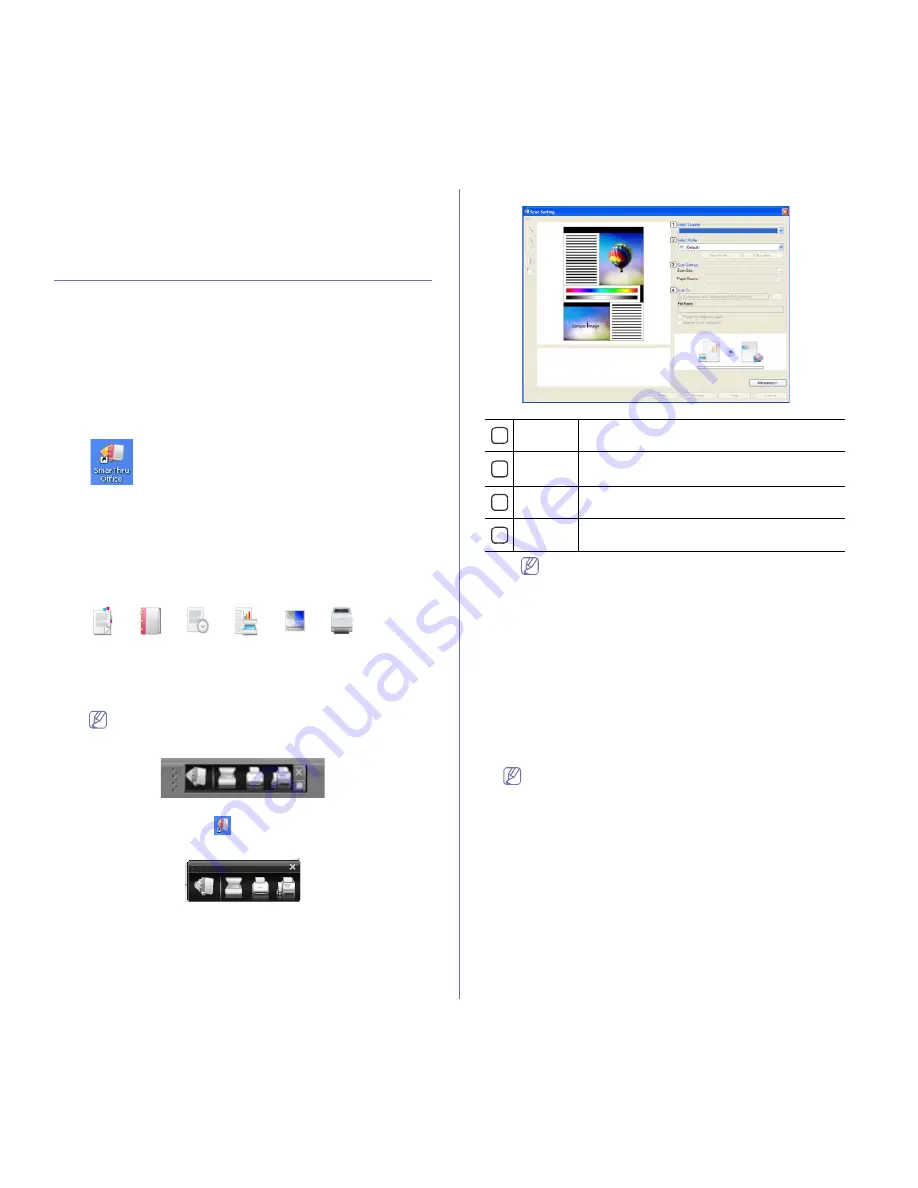
2.Scan Setting
window opens.
Click
Advanced
button to set more scan options.
3.
Set scan settings and click
Scan
.
For more information, click
Help
>
SmarThru Office help
.
Send to
FTP
You can upload files to an FTP server while working on SmarThru
Office.
1.
Select
File
>
Send to
>
Send By FTP
.
2.Send By FTP
window opens.
3.
Add your file and click
Upload
.
You can send email while working on SmarThru Office.
You need an email client program, such as Outlook Express, to
send email in SmarThru Office. Procedure for sending email may
differ depending on email client program you are using.
1.
Select
File
>
Send to
>
Send By E-mail
.
2.
An email client opens.
3.
Type in necessary information and send your email.
1
Select
Scanner
Allows you to select between the Local or Network
scanner.
2
Select
Profile
Allows you to save settings frequently used for
future use. Click
New Profile
to save the setting.
3
Scan
Settings
Allows you to customize settings for
Scan Size
and
Paper Source
.
4
Scan To
Allows you to customize settings for
File Name
and location to send scanned data.
Содержание SCX-5835 Series
Страница 14: ...Regulatory information_ 22 CHINA ONLY ...


