161
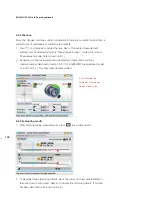
6.3.5 Results
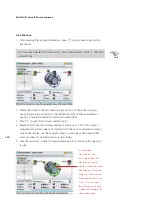
1. Press
RES
to evaluate results.
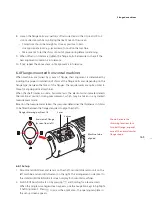
Sign convention
POSITIVE GAP opens towards 0:00 or 3:00
POSITIVE OFFSET if the top machine is towards 0:00 or 3:00
Remember, viewpoint is always determined by looking from the sensor towards
the laser emitter. Note the little white clock face on the laser serves as a reminder
of this.
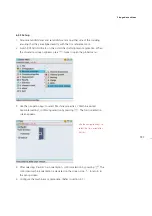
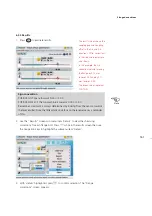
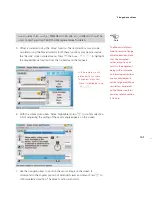
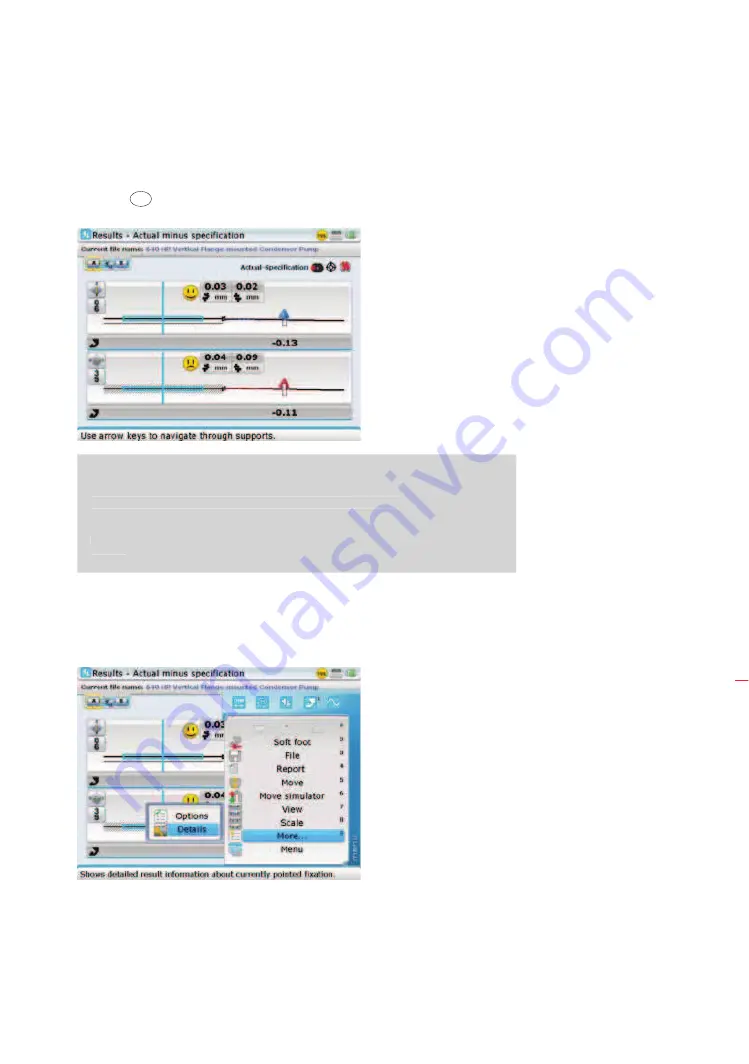
2. Use the “Results” screen sub menu item ‘Details’ to view the shimming
corrections for each flange bolt. Press
q
while in the results screen then use
the navigation keys to highlight the submenu item ‘Details’.
3. With ‘details’ highlighted, press
e
to confirm selection. The “Flange
corrections” screen appears.
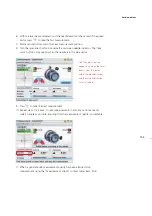
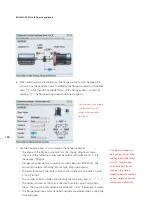
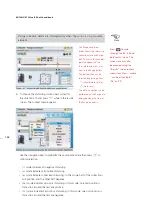
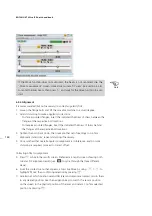
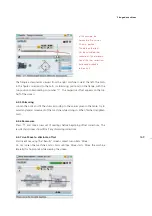
The results screen shows the
coupling gap and coupling
offset in the 0-6 and 3-9
directions. Offset corrections
in the side and top view are
also shown.
In this example, the 0-6
correction indicates moving
the flange by 0.13 mm
towards 0:00 and by 0.11
mm towards 3:00.
The screen values represent
POSITION.
Sign convention
POSITIVE GAP opens towards 0:00 or 3:00
POSITIVE OFFSET if the top machine is towards 0:00 or 3:00
Remember, viewpoint is always determined by looking from the sensor towards
the laser emitter. Note the little white clock face on the laser serves as a reminder
of this.
Note
Flanged machines
Содержание ROTALIGN Ultra iS
Страница 1: ...ROTALIGN Ultra iS Operating handbook Shaft alignment...
Страница 11: ...ROTALIGN Ultra iS Shaft handbook 10 This page intentionally left blank...
Страница 56: ...55 Horizontal shaft alignment 1 2 4 5 6...
Страница 123: ...ROTALIGN Ultra iS Shaft handbook 122 Page intentionally left blank...
Страница 141: ...ROTALIGN Ultra iS Shaft handbook 140 This page intentionally left blank...
Страница 177: ...ROTALIGN Ultra iS Shaft handbook 176 Page intentionally left blank...
Страница 207: ...ROTALIGN Ultra iS Shaft handbook 206 Page intentionally left blank...
Страница 213: ...ROTALIGN Ultra iS Shaft handbook 212 Declaration of conformity...
Страница 219: ...ROTALIGN Ultra iS Shaft handbook 218...

