ROTALIGN
®
Ultra iS Shaft handbook
154
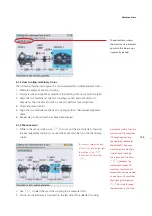
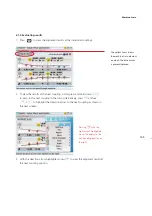
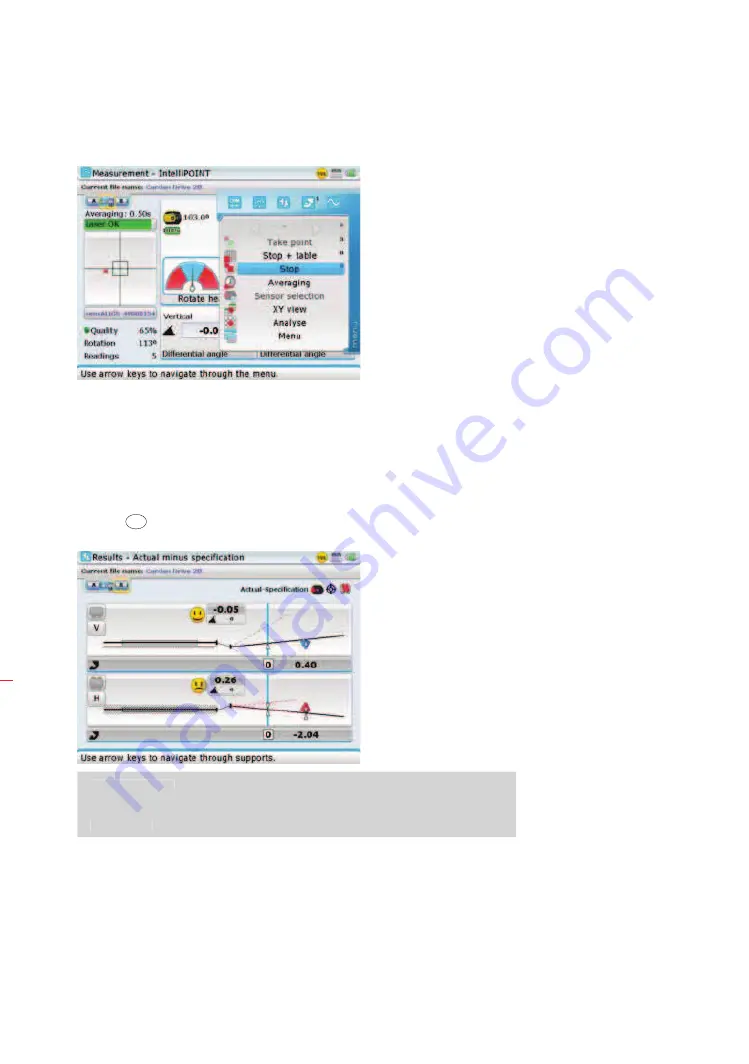
Stop measurement by using
f
/
g
to highlight ‘Stop’ then pressing
e
to
confirm selection.
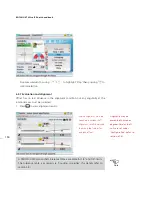
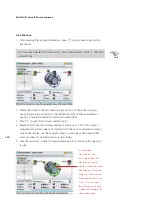
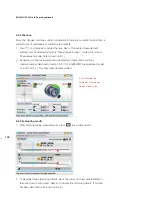
6.2.7 Evaluation and alignment
Offset has no real influence in the alignment condition but any angularity at the
rotational axes must be corrected.
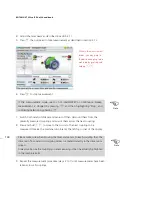
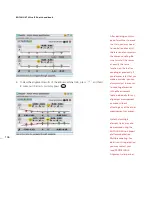
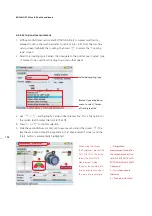
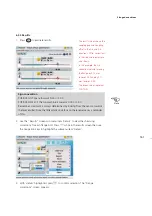
1. Press
RES
to view alignment results.
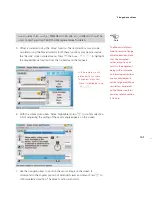
A PRÜFTECHNIK cardan shaft tolerance table is available for 1/2° and 1/4° limits.
The tolerance table is accessed via ‘Coupling properties’ (for details refer to
section 4.9).
Angularity may be
presented in mrad or
degrees. Cardan shaft
units are set under
‘Configuration’ (refer to
section 8.1.3).
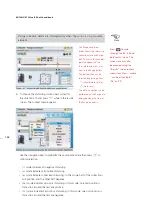
As only angularity must be
corrected in cardan shaft
alignment, results displayed
show only foot values for
one pair of feet.
Note
A PRÜFTECHNIK cardan shaft tolerance table is available for 1/2° and 1/4° limits.
The tolerance table is accessed via ‘Coupling properties’ (for details refer to
section 4.9).
Содержание ROTALIGN Ultra iS
Страница 1: ...ROTALIGN Ultra iS Operating handbook Shaft alignment...
Страница 11: ...ROTALIGN Ultra iS Shaft handbook 10 This page intentionally left blank...
Страница 56: ...55 Horizontal shaft alignment 1 2 4 5 6...
Страница 123: ...ROTALIGN Ultra iS Shaft handbook 122 Page intentionally left blank...
Страница 141: ...ROTALIGN Ultra iS Shaft handbook 140 This page intentionally left blank...
Страница 177: ...ROTALIGN Ultra iS Shaft handbook 176 Page intentionally left blank...
Страница 207: ...ROTALIGN Ultra iS Shaft handbook 206 Page intentionally left blank...
Страница 213: ...ROTALIGN Ultra iS Shaft handbook 212 Declaration of conformity...
Страница 219: ...ROTALIGN Ultra iS Shaft handbook 218...

