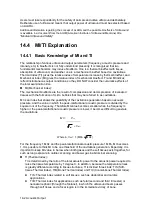
Probes and Biopsy 12-37
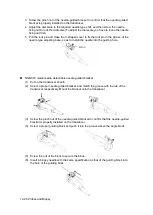
(2) Turn on the knob of fixing guiding block and remove the guiding block from the hole
of installing guiding block.
(3) Turn on the knob of fixing needle-guided bracket and remove the needle-guided
bracket.
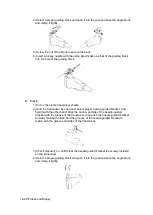
NGB-010
(1)
Remove the guiding block slightly along the direction of the needle’s tail, and
separate the residual part of the needle-guide bracket and the transducer from the
needle.
(2) Remove the support of needle-guided bracket from the transducer.
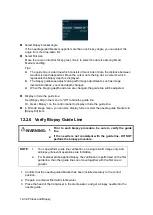
NGB-016
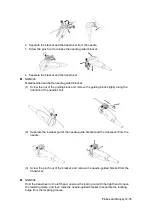
1. Screw the nut of the guiding block and remove the guiding block slightly along the
direction of the needle’s tail.
2. Separate the residual part of the needle-guide bracket and the transducer from the
needle.
3. Screw the pinch nut of the bracket, and remove the needle-guided bracket from the
transducer.
4. Separate the transducer and the needle-guided bracket.
12.2.9 Clean and Sterilize the Needle-guided Bracket
Cleaning
1. Wear sterile gloves to prevent infection.
2. Or, wash with clean water or soapy water to remove all the foreign matters, or, wipe the
bracket with a soft ethyl carbamate sponge.
3. Wipe off the water on the needle-guided bracket using sterile cloth or gauze after
washing it.
Please follow the instructions in the manual for cleaning.
Sterilization
1. Wear sterile gloves to prevent infection.
Содержание DP-50 Exp Vet
Страница 2: ......
Страница 34: ...2 6 System Overview 2 6 Introduction of Each Unit Right View Left View...
Страница 42: ......
Страница 68: ......
Страница 128: ......
Страница 148: ......
Страница 166: ...10 18 DICOM For details on tast manager see 9 6 Animal Task Manager...
Страница 180: ......
Страница 220: ......
Страница 224: ......
Страница 236: ......
Страница 242: ......
Страница 248: ......
Страница 249: ...Acoustic Output Reporting Table 60601 2 37 C 1 Appendix C Acoustic Output Reporting Table 60601 2 37...
Страница 342: ...D 2 Printer Adapter Type Model SONY X898MD...
Страница 343: ...P N 046 017713 02 1 0...


