3-6 System Preparation
1. Connect the data cable with the USB port on the ultrasound system.
2. Plug the other end power plug into an appropriate outlet.
3. Power on the system and the printer.
4. Check the printer status:
Enter [Setup]-> [Print Preset]->
“Printer Driver” page, printers that are installed
automatically will be displayed in the list with the “Status” of “Ready”.
5.
Return to “Print Service” page, and select “Report Print” in the list, and set attributes in
the Property box under the screen:
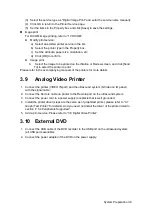
Select the printer model from the drop-down list right to the
“Printer”;
Set Paper Size.
Data cord
USB port
Power cord
Содержание DP-50 Exp Vet
Страница 2: ......
Страница 34: ...2 6 System Overview 2 6 Introduction of Each Unit Right View Left View...
Страница 42: ......
Страница 68: ......
Страница 128: ......
Страница 148: ......
Страница 166: ...10 18 DICOM For details on tast manager see 9 6 Animal Task Manager...
Страница 180: ......
Страница 220: ......
Страница 224: ......
Страница 236: ......
Страница 242: ......
Страница 248: ......
Страница 249: ...Acoustic Output Reporting Table 60601 2 37 C 1 Appendix C Acoustic Output Reporting Table 60601 2 37...
Страница 342: ...D 2 Printer Adapter Type Model SONY X898MD...
Страница 343: ...P N 046 017713 02 1 0...


