background image

9-16

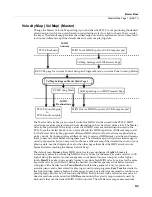
Master Mode

MIDI Transmit (XMIT)

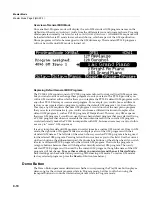
Program Change (ProgChange)

When


ProgChang


is


set


to


On

,


the


PC3LE


sends


program


change


commands


to


its


USB


or


MIDI


Out


port


when


you


select


programs


or


setups


from


the


front


panel


or


from


your


MIDI


controller.


Select


a


value


of


Off


when


you


want


to


change


programs


on


the


PC3LE


but


don’t


want


to


send


program


change


commands


to


the


USB


or


MIDI


Out


port.


This


parameter


doesn’t


affect


the


type


of


program


change


command


that’s


sent;


it


just


determines


whether


any


command


is


sent


at


all.


(The


type


of


program


change


command


is


determined


by


the


BankMode


parameter


on


the


CH/

PROG


page


in


the


Setup


Editor


of


your


control


setup.


See


The


Setup


Editor

on page 7

5


for


more


details.)


Note:


The


ProgChang


parameter


applies


to


all


modes


except


Song


mode


and


Setup


mode


(or


when


a


setup


is


loaded


from


Quick


Access


mode.)


Setups


disregard


the


ProgChang


setting


and


instead


use


the


EntryProgChg


parameter


on


the


SetupMode:CH/PROG


page


(See


The


Channel/Program


(CH/PROG)


Page on page 7

6.)


Songs


disregard


this


ProgChang


setting


and


instead


use


the


ProgChang


parameter


on


the


Song:Event


Filter


Playback


page,


accessed


from


the


PLYFLT


soft


button


in


Song


mode.

Change Setups (ChgSetups)

This


parameter


determines


the


exact


timing


of


setup


changes


when


you


select


a


different


setup—either


by


a


normal


data


entry


method


or


via


MIDI


program


change


commands.


Choose


KeyUp


to


indicate


that


you


want


setup


changes


to


take


place


only


when


you’ve


released


all


currently


held


notes.


Choose


Immediate


to


indicate


that


you


want


such


changes


to


happen


immediately


when


you


select


the


setup.

Содержание PC3LE

Страница 1: ...arks of Young Chang Co Ltd All other products and brand names are trademarks or registered trademarks of their respective companies Product features andspecificationsaresubject tochangewithoutnotice Y...

Страница 2: ...fied service personnel when A The power supply cord or the plug has been damaged B Objects have fallen or liquid has been spilled into the product C The product has been exposed to rain D The product...

Страница 3: ...cles and the point where they exit from the apparatus 11 Only use attachments accessories specified by the manufacturer 12 Use only with a cart stand tripod bracket or table specified by the man ufact...

Страница 4: ...304 Derry Avenue C Agoura Hills California 91301 USA telephone 800 994 4984 fax 818 597 0411 Email Info AmericanMusicAndSound com Kurzweil Co LTD iPark Building 102 Floor 9 Jeongja Dong 9 Bundang Gu S...

Страница 5: ...ter 2 Startup Make Connections 2 1 Make Music 2 1 Startup the Details 2 2 Before You Start 2 2 Connecting the Power Cable Line Cord 2 2 Connecting Audio Cables 2 2 Connecting MIDI 2 3 Pedals 2 3 Switc...

Страница 6: ...on Presses 3 11 Intuitive Controller Selection Data Entry 3 12 Search 3 12 Quick Song Recording and Playback 3 13 Chapter 4 The Operating Modes What the Modes Are 4 1 Selecting Modes 4 1 Finding Squar...

Страница 7: ...Chapter 7 Setup Mode Split Layer Button 7 2 Adding a Split Zone 7 2 Adding a Layer Zone 7 4 Tap Tempo Button 7 4 The Setup Editor 7 5 The Channel Program CH PROG Page 7 6 Program 7 6 Destination 7 6 C...

Страница 8: ...Effects Overview 7 59 The FX Page 7 61 The AUXFX1 and AUXFX2 Pages 7 62 The COMMON Page 7 63 Tempo 7 63 Clock Source 7 64 Arpeggiator Global ArpGlobal 7 64 Aux FX Channel 7 64 KB3 Channel 7 64 TRIGGER...

Страница 9: ...5 Program Change ProgChange 9 16 Change Setups ChgSetups 9 16 MIDI Receive RECV 9 17 Basic Channel 9 17 MIDI Receive Mode MIDI Mode 9 17 Velocity Map Receive 9 18 Pressure Map Receive 9 19 All Notes O...

Страница 10: ...1 Song Mode The FX Pages 10 12 Song Mode The MIXER Page 10 12 The Rec Play and Stop Soft Buttons 10 12 The Keep Soft Button 10 13 The Done Soft Button 10 13 Song Mode The METRONOME Page 10 13 Metronom...

Страница 11: ...ameters for Edit Song Track Functions 10 22 Region Criteria Box Parameters 10 22 Soft Buttons on the TRACK Page 10 23 Song Editor Track Functions 10 24 Erase 10 24 Copy 10 24 Bounce 10 25 Insert 10 26...

Страница 12: ...akes 13 8 Part 6 Adjusting The Volume Of Each Instrument 13 10 Part 7 Learning More About Song Mode 13 15 Chapter 14 Tutorials Setup Mode The Setup Editor 14 3 Using And Editing A Split Program Setup...

Страница 13: ...Song Recording And Playback Record An Idea From Any Mode 15 5 Program Mode 15 6 Setup Mode 15 8 Appendix A Specifications MIDI Implementation Chart A 1 Specifications A 2 Appendix B PC3LE Bootloader U...

Страница 14: ...x...

Страница 15: ...with riffs or control other functions Assignable knobs use the shift button to access 3 different functions for each knob to control up to 15 parameters Convenient knob presets each preset has its own...

Страница 16: ...arts An on board sequencer Song mode with front panel transport buttons lets you record your musical ideas any time inspiration strikes The PC3LE has 64 voice polyphony with 16 multi timbral channels...

Страница 17: ...rs and DSP tools can produce stunningly realistic analog emulations as well as never before heard synthetic sound scapes How to Use This Manual This manual describes how to connect and power up your P...

Страница 18: ...mb drive into the PC3LE for backing up archiving sharing your work and updating your software Any size USB mass storage device will work though thumb drives are recommended for their portability durab...

Страница 19: ...rubber feet and attach them now near each corner all on the same level 3 Connect the power cable 4 Make sure your sound system is at a safe volume level Also make sure that the PC3LE s MASTER VOLUME...

Страница 20: ...ce the risk of a shock Connecting Audio Cables Analog After you ve turned down the level on your sound system connect the PC3LE s analog audio outputs to your sound system using a pair of stereo or mo...

Страница 21: ...ving Storage mode will restore USB MIDI functionality USB MIDI and 5 pin MIDI can be used at the same time the MIDI signals will be combined into a single 16 channel MIDI stream Pedals Plug your switc...

Страница 22: ...ugh thumb drives are recommended for their portability durability and low price The USB Storage port is on the back panel of the PC3LE but it is easily accessible from the front of the instrument A US...

Страница 23: ...r desktop One important thing to know here is that this is a virtual drive You can save to this drive from the PC3LE but you must immediately transfer that file to your desktop or other folder You mus...

Страница 24: ...imary function The PC3LE has various settings for responding to MIDI Program Change commands from external sources These are explained in Chapter 9 so we won t go into them here You should be able to...

Страница 25: ...uttons simultaneously to return transposition to zero The Panic button or a double press of Shift and Enter at the bottom of the alphanumeric keypad sends an All Notes Off message and an All Controlle...

Страница 26: ...of factory preset or user programmed banks Each bank contains ten memory slots or entries where you can store any combination of programs or setups While you re in Quick Access mode you can select an...

Страница 27: ...0 and Type 1 MIDI sequences Storage mode Load and save programs setups sequences and other objects via USB Software Upgrades It s easy to upgrade the PC3LE s operating system and objects programs setu...

Страница 28: ...2 10 Startup Software Upgrades...

Страница 29: ...Editor Master mode Define performance and control characteristics for the entire PC3LE and how your PC3LE sends and receives MIDI information Song mode Use the PC3LE s sequencer to record and play bac...

Страница 30: ...l Each of the five Assignable Controls can control three separate functions independently giving you access to knob control of 15 parameters Use the Shift button to the left of these knob controls to...

Страница 31: ...tches to toggle between accessing switches 1 5 or 6 10 Pressing this Shift button will light one of the LEDs of the two rows of labels below the Assignable Switches This lets you know which set of swi...

Страница 32: ...ite program in that category by using the Alpha wheel buttons or up down cursor buttons Alternatively you can find the program by pressing the category Shift button and using the numbered category but...

Страница 33: ...though some programs use the pitch wheel to lower pitch by as much as an octave The Pitch Wheel has a spring so that it will snap back to place i e back to the original pitch when you release it The M...

Страница 34: ...de and its editor s the various pages are selected with the navigation buttons There are many pages but there are a few features common to each page This is the entry level page for Program mode The T...

Страница 35: ...the soft button is labeled in lower case or mixed case letters Save for example the soft button performs some kind of function The Cursor Buttons To the right of the display are four buttons arranged...

Страница 36: ...ocated to the left of the display activates each of the PC3LE s editors Pressing the Edit button tells the PC3LE that you want to change some aspect of the object marked by the cursor For example when...

Страница 37: ...the plus or minus button corresponds to one click to the right or left with the Alpha Wheel These buttons will repeat if pressed and held Pressing the plus and minus buttons simultaneously will move...

Страница 38: ...nal value by pressing Cancel Pressing Clear is the same as pressing 0 without pressing Enter When entering names you can use the Left Right cursor buttons or the soft buttons to move the cursor to the...

Страница 39: ...ght cursor buttons Brings up Tap Tempo page Song mode Up Down cursor buttons Toggle between Play and Stop Chan Zone Select all tracks on any TRACK page in Song Editor Left Right cursor buttons Brings...

Страница 40: ...ar as the value for the LoKey parameter Repeat the process for the HiKey parameter Search You can find programs or setups by searching for a string of characters from the Program or Setup mode main pa...

Страница 41: ...ng track and recording mode are determined by the current settings in Song mode likewise for the playback mode when you re playing a song When the sequencer status is STOPPED neither the Record button...

Страница 42: ...3 14 User Interface Basics Quick Song Recording and Playback...

Страница 43: ...urrent operating mode Pressing one of the mode buttons selects the corresponding mode This is the mode s entry level At the entry level the LED of the selected mode is lit Only one mode can be selecte...

Страница 44: ...others These are Program Setup and Quick Access modes We ll describe each of the six modes briefly in this section Program Mode The PC3LE starts up in Program mode where you can select play and edit...

Страница 45: ...ton Different banks are selected with the Chan Zone buttons There s a selection of factory preset banks and you can use the Quick Access Editor to create your own banks and store them in the PC3LE s m...

Страница 46: ...4 4 The Operating Modes Using the Modes...

Страница 47: ...lly write your editing changes to memory until you save the object you re working on It then allows you to choose between writing over the original object or storing the newly edited version in a new...

Страница 48: ...he original object Double press the and buttons beneath the Alpha Wheel to select the next available user location Objects of different types can have the same ID but objects of the same type must hav...

Страница 49: ...rently selected character Press the or soft buttons to move the cursor without changing characters Press an alphanumeric button one or more times to enter a character above the cursor The characters t...

Страница 50: ...press the buttons simultaneously to toggle between the ID that the PC3LE suggested and the original ID Or press the Cancel soft button to cancel the operation If you decide not to cancel or change the...

Страница 51: ...he cursor one space to the right each time you strike a key just like a typewriter or computer keyboard This is the most convenient setting l L Delete move characters left one space Move cursor left o...

Страница 52: ...ll delete the object and all its dependent objects when you execute the Delete function Continuing with the example from above if you were deleting the setup you created and you chose to delete depend...

Страница 53: ...C3LE s assignable knobs switches pedals and wheels can be used to control a program specific parameter or to send MIDI continuous controller values to external equipment Each factory program has some...

Страница 54: ...heir ID s can be found at kurzweil com When not in General MIDI mode default programs used for GM mode can be accessed starting at ID 4096 see General MIDI on page 9 9 for details The PC3LE has variou...

Страница 55: ...ch as three octaves up or down The top line of the display shows the current amount of transposition Xpose Pressing both Xpose buttons simultaneously returns the transposition to zero The Xpose button...

Страница 56: ...m mode the Arpeggiator 2 page has no SyncTo SyncType or Num Beats parameters as it does in Setup mode Split Layer Button Press the Split Layer button to create a split or layered setup using the curre...

Страница 57: ...in detailed and more realistic programs Each layer is also routed through sophisticated digital signal processing DSP algorithms which shape the tone and other behaviors of the sounds KB3 programs use...

Страница 58: ...3 Mode Effects Buttons Assignable Switches When using a KB3 program the PC3LE s assignable switches control KB3 effects The LEDs of the assignable switches indicate the status of the various effects f...

Страница 59: ...used for emulating different aged organs as an older organ will have more leakage as it ages and its capacitors begin to leak The Mod Wheel controls Distortion Drive Switch Pedal 1 the sustain pedal c...

Страница 60: ...volume 7 87 100 volume 6 73 86 volume 5 58 72 volume 4 44 57 volume 3 30 43 volume 2 16 29 volume 1 0 15 volume 0 0 minimum volume 127 maximum volume Values between 0 and 127 scale between minimum an...

Страница 61: ...er a physical controller or MIDI CC number which that parameter is controlled by For each parameter selected the right top line of the page displays what type of parameter it is The three parameter ty...

Страница 62: ...ume of your programs will stay consistent and can always be changed by the expression pedal If you want a program to have a default volume you must set a MIDI Value other than None for the Expression...

Страница 63: ...are set in cents where 100 cents 1 half step For both Bend parameters positive values will cause the pitch to bend up while negative values will cause the pitch to bend down Large positive values can...

Страница 64: ...e pads channel A value of Self uses the same effects resources as the current channel saving effects resources for other tracks To turn the pads off set this parameter to None by entering 0 Note Chann...

Страница 65: ...signal from all active programs aux sends A Note About Processor Power Allocation Each effects Chain is composed of an effect box or a series of effect boxes Each effect box uses a certain amount of...

Страница 66: ...ll appear in the field to the right You can also use the Chan Zone buttons to the left of the display to change the insert number being viewed The insert s chain name will usually give you a clue abou...

Страница 67: ...or Num Beats parameters as it does in Setup mode The Program Editor Utility Soft Buttons Import Arpeggiator Settings ImpArp The ImpArp button allows you to import arpeggiator settings from other prog...

Страница 68: ...a CC number to a source field the number may be displayed in the source field as the name of that CC s default use VAST Program Structure The diagram below depicts the hierarchy of a V A S T Program...

Страница 69: ...nel and control assignments Selected for performance and editing in Program mode up to 32 layers per program A keymap processed through an algorithm modulated by control sources Up to 128 sample roots...

Страница 70: ...will switch between layers The Soft Buttons in the Program Editor The Program Editor s soft buttons are labeled by the words that appear in the bottom line of the display These buttons have two impor...

Страница 71: ...the original program Pressing the Storage button again returns you to the Program editor Using the Compare Editor makes no changes to the current program FX Bypass Press the Master button to bypass o...

Страница 72: ...ge Therefore you ll need to check the KeyTrk value on both pages to see how key tracking works within a program Unless you re looking for nonstandard note intervals the values of the KeyTrk parameters...

Страница 73: ...characteristics The nature of the change depends on the timbre itself so this parameter calls for experimentation Basically timbre shifting changes a note s timbre by imposing different harmonic quali...

Страница 74: ...set AltMethod to Switched and move the Mod Wheel at least half way up at Note Start the sample will begin at the pre set alternate start point in this case slightly past the initial chiff If you set t...

Страница 75: ...lue higher than the HiVel value the layer will not play at all High Velocity HiVel Similarly this will set the highest attack velocity at which the layer will be enabled Attack velocities above this t...

Страница 76: ...ated at each note start based on the status of the delay control source at that time Minimum Delay MinDly Maximum Delay MaxDly When using Delay Control DlyCtl see above the length of the delay before...

Страница 77: ...program This is useful for drum programs since you can define a different velocity trigger level for each of the 32 layers available in drum programs First set the Enable parameter for the Layer 1 to...

Страница 78: ...a note is held otherwise the sounds will sustain forever press the Cancel and Enter buttons simultaneously to stop sustained notes This parameter can come in handy when your PC3LE is slaved to a drum...

Страница 79: ...e Architecture Synthesis Technology The DSP functions are synthesis tools filters oscillators etc that you assign to the various stages of the algorithm The DSP functions you choose determine the type...

Страница 80: ...t through a one stage DSP function that controls the pitch of the samples in the keymap this function is represented as a block labeled PITCH in the upper right hand corner of the display In fact the...

Страница 81: ...arameters the function parameters are accessible on both the DSPCTL page and the DSPMOD page They are listed along the left hand side of each page any changes made to them on one page are reflected in...

Страница 82: ...le C is the zero point Regardless of the key tracking value there is no effect on Middle C If you set a nonzero value for key tracking the effect increases for each note above or below Middle C In the...

Страница 83: ...lue of LFO1 then set the Minimum Depth parameter to 100 ct and Maximum Depth to 1200 ct Then set the Depth Control parameter to MWheel This lets you use the Mod Wheel to vary the depth of the oscillat...

Страница 84: ...esponds to its non cascade equivalent which has the same ID number minus 100 For example algorithm 105 is a cascade mode version of algorithm 5 On the Alg page select which layer you want to have runn...

Страница 85: ...e parameter you wish to edit The Output Mode parameter determines the number of outputs from the algorithm With Output Mode set to Normal the algorithm has one output With Output Mode set to Sep L R t...

Страница 86: ...n parameter you wish to edit and then press the button to move the cursor into the subpage The label of a function parameter depends on its corresponding function block in the current layer s algorith...

Страница 87: ...ion parameter By assigning control sources to modulate a function parameter you can enable real time control of your program s sound and behavior You can assign Src1 to any control source and can spec...

Страница 88: ...OM drum programs have layer specific effects in which case the OUTPUT page for layers with layer specific effects will have the additional parameters Out Gain Out Pan and Out Mode The following page i...

Страница 89: ...ge values below 64 shift it left while those above 64 shift it right A setting of Auto assigns the pan setting of each note based on its MIDI note number In this case Middle C MIDI note number 60 is e...

Страница 90: ...es the new PC3LE drum map all other factory drum programs use this map 120 241 248 369 376 The new drum map is similar to that of the PC2 except tom tom sounds have been moved into octave C3 C4 so the...

Страница 91: ...positive values can cause samples to bend to their maximum upward pitch shift before the Pitch Wheel is fully up or down This will not happen when bending pitch down Monophonic When off the program is...

Страница 92: ...s you two ways to get portamento See the Attack Portamento parameter below When applying portamento to multi sampled sounds Acoustic Guitar for example the PC3LE will play more than one sample root as...

Страница 93: ...ect applied to all the notes you play You d use a local LFO controlling pitch to create a vibrato for a solo violin since you want to be able to vary the rate and depth of the vibrato for each note Ou...

Страница 94: ...LFO1 is always local meaning that it s triggered with each Note On event and runs independently for each note in the layer LFO2 is local by default but can be made global This is done on the COMMON p...

Страница 95: ...IDI controller and you ll hear the LFO s rate change when you move its Mod Wheel Select different LFO Shapes and check out the effect on the pitch LFO Phase Use this parameter to determine the startin...

Страница 96: ...elease section no sustain At a setting of Repeat the ASR will cycle through the attack and release sections then loop forward and cycle through again until the ASR s trigger switches off If the mode i...

Страница 97: ...any other control source Using the FUNs involves defining them on the FUN page then assigning one or more of them as control sources The FUN page looks like this There are three parameters for each F...

Страница 98: ...ha Wheel a click The value Natural will change to User and a set of AMPENV parameters will appear The sound will change when you do this because the default settings for the User envelope as shown in...

Страница 99: ...ve to their assigned levels in the time specified Their starting levels are equal to the final levels of the preceding segment Decay Segment The decay section has only one segment It has values for ti...

Страница 100: ...elope has played once through its normal cycle Regardless of the loop type and the number of loops each note goes into its release section as soon as its Note State goes off that is when a Note Off is...

Страница 101: ...ontrolled by Keytrk and VelTrk the resulting change on Attack would be affected by the combination of the values produced by KeyTrk and VelTrk Also note that unlike previous Kurzweil models ENVCTL doe...

Страница 102: ...attack velocities greater than 64 make the attack section run faster and attack velocities below 64 make it run slower This gives you realtime attack control over the envelope Source Depth These two...

Страница 103: ...ry press the Delete soft button you will be prompted to confirm or cancel To return to the program editor press the Done soft button or the Exit button See Export on page 11 11 for details on exportin...

Страница 104: ...the highest numbered layer in the program Import Layer ImpLyr Copy a specific layer from another program into the current program This button brings up a dialog that prompts you to select a layer numb...

Страница 105: ...velope more on using Natural mode later Finally look at the ALG page In the current algorithm the 3 block KVA oscillator PWM has been selected which generates the sound for this layer of the program M...

Страница 106: ...ed oscillators for most applications The tables below list KVA oscillators by type and function block size Before setting an oscillator you must choose an algorithm which includes a block that matches...

Страница 107: ...ific functions and other parameters To add a DSP function to the Sync Square oscillator you ll need to use cascade mode For example to add a filter duplicate one of the layers to create layer 3 On lay...

Страница 108: ...instead of changing any parameters on the DSPCTL page press the DSPMOD soft button to reach the DSP Modulation page On the left side of the screen choose the parameter for LP Frq and then press the ri...

Страница 109: ...sine oscillator that can add an input signal to its output The Sin Pch and Sine Am parameters affect the pitch and amplitude of the sine waveform without affecting the pitch of the input source RES N...

Страница 110: ...es are not usually heard in these layers see the note below for exceptions Keymap selection is important because the maximum amplitude set for each key in the keymap is applied to the oscillator For m...

Страница 111: ...an specify which sample you wish to use the number of tone wheels which will affect how many other voices are available to you and other related settings Upper Tone Wheel Keymap Use this parameter to...

Страница 112: ...tone wheel We ve provided several tone wheel volume maps here based on measurements we ve taken on different organs Equal is a map with all tone wheels at the same volume It s not based on a real B3 B...

Страница 113: ...l change Choose either 0 8 to approximate the drawbar settings on actual organs or choose 0 127 for a finer degree of resolution Volume This parameter appears only if you ve set Mode see above to Pres...

Страница 114: ...e no Hz KeyTrk or VelTrk parameters For a full description of the PITCH page parameters see Common DSP Control Parameters on page 6 29 The DSP Control DSPCTL Page on page 6 33 and The DSP Modulation D...

Страница 115: ...ou play while at least one key is held down get no percussion You can turn percussion on or off by pressing Assignable Switch 6 SW6 labeled Percussion On Off Assignable Switch 6 also sends and respond...

Страница 116: ...m Controls which drawbar is used as the basis for the percussion when Harmonic is set to Low On an actual tone wheel organ this is Drawbar 4 2nd harmonic The actual pitch obtained depends on the drawb...

Страница 117: ...ick on or off With KeyClick set to Off you may still hear a click depending on your Note Attack and Note Release settings see below You can turn key click on or off by pressing Assignable Switch 10 SW...

Страница 118: ...volume level below which key click must decay before it will be retriggered Note Attack Controls the attack characteristic of notes Normal provides a smoothed attack while a setting of Hard has an ins...

Страница 119: ...een 0 and 127 scale between 96 dB and 0 dB When using CC 24 the value displayed for the Leakage parameter will not change LeakMode Selects between different leakage models determining which leakage ha...

Страница 120: ...Depth 1 43 85 Depth 2 86 127 Depth 3 VolAdjust Provides an overall volume adjust for the KB3 model Use this parameter to normalize KB3 programs with other programs BendRngUp BendRngDn Respectively co...

Страница 121: ...ge Use this page to route the current program s post FX signals The two Pan parameters correspond to those of the VAST Program editor OUTPUT page See page 6 36 The Out Gain and Demo Song parameters co...

Страница 122: ...lding where an octave or part of an octave is repeated at the top or bottom of the keyboard is handled automatically by KB3 Mode emulating the folding done on actual tone wheel organs Early Tone Wheel...

Страница 123: ...to enter Setup mode you ll see a list of setups with the currently selected setup highlighted in the middle of the list Select a setup by scrolling through the list with the Alpha Wheel cursor buttons...

Страница 124: ...split or layer zone to the currently selected setup You will be brought to the Split Layer page Press the LoSplt or UpSplt soft button to add a new zone to the lower or upper half of the keyboard or p...

Страница 125: ...he new zone you are creating but no keys above it will trigger this zone If you are on the Split Layer UPPERSPLIT page the Split Key will become the lowest key that plays in that zone The Split Key an...

Страница 126: ...reating Select the field for the LowKey parameter and choose your Low Key by holding the Enter button on the alphanumeric pad and playing a key You can also use the Alpha Wheel or buttons to enter a n...

Страница 127: ...allowing you to compare your edited setup with the original setup Pressing the Storage button again returns you to the Setup editor Using the Compare Editor makes no changes to the current setup FX B...

Страница 128: ...h the local program and bank numbers You can enter the Program Editor for the program on the currently selected zone by selecting the Program field and pressing the Edit button to the left of the disp...

Страница 129: ...e create two or more zones that are identical except for their transposition settings Now you can play parallel intervals or chords with single keystrikes MidiBank The PC3LE s programs are divided int...

Страница 130: ...ction below for details on setting an Input Channel To play the entire Setup from an external MIDI device see Local Keyboard Channel LocalKbdCh on page 9 21 When Local Keyboard Channel is set to somet...

Страница 131: ...h the Kurzweil K2000 K2500 or K2600 The Bank Select message is sent as Controller 32 with a value between 0 and 127 The K2000 K2500 and K2600 support only 10 banks with 99 programs per bank so Program...

Страница 132: ...can also scroll through the list of controllers in the Control field by selecting the Control field with the cursor buttons and using the Alpha Wheel or the buttons to scroll through the list Once yo...

Страница 133: ...es pressure Note Aside from the Pressure settings on the Controllers page MIDI pressure values can be affected by settings you make on other pages See Pressure Map Press Map Master on page 9 5 for an...

Страница 134: ...set the Scale parameter to 100 and set the Offset parameter to 127 This makes the selected controller send a value of 127 when all the way down and a value of 0 when all the way up To get an idea of h...

Страница 135: ...ENT Page on page 10 31 or to an external sequencer To see the CC number being used for a parameter you can temporarily change the DestType parameter to Ctrl to see the CC number in the Dest field Some...

Страница 136: ...choose SW Momentary in the Type field the control will send the value for its OnValue parameter when pressed and the value for its OffValue parameter when released If you choose SW Toggled in the Typ...

Страница 137: ...mines whether an initial setting for the switch will be sent when the setup is selected and what that initial setting will be There are three choices None no setting is sent when the setup is loaded O...

Страница 138: ...o assign a Riff Lastly use the Zone field to set the desired zone that you wish to control with the current pad You can control either the current zone or all zones See below for parameter explanation...

Страница 139: ...gned to play a Riff the pad will light up blue when the riff is started Trig Mode Trigger Mode With Trig Mode set to Start Stop the pad will act as a toggled switch meaning it will alternate between s...

Страница 140: ...SB out ports destinations 0 127 will only perform their named function if the external equipment has the capability to do so Most of these named functions correspond to the MIDI standard for continuou...

Страница 141: ...notes that are currently down but not notes played subsequently 67 Soft Lowers the volume by a preset amount and may soften the timbre as well see SW Pedal 1 2 Arp switch Arp latch sw Switch 1 10 on p...

Страница 142: ...129 PitchRev Pitch values above and below 64 bend the pitch down and up respectively 130 PitchUp Pitch values above 0 bend the pitch up 131 PitchDwn Pitch values above 0 bend the pitch down 132 Press...

Страница 143: ...154 ArpLmtOp Arpeggiator Shift Limit Option each range of values selects one of seven options in order on parameters list 0 18 19 36 37 54 55 72 73 90 91 108 109 127 SeeThe ARPEGGIATOR Page on page 7...

Страница 144: ...lects bank 2 controller value 7 selects bank 7 SeeThe ARPEGGIATOR Page on page 7 35 173 VelPatt Selects one of the 128 patterns in the current ARPEGGIATOR VelPatt Bank SeeThe ARPEGGIATOR Page on page...

Страница 145: ...ift Pattern for the desired zone in order for Shift Key Number to have an effect To select a Shift Pattern for the current zone in a setup enter the setup editor and go to the Arpeggiator page by pres...

Страница 146: ...se a key is to set Shift Key to Last Note Played mode in which the last note played in the zone will set the key For example you could set the zone being used for Shift Key Number to have a Key Range...

Страница 147: ...n 12 steps will trigger notes in every octave over a shorter range of the controller For example in a shift pattern with 3 steps by default the controller values 0 to 2 will trigger notes starting in...

Страница 148: ...ables you to control the initial MIDI pan setting for each zone of the current setup When you select a setup in Setup mode MIDI channels for zones that have an Entry Pan value other than None will rec...

Страница 149: ...ng mode that you are using Low Key LoKey High Key HiKey The LoKey and HiKey parameters define the note range of the currently selected zone The easiest way to change these values is to press and hold...

Страница 150: ...aults to C4 but you can change this with the Transpose parameter This works well when you want the sound from a particular key to play with every note of another zone for example playing a ride cymbal...

Страница 151: ...This is useful for creating velocity based crossfades between zones See the following section on Velocity Offset for ideas about negative scaling The following illustration shows what happens when you...

Страница 152: ...ity available will be 102 while any keystroke 25 or below will produce a velocity of 1 a velocity value of zero has a special meaning in MIDI and cannot be used for Note Ons You can think of Scale as...

Страница 153: ...l end up as zeroes well ones actually since a MIDI note on with velocity zero is something else So to get true inverse scaling that is minus 100 you must set an offset of 127 to get the full range of...

Страница 154: ...ocity differences less than with a linear curve while when you re playing hard you ll notice velocity differences more Compress produces a velocity curve that is the opposite of the expanded curve tha...

Страница 155: ...set one parameter instead of two MIDI Velocity 127 0 127 Strike Velocity 64 64 Velocity Curve Linear Velocity Curve Bump Velocity Curve Crossfade as you hit the keys harder increase the velocity MIDI...

Страница 156: ...nt sounds depending on how hard you strike it The values can be anywhere from 1 to 127 As with other parameters zones can overlap or be totally discrete or be identical Usually LoVel will have a small...

Страница 157: ...keyboard You have control over several processing parameters velocity order duration transposition orchestration whether the notes are played simultaneously and whether the intervals between notes ar...

Страница 158: ...ical order in which you played and latched them Upwards means that notes play in ascending pitch order regardless of their chronological order Downwards means descending pitch order UpDown causes note...

Страница 159: ...ived from the first note played as the center position to shift velocities up or down from If no other keys are playing patterns will start over each time a key is pressed there are some exceptions to...

Страница 160: ...f the randomization range Each note of the arpeggiator will randomly choose a velocity within the given range See the table below for velocity ranges The Chimp1 through Chimp4 settings function in a s...

Страница 161: ...t Limit Limit determines how far up or down the Arpeggiator shifts from the original note The minimum value is 0 and the maximum is 60 When the Arpeggiator reaches the limit the Arpeggiator responds a...

Страница 162: ...the Arpeggiator cycle is C4 Shift Amount is 4 a third and Shift Limit is 7 so notes won t get shifted above G4 The Arpeggiator plays C4 then E4 The next note should be G 4 but that s above the shift...

Страница 163: ...each key often making the pattern unrecognizable Though triggering a Shift pattern from multiple keys can be used creatively it can also make it hard to predict what the output will be You can edit th...

Страница 164: ...to return to the ARPEGGIATOR page When exiting the editor it will automatically give you the option to save the pattern if changes have been made For more detailed instructions on these functions see...

Страница 165: ...oller is on notes will arpeggiate only while you are holding down keys similar to Keys mode If you activate Controller 158 the keys currently held down will latch and any additional keys played while...

Страница 166: ...keeper Maybe you want to start with the lead arpeggiation in zone 2 and have the bass arpeggiation in zone 1 start later In this case you would set the SyncTo parameter for zone 2 to FirstArp Av With...

Страница 167: ...ggiators are running As soon as you start something to sync to the bass arpeggiator will start playing as well provided that it is set to sync to something else or the first available If another arpeg...

Страница 168: ...ysical controllers to special arpeggiator Controller Destinations Any input or entry value from a physical controller assigned to an arpeggiator Controller Destination overrides the programmed values...

Страница 169: ...e 0 63 off 64 127 on 171 ShiftPatt Selects one of the 128 patterns in the ShiftPatt Bank for the ARPEGGIATOR page of a controller s zone 172 ShiftPBank A controller value selects the corresponding Shi...

Страница 170: ...he CH PRG page of the Setup Editor choose the program that you want to use for the riff on the current zone Program changes that are recorded in song mode will be ignored when using the song as a riff...

Страница 171: ...59 Since there are 960 possible start points within a beat you can specify your riff to start on any common beat subdivision moments and a few uncommon ones The following Tick values correspond to the...

Страница 172: ...SrcTrack for each zone To create a setup with a single riff that plays multiple instrument parts set SrcTrack to ALL Each track of the sequence will play its track through the zones which have corresp...

Страница 173: ...value change as you press a key Next move your cursor to the right to highlight the second value of the Trigger field this will be the high end of the trigger key range Use one of the methods describe...

Страница 174: ...CondRel parameter allows you to have a riff play only while a key is pressed and held and nothing will stop or restart that riff until the key is released To use conditional release set the same range...

Страница 175: ...s with the program used for each channel in the song so it s best to make a setup that uses the same programs as your song on the same MIDI channels If you plan on syncing riffs with a song it may be...

Страница 176: ...playing to sync to the current riff will wait for the playing riff or song to restart its loop if it is looped before starting see Loop on page 7 52 for looping riffs and Loop on page 10 11 for loopi...

Страница 177: ...to to begin playing first before releasing This is similar to DownBeatWait but it will only release the riff the first time that whatever it is syncing to starts This way you can trigger the riff to...

Страница 178: ...at controller s zone The override remains in effect until you select a different setup Remember each of the following Controller Destinations affects only the riff for the zone which your controller i...

Страница 179: ...tune the value for Bend Range semitones 100 cents equals one semitone or one half step you can set this parameter anywhere between 0 and 100 cents BendRangeUp in both semitones and cents affects all...

Страница 180: ...roller to it s center position by hand In these cases it is useful to use a separate controller for bending only up or down For example to have a knob only bend up use a knob with an Offset value of 6...

Страница 181: ...n be set to be applied either pre or post Insert Effect see Signal Flow below for details Chains The object used for Insert and Aux Effects is referred to as a Chain A Chain is a sequence of up to 8 e...

Страница 182: ...ect see the Insert Effects and Aux Effects sections above If you are using both types of effects for a zone or track in Song Mode you can choose to have your signal sent to the Aux effects before or a...

Страница 183: ...ble effects allocation for the MIDI channels of less important zones tracks This is done on the FX page in either Setup or Song mode which provides per channel control over effects allocation see belo...

Страница 184: ...s parameter switches on or off the Aux override Set Override to Yes to select an override Aux Chain on this page Set Override to No to allow Aux FX chain of the program for the current zone or track i...

Страница 185: ...Alpha Wheel or buttons Pre means that the Aux Send takes place before any Insert Effect is applied whereas a setting of Pst means that the Aux Send takes place post Insert Effect Of course if the prog...

Страница 186: ...ls on the arpeggiator for each Zone see The ARPEGGIATOR ARPEGGIATOR 2 ARP1 ARP2 Pages on page 7 35 Aux FX Channel The Aux FX Channel determines the FX channel through which the aux sends of all of the...

Страница 187: ...more detailed instructions on saving see Saving and Naming on page 5 3 Delete This erases a setup from memory freeing up space to store setups in other locations You can check the free memory in the P...

Страница 188: ...e the Mod Wheel to choose Arp latch sw for the controller field alternatively the Arp Enable button Arp switch can be used On the Controllers page for Arp latch sw use the cursor buttons to select the...

Страница 189: ...t the song in Song mode just as you would with any other song see Song Mode and the Song Editor on page 10 1 Each program from each zone in your setup is automatically assigned to a track change the R...

Страница 190: ...ng zones and do not change the controller destination assignments for each new zone Often this is the desired behavior such as when using zones to create layers For example if zone one sends pitch ben...

Страница 191: ...C numbers set for the control setup Don t edit the control setup unless you are an advanced MIDI user who needs to send specific MIDI CC s to external equipment You can save multiple versions of a con...

Страница 192: ...de it is best to set transposition settings with Xpose or Octav soft buttons on the Program Mode main page see The Program Mode Page on page 6 2 An overall velocity response adjustment is best made wi...

Страница 193: ...umeric pad then press Enter The bank is selected and you return to the Quick Access mode page Each bank contains ten memory slots or entries where you can store programs or setups in any combination A...

Страница 194: ...Master mode MIDI Transmit page The QA Editor Use the QA Editor to customize existing QA banks Enter the QA editor from QA mode by pressing the Edit button The top line gives you the usual mode reminde...

Страница 195: ...he setup list Just as with programs the cursor highlights the setup s ID and name Use the Alpha Wheel or buttons to scroll through the setups You can also use the alphanumeric pad followed by the Ente...

Страница 196: ...8 4 Quick Access Mode The QA Editor...

Страница 197: ...nal factory settings When you exit Master Mode the PC3LE saves a Master Table The Master Table remembers the settings of the Master pages as well as the state of the PC3LE such as which programs are a...

Страница 198: ...t of PC3LE program notes and not notes sent via MIDI Transpose Like the Tune parameter above Transpose affects every PC3LE program but not those notes sent to the MIDI Out port You can adjust the MIDI...

Страница 199: ...ck velocity before and after reaching the Master Velocity Map The default map Linear allows MIDI velocities to pass unchanged Light 1 3 make it increasingly easier to produce high MIDI velocity values...

Страница 200: ...lues for all MIDI sources and destinations used in the PC3LE see the circled box above for its location in the MIDI signal flow Different maps used for the Pads Velocity Map generate different MIDI ve...

Страница 201: ...ifferent curve to received MIDI pressure aftertouch values and remaps them to new values before letting them pass The default map provides the widest range of pressure aftertouch expression but you ma...

Страница 202: ...each of the semitones in a single octave used for all octaves by setting pitch offsets for each note in cents Scroll through the list of Intonation maps and listen for the differences between semiton...

Страница 203: ...tervals The original tuning of Classical European music 3 Just Flat 7th Similar to classic Just but with the Dominant 7th flatted an additional 15 cents 4 Harmonic The perfect 4th Tritone and Dominant...

Страница 204: ...put Setting this parameter to Variable makes the Digital Output respond to changes made on the volume slider Setting this parameter to Fixed makes the Digital Output output a signal with a fixed volum...

Страница 205: ...ing takes place in Program mode When the Master Page Drum Remap is set to GM the PC3LE remaps Drum programs to the GM drum map General MIDI This parameter enables or disables General MIDI GM mode You...

Страница 206: ...ce that uses GM program 1 would now use the new harpsichord program that you selected Using a PC3LE program that does not resemble the instrument named in the current GM program would technically make...

Страница 207: ...ond to every button press on the first instrument just as if you were pressing the buttons of the second one Keep in mind that both devices must be in exactly the same state the same page in the same...

Страница 208: ...and determines if the PC3LE s sound engine will receive MIDI data Select the desired destination or any combination of destinations depending on your needs For example a value of Local disables the U...

Страница 209: ...ach track determines this in a song The value for this parameter matches the current MIDI channel displayed on the top line of the Program mode page If you change the current MIDI channel while in Pro...

Страница 210: ...ws MIDI velocities to pass unchanged Maps Light 1 3 make it increasingly easier to produce high MIDI velocity values for the same key strike velocity with Light 3 being the easiest so these maps may w...

Страница 211: ...MIDI data sent from Song mode or to the PC3LE s sound engine The default map provides the widest range of pressure aftertouch expression but you may want to choose a different map if the default does...

Страница 212: ...or more details Note The ProgChang parameter applies to all modes except Song mode and Setup mode or when a setup is loaded from Quick Access mode Setups disregard the ProgChang setting and instead us...

Страница 213: ...g of Poly the PC3LE responds only to events that are sent on the same channel as the PC3LE s current MIDI channel the one displayed on the top line of the Program mode page In Poly mode the currently...

Страница 214: ...make it increasingly easier to produce high MIDI velocity values for the same key strike velocity with Light 3 being the easiest so these maps may work better for users who play with a lighter touch...

Страница 215: ...ffect on MIDI data sent from the PC3LE s keyboard The default map provides the widest range of pressure aftertouch expression but you may want to choose a different map if the default does not suit yo...

Страница 216: ...ram change commands received via MIDI See Program Change Formats on page 9 25 for an explanation of the various values available for this parameter System Exclusive ID SysExID The SysExID parameter di...

Страница 217: ...OG page which matches the channel on which the external MIDI device is transmitting If no Zone s Channel parameter matches the external device will play the program that was last used by that channel...

Страница 218: ...C number to the channel which contains the program Using External CCs In Program Mode Local Keyboard Channel Enabled To control a program parameter via external MIDI CC in Program Mode the parameter m...

Страница 219: ...different channel these CCs will be received normally by the Program in the Setup Zone for that channel Using External CCs In Setup Mode Local Keyboard Channel None Input Channel Enabled To control a...

Страница 220: ...6 8 CTL6 8 22 27 Knob 8 CTL8 85 Knob 9 CTL9 28 Knob 10 CTL10 30 Knob 11 15 CTL11 15 102 106 Programmable Switches 1 10 SW1 10 68 77 Control Setup Default Assignments PC3LE Physical Controller Controll...

Страница 221: ...front panel selecting programs is as simple as entering the program s object ID on the alphanumeric pad and pressing Enter Even program numbers above the usual MIDI limit of 127 can be selected this w...

Страница 222: ...LE system causes ALL parameters to be restored to default values and ALL user objects to be erased Delete Press the Delete soft button to delete the master table which stores all settings on the Maste...

Страница 223: ...volume level Nonetheless this can give you a valuable indication of how your voices are being used For example if all or most of the voices are active then there s a good chance that when voice steali...

Страница 224: ...f there is enough internal memory available for the objects being loaded If there is not enough internal memory available use the Delete soft button to delete user objects To save user objects before...

Страница 225: ...u answer Yes to this question all dependent objects of the selected objects are deleted unless they are being used as dependents of other objects that are to remain in memory Answering No will delete...

Страница 226: ...9 30 Master Mode UTILITIES...

Страница 227: ...sounds with a sequencer Rather you are recording commands that cause sounds to be played Nonetheless we will sometimes explain sequencer features by drawing analogies to familiar tape recording techni...

Страница 228: ...you record your first track will be the song s initial tempo During playback the current tempo is shown in this field During recording tempos dialed in here get recorded in the Tempo Track The initial...

Страница 229: ...d An initial program is the program that will be used for a track when it is played from the start of bar 1 or any other point if there are no program changes and Control Chase is turned on see Contro...

Страница 230: ...see Song Editor The EVENT Page on page 10 31 Setting Initial Values For All Tracks An important last step before saving a finished song is to store initial values of Program Volume and Pan for all tra...

Страница 231: ...ick of a track Initial Pan settings are not automatically written during recording because they make it harder to try out different Pan settings for a track For example an initial Pan setting will res...

Страница 232: ...Pan are set to NONE then the track for that channel uses the Pan setting of that channel in Program mode or Quick Access mode If there is no zone that uses certain channels used by your song then thos...

Страница 233: ...play the same program the one on the higher numbered track since that s the most recent Program Change command received on that channel Soft Buttons on the MAIN Page This section contains description...

Страница 234: ...cTrk set to None If this is not done you will simultaneously record to the external sequencer and the selected RecTrk if in Song Mode or activate the Quick Song Recording function from other modes Thi...

Страница 235: ...in part of the song without listening to the whole thing The Playing field displays whether to NEW or OLD data is playing Stop halts the playback of either the Old or the New version of the song you a...

Страница 236: ...ading a new song if the MAIN page settings were changed while recording or with recording armed or if any of the BIG page settings were changed For more detailed instructions see Saving and Naming on...

Страница 237: ...With the RecMode parameter set to Unloop any existing tracks will be played back as if they were looping from the Time In to the Time Out point but they are actually being re recorded linearly over ab...

Страница 238: ...the screen displays current settings for the selected track including program number and name panning and volume Changing the settings for a track s program volume or panning while the sequencer is re...

Страница 239: ...modes in which the metronome plays With Metronome set to Off the metronome never plays With Metronome set to Rec the metronome only plays during recording With Metronome set to Always the metronome p...

Страница 240: ...Vel This parameter determines the velocity of the note played by the metronome for the downbeats the 1 of each measure Soft Note This parameter determines the MIDI number of the note played by the me...

Страница 241: ...ng playback With Notes set to On only the notes within the specified note range with velocities within specified velocity range are recorded played LoKey LoKey determines the lowest key that is record...

Страница 242: ...Controllers is set to On LoVal LoVal determines the lowest value for the specified controller that is recorded played back when Controllers is set to On Hi The Hi to the right of LoVal determines the...

Страница 243: ...from the beginning of the song up to the current time are computed and the most recent non note MIDI event is sent out before starting playback This ensures that the volume panning program changes an...

Страница 244: ...oaded at a given time in the system These include the current song the compare song buffer and up to 16 riffs The STATS page shown below is the state of the PC3LE event pool with 0 New Song selected a...

Страница 245: ...k 1 16 or all tracks All of the values for the parameters found in any of the Song editor pages are saved in the song object Song Editor The COMMON Page Press the Edit button on the front panel of the...

Страница 246: ...r tracks 1 8 or 9 16 Use the Chan Zone buttons to the left of the display to select one of the tracks 1 8 viewed in the top right corner of the page in order to access tracks 1 8 or select one of the...

Страница 247: ...Editor you can scroll through modify add or delete any or all of the tracks MIDI events The EVENT page is described on page 10 31 Rec Play and Stop function as described in The Rec Play and Stop Soft...

Страница 248: ...saving and then redo each of the changes you made That s why it s usually best to save after each successful edit Common Parameters for Edit Song Track Functions Locate This parameter is available for...

Страница 249: ...ted controller s recorded data Value ranges are not definable when Ctl is set to All Available Values are 0 127 Soft Buttons on the TRACK Page FromTo is a quick way to define the region of time you in...

Страница 250: ...rack use the Events parameter in the Region Criteria box to select a specific MIDI event type you would like the edit function to affect Some event types provide you more criteria selection parameters...

Страница 251: ...n track Bounce Use the Bounce function to move the selected events from the current track to another track either merging with or overwriting existing data on the destination track The Bounce function...

Страница 252: ...n you perform this function rather they are offset by the length of the blank time being added to a Bar and Beat later in the song Amount Bars Beats Ticks The length of the blank time being added is d...

Страница 253: ...rid 1 1 to 1 480 This setting determines the size of the Quantize grid expressed as a fraction of a Bar with a 4 4 meter Set Grid to 1 1 for whole note grid 1 16 for sixteenth notes All of the standar...

Страница 254: ...dary location Amount Bars Beats Ticks The Ticks parameter specifies the number of bars beats and ticks that the MIDI events from within the selected region are moved forward for positive values or bac...

Страница 255: ...track is All tracks then the destination track will be All tracks as well No matter what channel the current track source track in the source song is set to when you use the grab function the events...

Страница 256: ...the original or scaled values Values for velocities can not be less than 1 or greater than 127 Values for controllers can not be less than 0 or greater than 127 As an example to set all Velocities to...

Страница 257: ...Control Source List 0 to 127 The New parameter is set to the Controller code you wish to have use the existing values once used by the Old Controller to produce a different effect Song Editor The EVE...

Страница 258: ...tial program volume and pan settings for the current track See Song Mode The MAIN Page on page 10 1 for details on initial settings for program volume and pan Each of these parameters can be set to NO...

Страница 259: ...k use the channel up down buttons to navigate to track 1 then press channel down The tempo track functions the same as the other tracks except the only event type available is tempo change Event Type...

Страница 260: ...10 34 Song Mode and the Song Editor Song Editor The EVENT Page...

Страница 261: ...ge Mode Page To enter Storage mode press the Storage button and the Storage mode page will appear Use this page to select the storage device you wish to use The currently selected device will be read...

Страница 262: ...d for their portability durability and low price Note Most USB thumb drives are compatible with the PC3LE but some older USB thumb drives and larger USB bus powered drives will not work with the PC3LE...

Страница 263: ...on Saved files will temporarily appear on the PC3LE virtual drive on your computers desktop and you then must copy your saved files to another location on your computer You must copy data from the PC3...

Страница 264: ...a page that has the Path field if their are any directories available in the root directory you will be able to choose them from a list using the alpha wheel cursor buttons or buttons Then press the O...

Страница 265: ...l up the File Name dialog see the following section and complete the storing process The File Name New Directory Rename Dialog When you create a new file in Storage mode create a new directory or rena...

Страница 266: ...n load individual objects if you want to See Loading Individual Objects on page 11 9 The Store Advanced Page Pressing the Select soft button calls up the Store Advanced page On this page you can selec...

Страница 267: ...d items Saving Master Table Files Among your choices on the Store Advanced page are Master Table files Master Table files consist primarily of the items on the Master mode pages as well as settings fo...

Страница 268: ...nce name can not be loaded the first eight characters of the file name will be used as the Song name Shortened song names can be renamed in Song mode Select Select or deselect the highlighted file An...

Страница 269: ...the object s number in the list as well as the object s type ID number and name The ID numbers are the same numbers that were used to reference the objects when the file was last saved by the PC3LE E...

Страница 270: ...ancel the mode selection and go back to choosing files The Utilities UTILS Page Pressing the UTILS soft button calls up the Utilities page Use the Utilities page to create directories folders on the c...

Страница 271: ...ss the ObjLst soft button You will be prompted to choose a directory to save into and then you will be prompted to name the file A comma separated value text file will be exported listing each object...

Страница 272: ...11 12 Storage Mode Format...

Страница 273: ...e At this point the keymap s job is done and the signal proceeds through the layer s algorithm and on to the audio outputs You can assign as many key ranges to a keymap as you like even creating a sep...

Страница 274: ...Editor is nested within the V A S T Program Editor To access the Keymap Editor press the Edit button while in Program Mode then press the V A S T soft button to enter the V A S T Program Editor The f...

Страница 275: ...parameter so that it plays at the correct pitch on the keyboard relative to its root key see Editing Samples on page 12 9 for details on the RootKey parameter Other keys within the key range transpose...

Страница 276: ...nge you are extending covers another velocity range the other velocity range will be deleted Coarse Tune Coarse Tune allows you to transpose a sample for a given range This is extremely useful when yo...

Страница 277: ...city range All key ranges in a keymap share the same velocity ranges Press the Split soft button to split the currently selected velocity range into two ranges until the maximum of eight velocity rang...

Страница 278: ...mind When you trigger the low and high notes the new key range is inserted If the new key range partially overlaps an adjacent key range the existing key range will be adjusted to accommodate the new...

Страница 279: ...the range assignment Each sample in a key range is automatically transposed based on each sample s RootKey parameter so that it plays at the correct pitch on the keyboard relative to its root key see...

Страница 280: ...o a key range from A 3 to E 4 Then you assigned the same sample to a key range from F 4 to B 4 You might be surprised to find that when you finished the F 4 B 4 key range and the Keymap editor page re...

Страница 281: ...ogram Editor and two keymaps must be selected see The KEYMAP Page on page 6 19 for details There are two sample editing pages MISC Miscellaneous and TRIM The soft buttons for these pages are visible w...

Страница 282: ...ope are complete Decay Rate affects each sample individually and is in effect only when the amplitude envelope for the program the Mode parameter on the AMPENV page in the V A S T Program Editor is se...

Страница 283: ...h control is Off or when the control source assigned to it is below its midpoint Ignore Release IgnRelease When set to a value of Off the sample will release normally when the note trigger is released...

Страница 284: ...can t decrease the Start point of samples below zero The Alternative Start A parameter lets you set a second optional start or end point for the current sample The Alternative Start will be used when...

Страница 285: ...nted by each display pixel A value of 1 256 means that each pixel represents 256 individual sample elements The maximum zoom setting of 1 shows you a very small segment of the sample The minimum setti...

Страница 286: ...12 14 Keymap and Sample Editing Editing Samples...

Страница 287: ...ack a song a k a a MIDI sequence in Song mode the PC3LE triggers each of the notes that you have recorded sort of like a player piano MIDI is very useful for recording songs with electronic instrument...

Страница 288: ...ind the value of an 8th note divide 960 by 2 since there are two 8th notes in a quarter note Divide 960 by 4 for 16th notes by 6 for 16th note triplets by 8 for 32nd notes and so on You can also use r...

Страница 289: ...be adjusted after recording as well see Chapter 10 Song Mode and the Song Editor for details on changing the tempo after recording 1 On the Song mode MAIN page use the cursor buttons to navigate to th...

Страница 290: ...just the Tempo parameter and press the Play Pause button to hear the metronome play the tempo For this example we will leave our previous Tempo setting of 100 0 4 Once you are happy with the tempo pre...

Страница 291: ...e will name the song My Song under ID 1025 See below for an explanation of this page Soft Button Functions On the Save Changes Page The PlyNew soft button allows you to play the song with your latest...

Страница 292: ...ou decide not to save or rename on the Song Save Changes page pressing the No soft button returns you to the Song mode page in which you were last recording Changes to the current song are not saved t...

Страница 293: ...rameter to an unused track number for example track 2 2 Set the instrument sound for the current track Use the cursor buttons to navigate to the Prog field and choose a program with the plus minus but...

Страница 294: ...and the Song Editor 1 On the Song mode MAIN page use the Chan Zone buttons to the left of the display to Set the RecTrk parameter to the track that you want to fix For example let s fix track 1 see be...

Страница 295: ...the song in order to re record the desired section Leave enough time usually a bar or two so that you will have time to prepare before the section you are replacing plays For this example we will set...

Страница 296: ...tial volume for each track Let s use the song we created in the parts above as an example Let s adjust the volume of track 1 and store the value as an initial volume setting 1 On the Song mode MAIN pa...

Страница 297: ...ch setting to be recalled at the song s beginning 6 Follow the above procedure in steps 4 and 5 to store current values as initial values after changing any volume pan or program parameters Note Most...

Страница 298: ...eview and save your changes just as in Step 4 of Part 3 see above Part 6 c Erasing Volume Automation If you ve saved a song with volume automation and you wish to change or remove it afterwords follow...

Страница 299: ...e automation from You can view the selected track number in the upper right corner of the screen 5 Set the Events parameter to Controllers see below 6 Set the Controller parameter to Volume You can do...

Страница 300: ...ton to delete the selected volume automation A screen will appear reading Erase Operation Completed Press the OK soft button to return to the EditSong TRACK page see below 9 Once back on the EditSong...

Страница 301: ...e In and Time Out points to equal an even number of bars such as 2 4 8 etc Recording into a looped section of bars is a common technique for recording sequence based music For example with a drum prog...

Страница 302: ...r the section and then change back to the original instrument sound after the section To do this simply press Record and Play Pause and then change the Prog parameter on the Song mode MAIN page to the...

Страница 303: ...ferent Zones 14 16 Assigning A Single Knob to Crossfade Between The Volume Of Different Zones 14 24 Switch Between Zones Based On Played Keyboard Velocity 14 29 Creating A New Setup 14 32 Basics Of Us...

Страница 304: ...and key ranges In each tutorial read the text for each step and look at the example display screen shots as a guide for following each step Important parameters that are mentioned in each step will be...

Страница 305: ...choice of soft buttons Press Rename to rename the setup before saving press No to return to the Setup mode main page without saving press Yes to choose an ID and save the setup press Cancel to return...

Страница 306: ...art 1 Load The Example Setup 1 Press the Exit button until you reach the ProgramMode page Next press the Setup mode button located with the mode buttons to the left of the display This will bring you...

Страница 307: ...e below 2 On the CH PROG page use the Chan Zone buttons to the left of the display to select Zone 1 see above You can view the number of the selected Zone in the top right corner of screen In the Prog...

Страница 308: ...his Zone end an octave higher by changing the LoKey field from E3 to E4 To do this select the LoKey field hold the Enter button on the alphanumeric pad and play E4 the E two whole steps above middle C...

Страница 309: ...you to the CH PROG page of the setup editor 4 Use the Chan Zone buttons to the left of the display to select Zone 1 You can view the number of the selected Zone in the top right corner of screen 5 On...

Страница 310: ...the left of the display This will bring you to the Setup mode main page 2 Use the buttons or Alpha Wheel to select the setup 38 Jazz Bass Piano or use the alphanumeric pad to enter 38 and press Enter...

Страница 311: ...o exit the Setup Editor and save your changes to this setup under a new ID See The Setup Editor section at the beginning of this chapter for details on saving when you exit the Setup Editor Alternativ...

Страница 312: ...p mode press the Exit button until you reach the ProgramMode page then press the Setup mode button located with the mode buttons to the left of the display This will bring you to the Setup mode main p...

Страница 313: ...er to 127 see below Now the Zone will play the piano program from only the right speaker For the EntryPan parameter a value of 64 plays the program at equal volume from left and right speakers A value...

Страница 314: ...e Setup mode button located with the mode buttons to the left of the display This will bring you to the Setup mode main page Next press 38 and then Enter on the alphanumeric pad to select the setup 38...

Страница 315: ...t select the Controller field with the cursor buttons Make sure the LED to the left of Timbre Knob is lit if it is not press the Shift button to the left of the Knobs until that LED is lit Next hold t...

Страница 316: ...age for Zone 1 Knob 1 should be left at their default values see above 8 Next lets repeat the steps above for Zone 2 using Knob 2 On the Controllers page use the Chan Zone buttons to the left of the d...

Страница 317: ...l or buttons to select a destination in the Dest field Knob 2 labeled Mod on the front panel should now control the volume of the piano which is on the upper half of the keyboard if not review the pre...

Страница 318: ...ues only range from 0 127 volumes that are changed by an offset get truncated to 0 or 127 if the addition of the offset to your current volume results in a value below 0 or above 127 Using an offset g...

Страница 319: ...r field with the cursor buttons Make sure the LED to the left of the Timbre Knob is lit if it is not press the Shift button to the left of the Knobs until that LED is lit Next hold the Enter button on...

Страница 320: ...age use the Chan Zone buttons to the left of the display to select Zone 3 see below You can view the number of the selected Zone in the top right corner of screen 9 On the Controllers page for Zone 3...

Страница 321: ...vious steps Zone 3 will always be 14 MIDI volume steps below Zone 2 because of the Offset parameter 13 To finish press the Exit button to the right of the display to exit the Setup Editor and save you...

Страница 322: ...page then press the Setup mode button located with the mode buttons to the left of the display This will bring you to the Setup mode main page Next press 58 and then Enter on the alphanumeric pad to s...

Страница 323: ...Wheel or buttons 6 With Knob 1 selected in the Controller field use the cursor buttons to select the DestType field and then use the Alpha Wheel or buttons to select Ctrl see below 7 With Ctrl selecte...

Страница 324: ...until that LED is lit Next hold the Enter button on the alphanumeric pad and move the Knob labeled Timbre This will select Knob 1 for the Controller field You can also set the desired controller in t...

Страница 325: ...e value set for Zone 3 For example if Knob 1 is sending a value of 127 Zone 2 will be at MIDI volume 127 while Zone 3 will be at MIDI volume 114 The value 114 is a result of the value sent by Knob 1 1...

Страница 326: ...iano and one of the pads or the piano and a blend of both pads 1 If you are not already in Setup mode press the Exit button until you reach the ProgramMode page then press the Setup mode button locate...

Страница 327: ...ntroller field with the cursor buttons Make sure the LED to the left of the Timbre Knob is lit if it is not press the Shift button to the left of the Knobs until that LED is lit Next hold the Enter bu...

Страница 328: ...lf way up than it would be with the standard Linear curve This allows for the pad sound to be closer to its full volume when Knob 1 is half way up which will give us an equal blend of both pad sounds...

Страница 329: ...the Alpha Wheel or buttons to select Ctrl see below 12 With Ctrl selected in the DestType field use the cursor buttons to select the Dest field In the Dest field press 7 and then the Enter button on...

Страница 330: ...step 8 above This is because we used the 100 Scale value for Zone 3 which makes the Expand curve boost middle values like the Compress curve usually does instead of decreasing middle values as Expand...

Страница 331: ...ranges in this way allows you to emphasize the dynamics of your playing by having more sounds come in as you play louder and having sounds drop out when you play more quietly 1 If you are not already...

Страница 332: ...t the same velocity range for Zone 3 Use the Chan Zone buttons to the left of the display to select Zone 3 see below You can view the number of the selected Zone in the top right corner of screen 7 On...

Страница 333: ...rial and additionally change the velocity range of the piano on Zone 1 so that it is not heard for velocities above 80 This way you only hear one sound at a time piano for low velocities and pads for...

Страница 334: ...f the display This will bring you to the Setup mode main page see below 2 Use the buttons or Alpha Wheel to select the setup 128 Default Setup or use the alphanumeric pad to enter 128 and press Enter...

Страница 335: ...eated and you will be brought to the CH PROG page for the new Zone You can view the number of the selected Zone in the top right corner of screen 6 On the CH PROG page for the new Zone select the Prog...

Страница 336: ...the Setup mode main page You will be presented with the message This setup has been edited Press Rename to save and name your setup press No to return to the Setup mode main page without saving or pr...

Страница 337: ...way to add a riff to a setup is to create a new zone which will be dedicated to playing a riff For this tutorial we will look at a setup that contains a drum riff and add a horn riff that will play i...

Страница 338: ...left of the display 5 We will use the new zone zone 6 to play a horn riff On the CH PROG page for zone 6 choose program 59 BigBand AMradio for the zone s program see below To do this enter 59 into th...

Страница 339: ...ts make the riff trigger only zone 6 and later we will make the riff trigger only from a pad Use the cursor buttons to select the SrcTrack field then use the Alpha Wheel or buttons to select 2 for the...

Страница 340: ...hanumeric pad Next use the cursor buttons to select G9 in the right most Release field and change it to C 1 by pressing 0 and then pressing the Enter button on the alphanumeric pad see below You can a...

Страница 341: ...will notice that the horn riff on pad 2 does not play at the same tempo as the drum riff on pad 1 The drum riff is playing at the tempo of the setup while the horn riff is playing at the tempo of its...

Страница 342: ...to select the field below SyncZone SyncType Use the buttons or the Alpha Wheel to select DownBeatWait for the SyncType field see below Now if you press pad 2 the PC3LE will wait until you press pad 1...

Страница 343: ...ollers page for zone 6 select SW Pedal 1 for the Controller field and select None for the OnControl and OffControl fields There are many possible ways to use riffs in a setup For example instead of tr...

Страница 344: ...button located with the mode buttons to the left of the display This will bring you to the Setup mode main page 2 Use the buttons or Alpha Wheel to select the setup 64 Old School Jam or use the alpha...

Страница 345: ...on at the bottom of the display to find the RIFF1 soft button then press the RIFF1 soft button This brings you to the RIFF1 page for zone 2 Here we can see that a riff is turned on for zone two Zone 2...

Страница 346: ...is bass part was originally played starting on a G in the song 95 Old School Jam the Root Note parameter has been set to G1 When you play a G within the trigger range this riff will play in the correc...

Страница 347: ...the drum riff is playing If you press pad 1 again to stop the drum riff you will be able to trigger the bass riff out of sync once again You may also want to assign a pad to stop the bass riff instead...

Страница 348: ...tons to the left of the display This will bring you to the Song mode MAIN page see below 2 On the Song mode MAIN page use the cursor to select the CurSng field if not already selected In the CurSng fi...

Страница 349: ...play riffs triggered from pads 1 4 while zone 5 contains a piano program playable from the keyboard The riffs on pads 2 4 are all set to sync to the down beat of the riff on pad 1 see the previous rif...

Страница 350: ...g into riffs in setup mode One thing that makes this example simple is that each track of the song 428 H Fact Sng uses its corresponding MIDI channel number If you were to go back to the song in Song...

Страница 351: ...play Press pad 1 again to stop the riff before continuing How does riff 1 play the entire song Since each track of the song is assigned to MIDI channels 1 4 in Song mode each track is still played by...

Страница 352: ...to select the SyncType field and use the Alpha Wheel to set this field to None see below This turns off the riff sync settings that had been saved with this setup Now pad 1 and 2 will each play a diff...

Страница 353: ...the left of the display and pressing and unlighting any lit pads Next press and light pad 1 to start riff 1 then press and unlight pad 1 to release riff 1 Since riff 1 has its RelSynTyp set to StartWa...

Страница 354: ...tor for the riff s zone make sure the Notemap parameter is set to Linear some factory setups that trigger riffs from the pads have Notemap set to Off The riff wont stop playing when released In the Se...

Страница 355: ...nnel 15 2 Picking Favorite Programs For Each Category 15 2 Easy Audition Play A Demo Song For Each Program 15 3 Save The Current Knob And Switch Settings From The Program Mode Main Page 15 3 Advanced...

Страница 356: ...ected program Before following the steps above you could set a program on each channel so that each channel will have a specific program upon startup This could be useful if you are triggering the PC3...

Страница 357: ...ou made to the previous program will be lost without warning Saving A Newly Edited Program If you are saving changes to a program that you have not previously edited the save dialog will choose the fi...

Страница 358: ...process for the HiKey parameter Search Function Find A Program Or Setup By Name You can find programs or setups by searching for a string of characters from the Program or Setup mode main pages or whe...

Страница 359: ...track and recording mode are determined by the current settings in Song mode likewise for the playback mode when you re playing a song When the sequencer status is STOPPED neither the Record button L...

Страница 360: ...ith the alphanumeric pad and pressing the Enter button Some insert effects chains may require you to turn up a parameter in order to hear the effect Most effect parameters are automatically assigned t...

Страница 361: ...d parameter selected use the cursor buttons to select the right column in the row of the desired parameter The right column is the control source column where you choose a controller to assign to the...

Страница 362: ...right corner of the display For details on assigning pads to a zone see Pads on page 7 16 3 With the desired zone selected press the KEYVEL soft button at the bottom of the display This will bring you...

Страница 363: ...ter must be set to On on the ARPEGGIATOR page for that zone Next press the CTRLS soft buttons to move to the Controllers page for the same zone and choose the desired pad in the Controller field To do...

Страница 364: ...Use As A Riff Record A Setup To Song Mode Riffs are full songs or individual tracks of a song created in the PC3LE sequencer that you can trigger in setup mode Every zone in a setup can have it s own...

Страница 365: ...de for multi timbral applications Messages Altered Note Number 0 127 True Voice 0 127 0 127 Velocity Note ON O O Note OFF O O After Touch Keys X O Channels O O Pitch Bender O O Control Change O 0 31 3...

Страница 366: ...cm Length 56 48 143 41 cm Weight 54 15 lb 24 56 kg Power PC3LE6 PC3LE7 PC3LE8 Internal AC power supply Automatic selection 90 250V AC operation 50 60 Hz Fuse 0 25A slow blow Measured AC input current...

Страница 367: ...the file system The Bootloader program itself is not found on the file system Instead it resides in a ROM chip that cannot be erased and therefore is permanently installed in your PC3LE Using the Boot...

Страница 368: ...and place it in the USB storage port on the rear panel of the PC3LE A USB connector will only fit into the port if oriented properly so don t force it into the port as this may damage your PC3LE or US...

Страница 369: ...to restore the instrument to its default state This is especially helpful if you re having problems getting sound programs or setups to work properly or think there may be some kind of underlying har...

Страница 370: ...file system This will delete everything that was stored internally on the PC3LE and leave a clean empty file system ready for use After the format is complete you will need to install an OS and objec...

Страница 371: ...fewer voices available than the PC3 and PC3K so Programs Setups and Songs will not be able to use all Layers Zones or Tracks if they require more voices than are available Object Types and Conversion...

Страница 372: ...Setup objects can be loaded but FX are not converted and the user set Program effects are used by default Program FX are not converted and must be set by the user Also any controller settings for a t...

Страница 373: ...ignable Switches In Setup Mode 7 14 Assigning samples to keymaps 12 3 Attack parameter ASR 6 44 Attack Portamento parameter Common 6 40 Attack Time and Level parameters AmpEnv 6 47 Audio cables 2 2 B...

Страница 374: ...parameter Layer 6 24 ENV2 and ENV3 pages Program Editor 6 48 ENVCTL page Program Editor 6 49 Envelope control 6 49 Envelope control parameters 6 50 Envelopes 6 46 6 48 EQ page Program Editor 6 69 Eras...

Страница 375: ...42 LFO parameters 6 42 6 43 LFOs 6 42 6 43 Line cord 2 2 Loading files 5 6 Loading Individual Objects 11 9 Loop Switch Sample Editor 12 11 Loop Type parameter AmpEnv 6 48 Looping samples 6 21 Loops 13...

Страница 376: ...6 47 6 48 ASR 6 44 6 45 Common 6 39 6 60 Envelope control 6 50 Layer 6 23 6 26 LFO 6 42 6 43 Path 11 4 PC3 and PC3K Objects C 1 PC3LE6 1 1 A 2 PC3LE7 1 1 A 2 PC3LE8 1 1 A 2 PCH 9 26 Pedals 2 3 pedals...

Страница 377: ...3 Playback mode 6 21 Tuning 12 4 Save dialog 5 3 Saving Naming 13 6 Rename 13 6 Setup Mode 14 3 Song Mode 13 5 Saving and namingObjects Saving 5 3 Saving files 5 6 Saving Master and Everything Files 1...

Страница 378: ...Program Setup 14 4 Start Point Sample Editor 12 12 Startup 2 1 Stereo parameter Keymap 6 20 Storage Mode 5 6 11 1 Storage mode 4 3 Sustain 7 19 Sustain not working 9 20 Sustain Pedal parameter Layer...

Страница 379: ...vii W Waveform display 12 12 X Xpose 2 7 6 3 8 2 Z Zero crossings 12 13 Zones Soloing 7 5 zones 14 2...

Отзывы: