Tutorials: Setup Mode
Basics Of Using Riffs
14-45
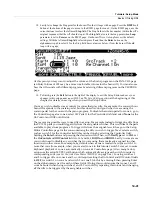
8. Next, press the
RIFF2
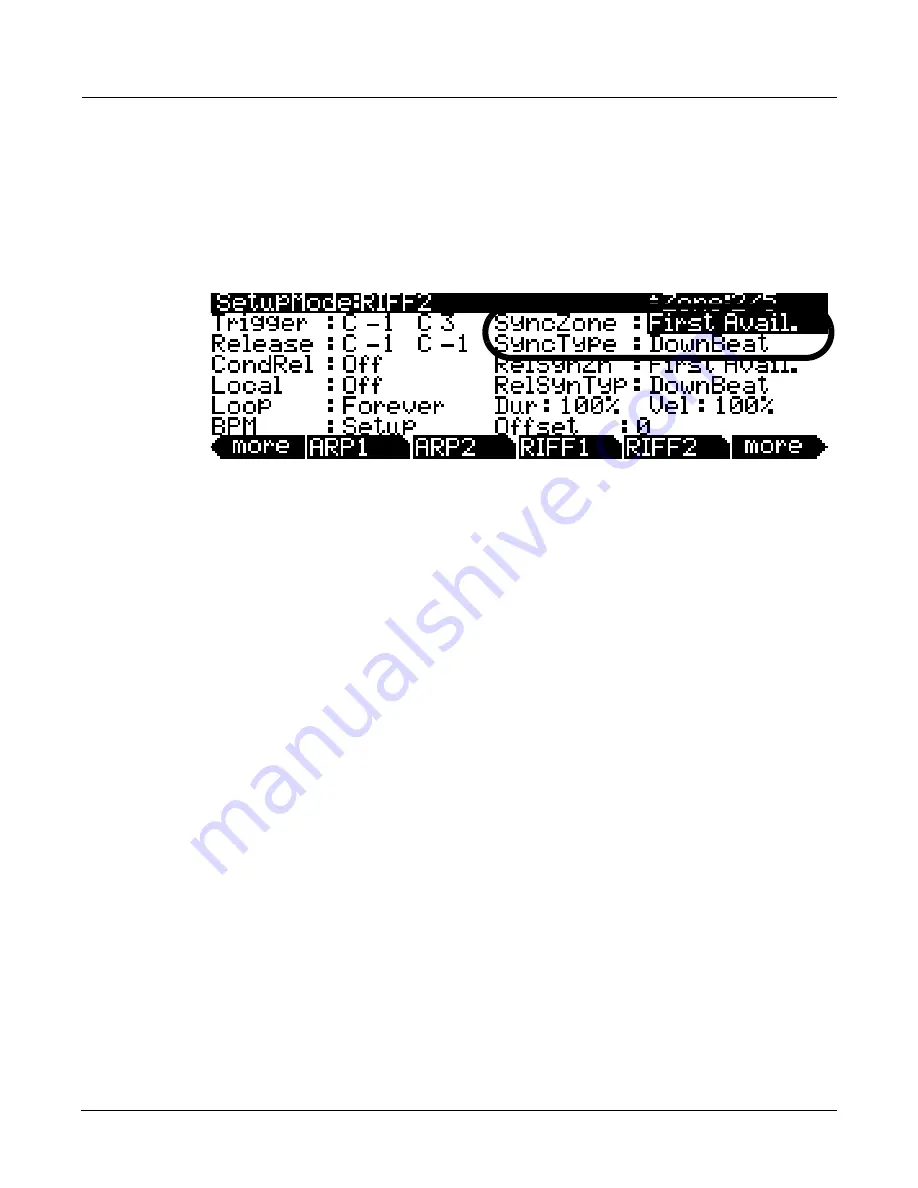
soft button at the bottom of the display to move to the RIFF2 page once
again. On the RIFF2 page, We can see that the bass riff on zone 2 is set to sync with the first riff,
arpeggiator, or song available, because the
SyncZone
parameter is set to
First Avail.
The riff waits
to trigger until the next down
beat of whatever it is syncing with because the
SyncType
parameter
is set to
DownBeat
(see below.)
This is why the riff waits for a downbeat before transposing and
restarting its loop when triggered.
If
you
would
rather
not
be
tied
to
down
beats
for
syncing
this
riff,
you
can
set
the
SyncType
to
None.
With
SyncType
set
to
None,
the
riff
will
not
sync
to
anything,
which
allows
you
to
trigger
it
more
freely.
This
can
be
helpful
if
you
need
to
transpose
the
riff
more
quickly
to
match
chord
changes.
If
you
would
like
to
transpose
the
riff
quickly,
but
still
want
it
to
be
able
to
sync
with
other
things,
a
SyncType
setting
of
AnyBeat
will
sync
the
riff
at
the
next
available
beat,
instead
of
waiting
for
a
down
beat.
Another
sync
option
is
to
have
the
bass
riff
sync
only
when
the
drum
riff
on
zone
1
is
playing.
For
example,
set
the
SyncType
parameter
for
zone
2
to
AnyBeat
,
and
set
the
SyncZone
parameter
to
Riff
1.
Press
pad
1
to
trigger
the
drum
riff
,
and
notice
that
the
bass
riff
syncs
with
the
next
beat
of
the
drum
riff
when
the
drum
riff
is
playing.
If
you
press
pad
1
again
to
stop
the
drum
riff,
you
will
be
able
to
trigger
the
bass
riff
out
of
sync
once
again.
You
may
also
want
to
assign
a
pad
to
stop
the
bass
riff,
instead
of
using
the
front
panel
Stop
button
which
stops
all
riffs.
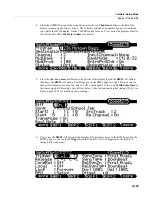
Press
the
CTRLS
button
to
go
to
the
Controllers
page
for
zone
2.
With
the
Controller
field
selected,
hold
the
category
Enter
button
and
press
pad
3
to
select
Drum
Pad
3
for
the
Controller
field.
This
pad
is
already
assigned
to
trigger
the
bass
riff,
but
since
we
can
trigger
it
from
the
keyboard,
lets
change
this
pad’s
assignment
to
stop
the
bass
riff.
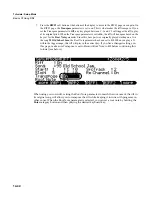
Use
the
cursor
buttons
to
select
the
Type
field
and
use
the
‐
/+
buttons
to
select
Switch
.
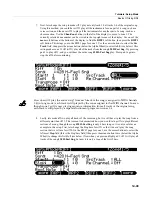
With
Switch
selected
for
the
Type
field,
set
the
DestType
field
to
Ctrl
and
the
SW
Type
field
to
Momentary
.
Finally,
use
the
cursor
buttons
to
select
the
OnControl
field,
then
use
the
alphanumeric
pad
to
enter
164
followed
by
the
category
Enter
button
to
select
RiffOff
for
the
OnControl
field.
Do
the
same
to
select
RiffOff
for
the
OffControl
field.
The
other
fields
should
be
left
at
their
default
values:
OnValue
:
0,
OffValue
:
0,
EntryState
:
Off,
ExitState
:
Off.
Now,
when
you
trigger
the
bass
riff
from
the
keyboard,
you
can
stop
the
riff
by
pressing
pad
3
(though
it
will
still
follow
any
RelSynZn
and
RelSynTyp
settings
made
on
the
RIFF2
page.)
9. To finish, press the
Exit
button to the right of the display to exit the Setup Editor and save your
changes to this setup under a new ID# if desired.
See
The
Setup
Editor
section
at
the
beginning
of
this
chapter
for
details
on
saving
when
you
exit
the
Setup
Editor.
Содержание PC3LE
Страница 14: ...x...
Страница 28: ...2 10 Startup Software Upgrades...
Страница 42: ...3 14 User Interface Basics Quick Song Recording and Playback...
Страница 46: ...4 4 The Operating Modes Using the Modes...
Страница 196: ...8 4 Quick Access Mode The QA Editor...
Страница 226: ...9 30 Master Mode UTILITIES...
Страница 260: ...10 34 Song Mode and the Song Editor Song Editor The EVENT Page...
Страница 272: ...11 12 Storage Mode Format...
Страница 286: ...12 14 Keymap and Sample Editing Editing Samples...
Страница 379: ...vii W Waveform display 12 12 X Xpose 2 7 6 3 8 2 Z Zero crossings 12 13 Zones Soloing 7 5 zones 14 2...


