Tutorials: Setup Mode
Basics Of Using Riffs
14-41
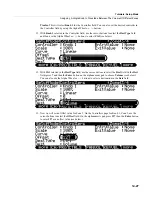
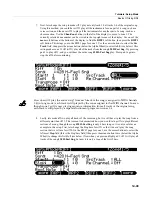
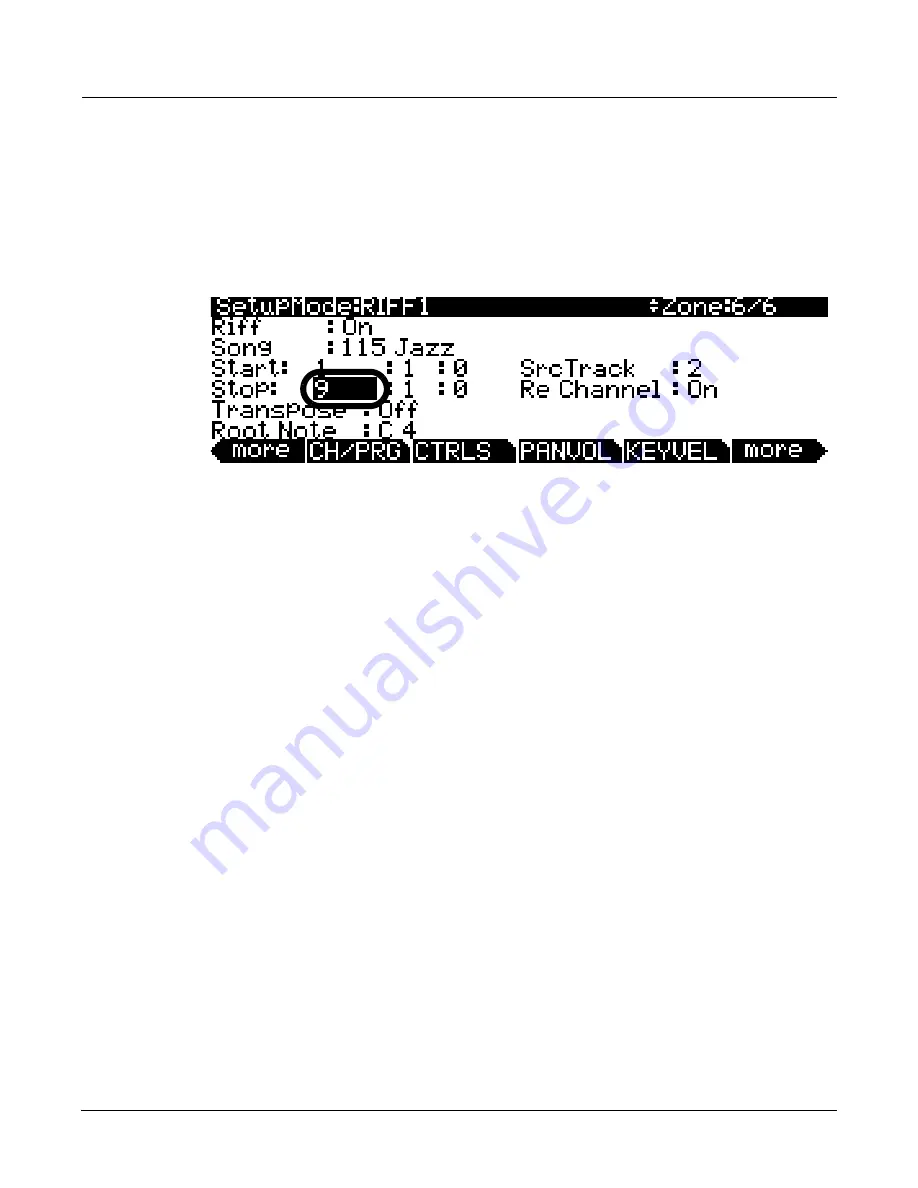
18. Lastly, lets change the Stop point for the horn riff so that it loops with no gaps. Press the
RIFF1
soft
button at the bottom of the page to move to the RIFF1 page for zone 6. On the RIFF1 page, use the
cursor buttons to select the left most
Stop
field. The Stop field sets the bar number (within the riff’s
original sequence) that the riff should stop at. The
Stop
field also sets the loop point when
Loop
parameter is set to
Forever
on the RIFF2 page. Our horn riff is set to loop forever (the default
setting.) With the left most
Stop
field selected, press
9
and then the
Enter
button on the
alphanumeric pad to select 9 for the Stop field bars value (see below.) Now the horn riff should
loop with no gaps.
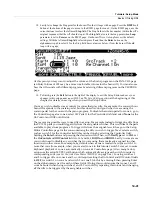
At
this
point
you
may
want
to
adjust
the
volume
of
the
horns
program
on
the
PAN
‐
VOL
page
(an
EntryVolume
of
100
may
be
a
more
comfortable
volume
for
the
horns
riff.)
You
can
also
see
how
the
riff
sounds
with
different
programs
by
selecting
different
programs
on
the
CH/PROG
page.
19. To finish, press the
Exit
button to the right of the display to exit the Setup Editor and save your
changes to this setup under a new ID#.
See
The
Setup
Editor
section
at
the
beginning
of
this
chapter
for
details
on
saving
when
you
exit
the
Setup
Editor.
You
may
wish
to
disable
some
controls
for
zones
that
play
riffs.
For
example,
the
zone
with
our
horn
riff
responds
to
the
sustain
pedal,
but
this
doesn’t
sound
good
when
we
are
using
the
sustain
pedal
for
the
zone
with
the
piano
program.
To
disable
the
sustain
pedal
for
zone
6,
go
to
the
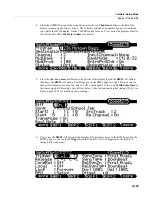
Controllers
page
for
zone
6,
select
SW
Pedal
1
for
the
Controller
field
and
select
None
for
the
OnControl
and
OffControl
fields.
There
are
many
possible
ways
to
use
riffs
in
a
setup.
For
example
instead
of
triggering
riffs
from
the
PC3LE’s
pads
you
could
trigger
riffs
from
the
assignable
switches.
This
would
leave
the
pads
available
to
play
drum
programs.
To
trigger
riffs
from
the
assignable
switches,
go
to
the
Setup
Editor
Controllers
page
for
the
zone
containing
the
riff
you
wish
to
trigger.
Next,
select
a
switch,
such
as
switch
2
for
the
Controller
field
(this
can
be
done
by
selecting
the
Controller
field,
holding
the
Enter
button
and
pressing
the
desired
switch.)
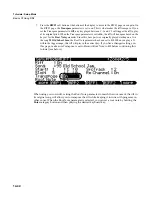
Then,
with
DestType
set
to
Ctrl
,
set
the
OnControl
and
OffControl
fields
to
163
and
164,
RiffOn
and
RiffOff.
Lastly,
in
some
cases
you
would
need
to
disable
any
switches
that
you
are
using
that
are
already
assigned
to
other
functions
in
other
zones.
For
example,
by
default
when
a
zone
is
created
it
assigns
switch
1
to
mute
that
zone
(for
example,
when
you
created
zone
6
in
this
tutorial,
switch
1
was
set
to
mute
keyboard
playback
of
zone
6
automatically
on
zone
6’s
Controllers
page.)
Also,
many
factory
setups
use
the
setup
MUTES
soft
button
which
automatically
assigns
each
switch
to
mute
its
corresponding
zone
(see
Set
Controls
Zone
Mutes
(MUTES)
on page 7
‐
66.)
So
using
switches
1
and
2
to
trigger
riffs
on
zones
4
and
5
would
require
setting
the
OnControl
and
OffControl
fields
to
OFF
for
switch
1
on
zone
1
and
switch
2
on
zone
2
(do
this
by
entering
0
then
pressing
Enter
on
the
alphanumeric
pad
for
each
of
these
fields.)
Doing
this
would
ensure
that
zones
1
and
2
wont
be
muted
when
using
switches
1
and
2.
You
could
try
repeating
this
tutorial
and
changing
all
the
riffs
to
be
triggered
by
the
assignable
switches.
Содержание PC3LE
Страница 14: ...x...
Страница 28: ...2 10 Startup Software Upgrades...
Страница 42: ...3 14 User Interface Basics Quick Song Recording and Playback...
Страница 46: ...4 4 The Operating Modes Using the Modes...
Страница 196: ...8 4 Quick Access Mode The QA Editor...
Страница 226: ...9 30 Master Mode UTILITIES...
Страница 260: ...10 34 Song Mode and the Song Editor Song Editor The EVENT Page...
Страница 272: ...11 12 Storage Mode Format...
Страница 286: ...12 14 Keymap and Sample Editing Editing Samples...
Страница 379: ...vii W Waveform display 12 12 X Xpose 2 7 6 3 8 2 Z Zero crossings 12 13 Zones Soloing 7 5 zones 14 2...

