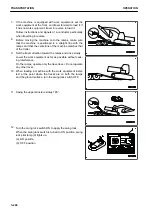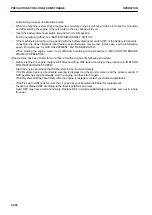
2.
Place the connector for wiring (B) in a clean vinyl bag or
the like to protect it from water, etc. during transportation
and fix it to the operator's cab with sealing tape or the like.
3.
Tilt down lock (D) of revolving lamp bracket (C).
4.
Remove the hook of lock (D) from the claw of base bracket
(E).
5.
Hold grip (G) and turn it clockwise, seeing it from the rear
of the machine.
6.
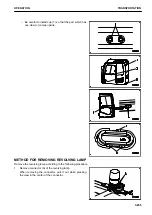
Remove revolving lamp bracket (C) from the claw of base
bracket (E).
k
k
CAUTION
When removing and installing the revolving lamp, be
sure to hold grip (G) instead of lamp itself to prevent
damage.
TRANSPORTATION
OPERATION
3-256
Содержание PC210-11
Страница 2: ......
Страница 24: ......
Страница 74: ......
Страница 75: ...OPERATION Please read and make sure that you understand the SAFETY section before reading this section 3 1 ...
Страница 352: ......
Страница 353: ...MAINTENANCE Please read and make sure that you understand the SAFETY section before reading this section 4 1 ...
Страница 431: ...SPECIFICATIONS 5 1 ...
Страница 435: ...PC210LC 11 PC210NLC 11 SPECIFICATIONS SPECIFICATIONS 5 5 ...
Страница 436: ...PC230NHD 11 SPECIFICATIONS SPECIFICATIONS 5 6 ...
Страница 458: ...PC210 11 2 Piece Boom PC210LC 11 2 Piece Boom PC210NLC 11 2 Piece Boom 2 PIECE BOOM ATTACHMENTS AND OPTIONS 6 22 ...
Страница 459: ...PC230NHD 11 2 Piece Boom ATTACHMENTS AND OPTIONS 2 PIECE BOOM 6 23 ...
Страница 470: ... Not including tail swing SUPER LONG FRONT BOOM AND ARM ATTACHMENTS AND OPTIONS 6 34 ...
Страница 505: ...REPLACEMENT PARTS 7 1 ...
Страница 521: ......


