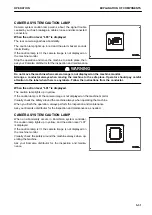
REMARK
Although there is no abnormality on the machine when the gauge enters the yellow range, for the conservation
of global environment reduce the engine output to a point where there is no adverse effect on the operation.
Perform energy saving operations within the green range. Travel less frequently. It also helps energy saving op-
erations. Consider the best way of operation for energy saving.
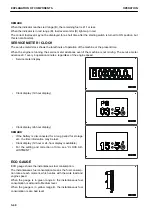
FUEL CONSUMPTION GAUGE
Fuel consumption gauge shows the average fuel consumption
of the machine.
(A): Shows the average fuel consumption of a day (from 0:00
a.m. of the day to 0:00 a.m. of the next day).
(B): Shows the split fuel consumption under measurement.
(C): Shows the split fuel consumption while measurement is
stopped.
REMARK
Display on the fuel consumption gauge can be switched be-
tween the average fuel consumption per day and the average
fuel consumption during a selected period (split fuel consump-
tion).
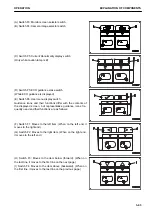
DEF LEVEL GAUGE
DEF level gauge indicates the remaining level of DEF.
If the indicator is in green range during operations, it is normal.
If the indicator comes close to (A) of red range during opera-
tion, check and add DEF.
(A) to (B): Red range
(A) to (C): Green range
When the indicator is in red range from (A) to (B), DEF level
caution lamp (1) lights up in red.
If DEF level further decreases after the monitor lights up in red,
the engine power is derated. For detail, see “HANDLE UREA
SCR SYSTEM WARNING”.
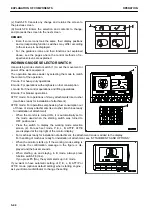
When remaining level of DEF cannot be detected, DEF level caution lamp (1) lights up in white.
REMARK
• Immediately after turning the starting switch to ON position and during the engine is running, DEF level cau-
tion lamp (1) lights up in white. However, this does not indicate abnormality.
• In cold weather, DEF level cannot be detected and DEF level caution lamp (1) lights up in white for approxi-
mately 1 hour. However, this does not indicate abnormality.
• Even if DEF level caution lamp (1) does not light up in white, it may take a long time for DEF level gauge to
display the correct position.
Note that the following cases are not abnormal:
• When DEF is added while the starting switch is kept at ON position.
• When the starting switch is turned to ON position immediately after adding DEF (within approximately
30 seconds).
Before adding DEF, turn the starting switch to OFF position. Wait for a while after adding, then turn the
starting switch to ON position.
OPERATION
EXPLANATION OF COMPONENTS
3-41
Содержание PC210-11
Страница 2: ......
Страница 24: ......
Страница 74: ......
Страница 75: ...OPERATION Please read and make sure that you understand the SAFETY section before reading this section 3 1 ...
Страница 352: ......
Страница 353: ...MAINTENANCE Please read and make sure that you understand the SAFETY section before reading this section 4 1 ...
Страница 431: ...SPECIFICATIONS 5 1 ...
Страница 435: ...PC210LC 11 PC210NLC 11 SPECIFICATIONS SPECIFICATIONS 5 5 ...
Страница 436: ...PC230NHD 11 SPECIFICATIONS SPECIFICATIONS 5 6 ...
Страница 458: ...PC210 11 2 Piece Boom PC210LC 11 2 Piece Boom PC210NLC 11 2 Piece Boom 2 PIECE BOOM ATTACHMENTS AND OPTIONS 6 22 ...
Страница 459: ...PC230NHD 11 2 Piece Boom ATTACHMENTS AND OPTIONS 2 PIECE BOOM 6 23 ...
Страница 470: ... Not including tail swing SUPER LONG FRONT BOOM AND ARM ATTACHMENTS AND OPTIONS 6 34 ...
Страница 505: ...REPLACEMENT PARTS 7 1 ...
Страница 521: ......


