| ascp: Transferring from the Command Line with Ascp |
134
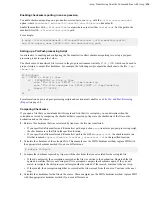
Run the following command in the
.ssh
folder to create a key pair. For
key_type
, specify either RSA (
rsa
)
or ECDSA (
ecdsa
). At the prompt for the key-pair's filename, press ENTER to use the default name
id_rsa
or
id_ecdsa
, or enter a different name, such as your username. For a passphrase, either enter a password, or press
return twice to leave it blank:
# ssh-keygen -t
key_type
Note:
When you run
ascp
in FIPS mode (
<fips_enabled>
is set to
true
in
aspera.conf
), and you
use passphrase-protected SSH keys, you must either (1) use keys generated by running
ssh-keygen
in a FIPS-
enabled system, or (2) convert existing keys to a FIPS-compatible format using a command such as the following:
# openssl pkcs8 -topk8 -v2 aes128 -in id_rsa -out new-id_rsa
3.
Retrieve the public key file.
The key-pair is generated to your home directory's
.ssh
folder. For example, assuming you generated the key
with the default name
id_rsa
:
/home/
username
/.ssh/id_rsa.pub
Provide the public key file (for example,
id_rsa.pub
) to your server administrator so that it can be set up for
your server connection. The instructions for installing the public key on the server can be found in the
a User's Public Key on the Server
on page 38; however, the server may be installed on an operating system
that is different from the one where your client has been installed.
4.
Start a transfer using public key authentication with the
ascp
command.
To transfer files using public key authentication on the command line, use the option
-i
private_key_file
. For
example:
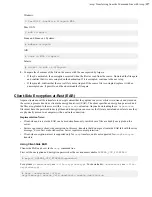
$ ascp -T -l 10M -m 1M -i ~/.ssh/id_rsa myfile.txt [email protected]:/space
In this example, you are connecting to the server (
10.0.0.2
, directory
/space
) with the user account
jane
and the private key
~/.ssh/id_rsa
.
Reporting Checksums
File checksums are useful for trouble-shooting file corruption, allowing you to determine at what point in the transfer
file corruption occurred. Aspera servers can report source file checksums that are calculated on-the-fly during transfer
and then sent from the source to the destination.
To support checksum reporting, the transfer must meet both of the following requirements:
• Both the server and client computers must be running HST Server (formerly Enterprise Server and Connect
Server) or HST Endpoint (formerly Point-to-Point Client) version 3.4.2 or higher.
• The transfer must be encrypted. Encryption is enabled by default.
The user on the destination can calculate a checksum for the received file and compare it (manually or
programmatically) to the checksum reported by the sender. The checksum reported by the source can be retrieved
in the destination logs, a manifest file, in IBM Aspera Console, or as an environment variable. Instructions for
comparing checksums follow the instructions for enabling checksum reporting.
Checksum reporting is disabled by default. Enable and configure checksum reporting on the server by using the
following methods:
• Edit
aspera.conf
with
asconfigurator
.
• Set
ascp
command-line options (per-transfer configuration).
Command-line options override the settings in
aspera.conf
.
Important:
When checksum reporting is enabled, transfers of very large files (>TB) take a long time to resume
because the entire file must be reread.

