GE H
EALTHCARE
O
PTIMA
XR200
AMX
/XR220
AMX
D
IRECTION
5336113-1EN, R
EVISION
10
I
NSTALLATION
M
ANUAL
Page 80
Section 4.10 Installing hardware options
4.10.2.5 Optional configuration 2
Optional configuration 2 is to strip first two and last four characters, and add a Tab suffix.
This configuration sets the barcode reader to strip the first two and last four characters, and add a
Tab at the end of the scan. Have a printed copy of these pages on hand so you can scan the
necessary barcodes. If you make a mistake during this configuration, start over at step 1.
1.
Power up the system. Wait until the green LED on the receiver starts flashing.
2.
4.10.2.2 Verifying the default configuration on page 79
.
3.
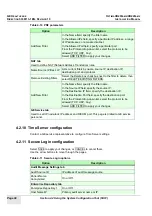
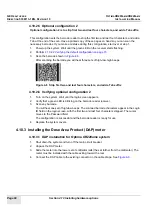
Scan the barcode shown in
.
After scanning the barcode you will hear three sets of high-low-high beeps.
Figure 4-8 Strip first two and last four characters, and add a Tab suffix
4.10.2.6 Verifying optional configuration 2
1.
Turn on the system. Wait until the login screen appears.
2.
Verify that a green LED is blinking on the barcode reader receiver.
3.
Scan any barcode.
You will hear one set of high-low beeps. The scanned barcode characters appear in the Login
ID field on the login screen, with the first two and last four characters stripped. The cursor
moves to the Password field.
The configuration is successful and the barcode reader is ready for use.
4.
Replace the system covers.
4.10.3 Installing the Dose Area Product (DAP) meter
4.10.3.1 DAP installation for Optima XR220amx system
1.
Shut down the system and turn off the main circuit breaker.
2.
Unpack the DAP meter.
3.
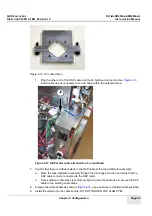
Slide the meter into the lower set of collimator rails (the set further from the collimator). The
meter must be installed with the cable exiting toward the rear.
4.
Connect the DAP cable to the existing connector in the cable drape. See
.

