GE H
EALTHCARE
O
PTIMA
XR200
AMX
/XR220
AMX
D
IRECTION
5336113-1EN, R
EVISION
10
I
NSTALLATION
M
ANUAL
Page 54
Section 3.6 Installing the digital detector
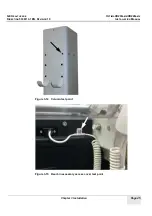
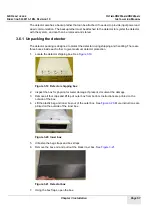
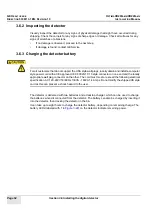
The tether connector will only fit one way, as shown.
3.6.5 Download detector firmware
This section applies to Optima XR200amx with digital upgrade and Optima XR220amx systems
only.
Note:
The first time a new detector is used with an Optima XR220amx or Optima XR200amx with digital
upgrade system, detector firmware must downloaded because the existing firmware present on the
detector may not be compatible with the system. If you attempt to use a detector that does not have
the correct firmware, an error message will be displayed stating
The detector is not
compatible with this system.
or
Digital cassette firmware is incorrect.
1.
Ensure the system has booted to applications without error.
2.
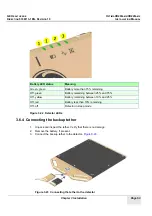
Connect the detector to the system using the tether and ensure the detector is on, Detector
Status Led illuminated.
3.
Power on the detector.
4.
On the Applications desktop, press the UTILITIES button.
5.
On the Utilities desktop, press LAUNCH.
6.
On the Service Home tab, press the UTILITIES tab button.
7.
In the left navigation frame, expand the SUBSYSTEM SOFTWARE folder.
8.
Select DET DATA DOWNLOAD folder.
9.
Select DET DATA DOWNLOAD link.
10. Select the appropriate detector.
11. Follow the on-screen instructions.
3.6.6 Detector registration
The first time a detector is used with an Optima XR220amx or Optima XR200amx with digital
upgrade, it must be registered with that system. During registration, the detector must be connected
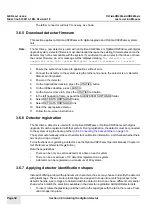
to the system using the backup tether (
3.6.4 Connecting the backup tether on page 53
).
The system automatically retrieves the detector’s calibration information, and checks whether there
has been a drop or impact.
For instructions on registering a detector, see the
Optima XR220amx Operator Manual, Chapter 14
Set Preferences (Detector Registration)
.
Note these guidelines:
•
There can be only one active detector at a time on each system.
•
There can be a maximum of 10 detectors registered on a system.
•
A detector can be registered on a maximum of 20 systems.
3.6.7 Applying detector identification shapes
Instead of affixing a label with alphanumeric characters, the site may choose to identify the detector
with plastic tags. These circular plastic tags are designed to snap into a matching recess in the
detector handle. A set of tags are delivered with the detector. Each one has a different color and/or
shape, which match the selections available in the detector registration Add/Edit Detector lists.
•
To insert, rotate the plastic tag until the notch in the tag aligns with the tab in the recess. Press
until it snaps into place.


