232001410G(10)
117
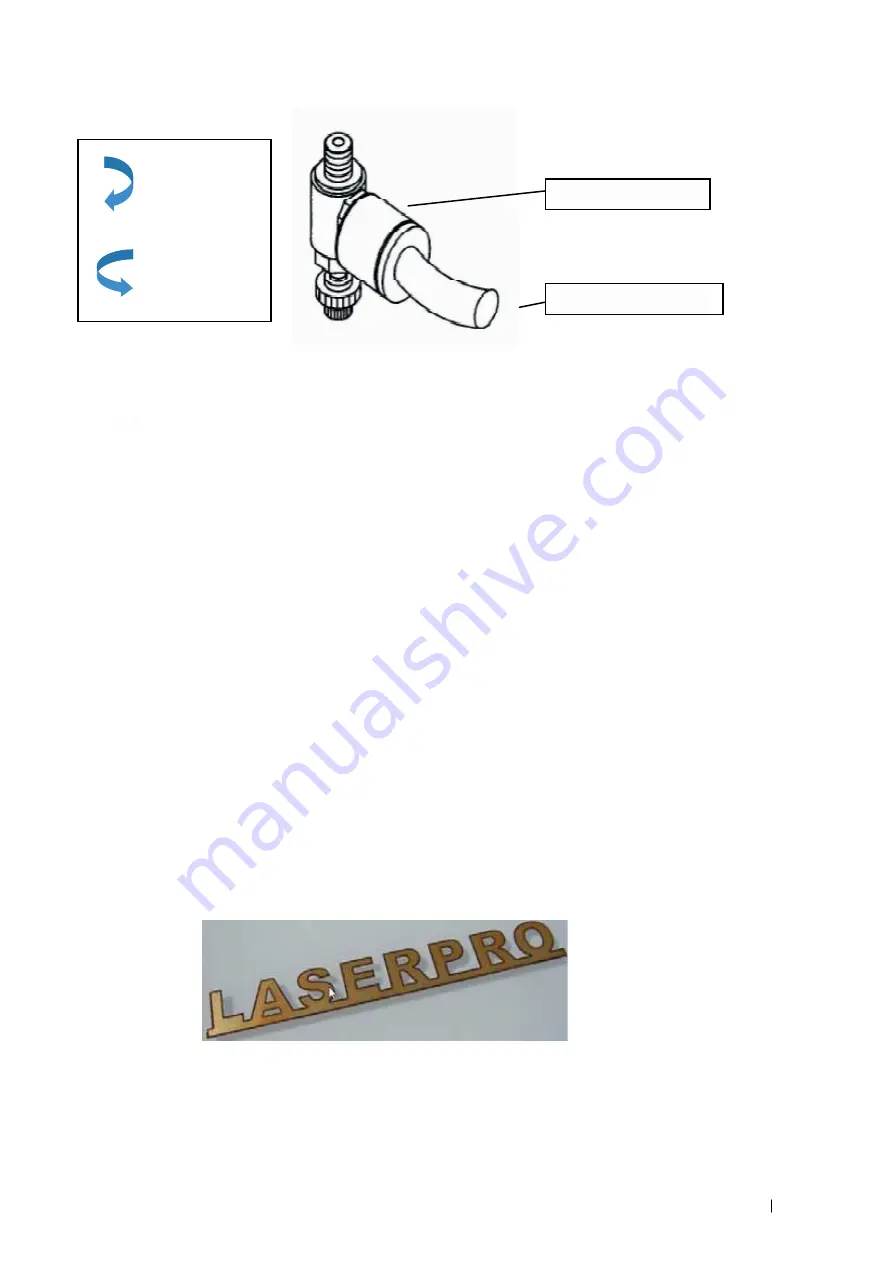
Ait Tube Fastener
Air Tube Connector
Air Flow Regulator:
8) Congratulations, you have finished setting up the air compressor. Make sure you have the
proper SmartAIR nozzle installed (depending on your application), before you turn on and utilize
the air compressor.
OPERATION:
(1) Switch on the air compressor unit and make sure that the airflow regulator on the air assist
value is opened (turn clockwise to increase the airflow, counter-clockwise to decrease the
airflow). The air nozzle under the laser head should emit a steady flow of air.
(2) With the SmartAIR nozzle and air compressor properly installed and operating, all
configurations and settings relating to air-assist functions are controlled through the print
driver and hardware control panel. Please refer to the LaserPro S290LS PEN page of
print driver section of this manual for details on how to enable and configure air-assist
functionalities.
7.3 Focus Lens Option
GCC offers two different focal lenses namely the 2.0” and 4.0” for different applications. The number
description, 2.0” and 4.0” signifies the distance of where passed through beam will converge. For example,
when a laser beam passes through a 2.0” focus lens, the beam will converge at a 2.0” distance resulting in a
concentration of energy at that spot.
The resulting spot size from the different focus lens are also different and the following chart shows the
different spot sizes achieved from the different lenses.
y
2.0” Lens: The 2.0” fiber laser focus lens with concentrated power within small spot area
which is good at cutting thin metal like 0.1mm copper foil.
y
4.0“ Lens: The 4.0“ lenses are good for marking on metal materials.
Turn
Clockwise
to increase
airflow
Turn
Counter-
Clockwise
to decrease
Содержание S290LS Series
Страница 1: ...www delinit by...
Страница 2: ......
Страница 4: ......
Страница 10: ...232001410G 10 6...
Страница 19: ...232001410G 11 15 Step 3 Use a flathead screwdriver to remove the brackets that secures the bars in place...
Страница 35: ...232001410G 10 31...
Страница 36: ...232001410G 10 32...
Страница 40: ...232001410G 10 36...
Страница 41: ...232001410G 10 37...
Страница 113: ...232001410G 10 109 8 Now you are ready to output the modified image by clicking File Print...
Страница 144: ...9 232001410G 10 140 Chapter 9 Basic Troubleshooting...
Страница 146: ...10 232001410G 1 1 142 Chapter 10 Appendix Glossary LaserPro S290LS Specification Sheet...


