background image

10. Route Planning 


10-3

Exchange with Monitored: 

This function exchanges planned and monitored routes. Planned route is used both as alternative route and as an 
editable route.  

NOTICE: 

Before using this function, set the next TO WPT on the Prepare page of the Plan dialog box. If this is not 

done, and unintended waypoint could become the TO WPT. If this occurs, right-click the TO WPT then enter 
correct WPT. 

Copy from Monitored: 

Copy monitored route to plan route. 

Backup and Restore: 

You can make a backup of a route to a floppy disk or restore a route from a floppy disk. See Chapter 14 Backup 
Operations. 

Report: 

Generate report of planned route. 

Full WPT Report: 

Generate detailed report of planned route. 

Passage Plan Report: 

Generate a combined report from active planned route and active Notes. 

Note:


To display a planned route, make sure that desired options of the planned route (Center line, Channel borders, 

WPT marks, Leg marks, etc.) are chosen to either Std or Other on the Route page in the Chart Display dialog box.  

Mode

LAT

LON

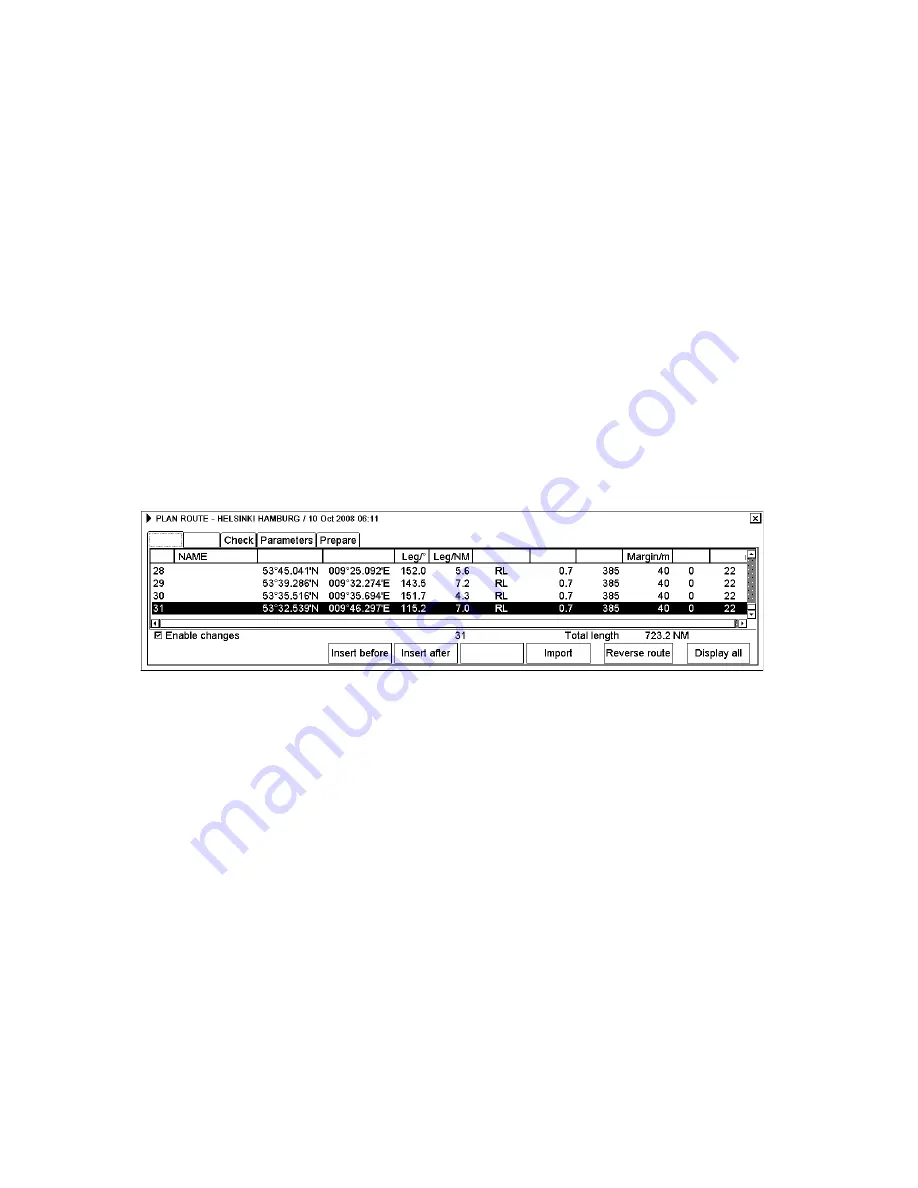
RAD/NM CH LIM/m                     MIN/kn   MAX/kn

Delete WPT

WPT

WPT

WPT count

Alerts


Содержание FCR-2107 series

Страница 1: ...MARINE RADAR ARPA FCR 2107 BB 2807 Series OPERATOR S MANUAL www furuno co jp MODEL Complies with MSC 192 79...

Страница 2: ...utor Dealer 9 52 Ashihara cho Nishinomiya 662 8580 JAPAN Telephone 81 0 798 65 2111 Fax 81 0 798 65 4200 A JUL 2006 Printed in Japan All rights reserved C OCT 13 2009 Pub No OME 35590 C 00015804112 00...

Страница 3: ...product according to local regulations for the disposal of industrial waste For disposal in the USA see the homepage of the Electronics Industries Alliance http www eiae org for the correct method of...

Страница 4: ...0 and 10 W m are given in the table below Note If the antenna unit is installed at a close distance in front of the wheel house your administration may require halt of transmission within a certain se...

Страница 5: ...erious damage to the equipment WARNING To avoid electrical shock do not remove cover No user serviceable parts inside WARNING Radiation hazard Only qualified personnel should work inside scanner Confi...

Страница 6: ...liminated from the radar screen CAUTION The plotting accuracy and response of this TT meets IMO standards Tracking accuracy is affected by the following Tracking accuracy is affected by course change...

Страница 7: ...te Monitor 1 18 1 15 Switching Hub HUB 100 1 19 2 Radar Operation 2 1 2 1 Radar Display 2 1 2 1 1 Radar mode 2 1 2 1 2 Chart radar mode 2 2 2 2 Tuning the Receiver 2 3 2 2 1 Choosing the tuning method...

Страница 8: ...storing user settings 2 33 2 22 4 Restoring default picture setup options 2 33 2 23 Noise Rejector 2 34 2 24 Suppressing Second trace Echoes 2 35 2 25 Adjusting Brilliance of Screen Data 2 36 2 26 Wat...

Страница 9: ...choosing past position plot interval 4 14 4 10 2 Past position display attributes 4 15 4 11 Predictor 4 16 4 11 1 Predictor settings 4 16 4 12 Set and Drift 4 17 4 13 TT Collision Alarm 4 18 4 13 1 S...

Страница 10: ...fore Departure 6 11 6 2 1 Setting chart alert calculation 6 11 6 2 2 Creating or updating a route 6 12 6 2 3 Checking and preparing route to monitor 6 13 6 2 4 Verifying configuration of navigation se...

Страница 11: ...5 7 9 7 Control of predefined IMO Chart Display Settings 7 66 7 10 Sailing Directions Tidal Tables etc Features of Vector Charts 7 67 7 11 Chart Viewing Dates and Seasonal Features of the Vector Chart...

Страница 12: ...xisting Route 10 11 10 4 1 Parameters 10 11 10 4 2 Changing waypoint position 10 11 10 4 3 Changing other waypoint data 10 13 10 4 4 Adding a new waypoint at the end of a route 10 13 10 4 5 Inserting...

Страница 13: ...o use in Planning Mode 13 6 13 4 1 Plan Notes dialog box description 13 7 13 5 Creating New Notes 13 8 13 5 1 Adding new Notes record 13 8 13 5 2 Choosing Notes record to modify 13 9 13 5 3 Changing N...

Страница 14: ...tion parameters setting 19 3 19 1 4 Optimization parameters setting 19 4 19 2 Color Calibration Settings 19 5 19 2 1 Color differentiation test for S57 charts 19 5 19 2 2 Gray scale test 19 6 20 Alert...

Страница 15: ...ensing system used by the C MAP AP 34 A4 4 2 Introduction AP 34 A4 4 3 System ID for C MAP AP 34 A4 5 CM93 3 Database AP 35 A4 5 1 Load of CM93 3 database to ECDIS AP 35 A4 5 2 Use of multiple databas...

Страница 16: ...Table of Contents xiv Appendix 6 Parts Lists and Parts Location AP 75 Radar AP 75 Chart Processor Unit EC 1000C AP 91 Specifications SP 1 Index IN 1 Declaration of Conformity...

Страница 17: ...d Target TT data AIS targets and other navigation data on a high resolution 20 1 inch display FCR 21x7 or 23 1 inch display FCR 28x7 Blackbox configuration also is available in the FCR 21x7 series The...

Страница 18: ...re using echo stretch to prevent the enlargement of unwanted echoes 2 17 Echo averaging The radar samples echoes with each scan Targets that show a large change with each scan are judged as clutter an...

Страница 19: ...UNIT MU 201CE or MU 231CE HUB 100 LAN ADAPTER EC 1010 LAN ADAPTER EC 1010 24 VDC 100 230 VAC VDR or Ext Display EPFS LOG AIS ALARM EPFS ALARM B ADAPTER ALARM 24 VDC PC keyboard Junction Box 100 230 VA...

Страница 20: ...0 VAC 100 230 VAC ANTENNA UNIT Performance Monitor PM 51 POWER SUPPLY UNIT PSU 007 220 VAC 3 60 Hz 200 VAC 3 50 Hz 110 VAC 3 60 Hz 220 VAC 3 50 Hz 440 VAC 3 50 Hz For HSC spec 220 VAC 3 50 Hz 220 VAC...

Страница 21: ...VAC 24 VDC CONTROL UNIT RCU 020 or RCU 015FEA CONTROL UNIT RCU 016 ANTENNA UNIT Performance Monitor PM 31 Radiator XN 20AF 6 ft XN 24AF 8 ft 100 230 VAC 100 230 VAC AD 100 Heading Sensor IEC 61162 2...

Страница 22: ...30 VAC 100 230 VAC Heading Sensor IEC 61162 2 100 115 VAC 220 230 VAC 1 50 60 Hz SN30AF SN36AF TRANSCEIVER UNIT RTR 082 AC220V 3 60Hz AC200V 3 50Hz AC110V 3 60 Hz AC220V 3 AC440V 3 60Hz AC380V 3 50Hz...

Страница 23: ...Scrollwheel Trackball module EBL rotary control VRM rotary control Control unit RCU 020 full keyboard Key Description POWER Turns the system on off This control does not switch the display on off BRI...

Страница 24: ...lay TT AIS target list CANCEL TRAILS Sets echo trail time Also functions to cancel data input ENTER MARK Terminate input in menu display MARK dialog box MENU Opens closes main menu RANGE Selects radar...

Страница 25: ...en the timer has reached 0 00 the indication ST BY appears at the screen center meaning the radar is now ready to transmit pulses In the stand by condition markers rings map charts etc are not shown F...

Страница 26: ...indication changes example yellow to green This indicates that the box or indication is correctly selected Then you can change setting by pushing the left button 1 3 Monitor Brilliance The brilliance...

Страница 27: ...ure for operation by trackball is given In the example below the menu operating procedure for operation on the radar chart radar main menu is presented 1 Do one of the following depending on the contr...

Страница 28: ...e menu used In some cases you will click the Close window button X at the top right corner on the menu Note Hereafter for sake of brevity we state push the scrollwheel in cases where you can push eith...

Страница 29: ...ing menu 3 Select Characters then push the left button Your screen should now look something like the one below In case of longitude E and W replace N and S 4 Spin the scrollwheel to select appropriat...

Страница 30: ...tion area Current function of left button scrollwheel right button Base When no options are checked on Standard page PartStd When some of options not all are checked on Standard page Std When all opti...

Страница 31: ...ample the available functions with the mouse are Menu by pushing left button Info by pushing scrollwheel Chart Menu by pushing right button Menu Info Chart Menu F1 F3 F4 F2 Left button Right button Sc...

Страница 32: ...1 Used range in chart radar mode is between 0 125 nm and 24 nm If you change from radar mode to chart radar mode when the range is 24 nm or less the range is not changed And if range is more than 24 n...

Страница 33: ...ARY DISPLAY Restore standard primary display SYMBOL DISPLAY Show symbol display dialog box TM CU RESET Return own ship to screen center in true motion and course up modes TOGGLE SHIP CENTER Toggle own...

Страница 34: ...datum does not change anything inside the system for navigation calculation processes or for electronic sea chart display processes But it changes the numerical values of positions displayed on the c...

Страница 35: ...ton while rotating the trackball If you locate the cursor over the intersection of a VRM and an EBL you can adjust them together using the left button and trackball Note that this can also be done fro...

Страница 36: ...tion to which measurements of range and bearing are referred To choose the location for the reference point open the Nav Marks dialog box check REF point place the cursor at the location desired then...

Страница 37: ...nsors connected to the system 1 Place the cursor on the Position field in the information area 2 Push the right button and the POSN page automatically appears SPD CRS POSN DR LORAN Off kn kn kn kn DGP...

Страница 38: ...5 Set each item as appropriate referring to the table below for details 6 Push the right button to close the menu Operation menu items Item No Description Options Key Beep Key beeps when key sequence...

Страница 39: ...Log BT Error Warning Dual axis log data is not received correctly 710 Echo Sounder Error Warning Echo sounder data is not received correctly 711 Wind Sensor Error Warning Wind sensor data is not rece...

Страница 40: ...he display Route Not selected Route selection box 2 Spin the scrollwheel to select desired route for monitoring Route planning must be done in the ECDIS mode For more information about route planning...

Страница 41: ...HUB 100 s AC power source to power it LED display The LEDs on the top of the unit light flash or go off according to equipment state When the equipment is powered all LEDs light and go off Switching H...

Страница 42: ...1 Operational Overview 1 20 This page intentionally left blank...

Страница 43: ...N 0 8 kn COG POSN 048 7 SOG POSN 17 4 kn Route HELSINKI Plan Speed 30 0 kn Plan 202 9 Route 217 9 CH LIM 195 m Off track 0 9 NM Outside channel To WPT Dist WOP NM Time Next WP Next Turn rad NM Turn ra...

Страница 44: ...Plan Speed 30 0 kn Plan 202 9 Route 217 9 CH LIM 195 m Off track 0 9 NM Outside channel To WPT Dist WOP NM Time Next WP Next Turn rad NM Turn rate min MODE Box see section 1 6 Chart Priority box see s...

Страница 45: ...pin the scrollwheel to select Echo then push the scrollwheel 3 Spin the scrollwheel to select Tune Initialize 4 Push the scrollwheel or push the ENTER MARK key on the control unit w keyboard Initializ...

Страница 46: ...in the HDG value at the top right corner of the screen 2 Push the right button to open the SENSORS dialog box Use the arrow buttons to select the SPD CRS dialog box SENSORS dialog box Spd Crs tab sele...

Страница 47: ...speed inputs Choosing presentation mode by keyboard Push the MODE key consecutively to select radar presentation mode desired The PRESENTATION MODE box shows the current presentation mode Choosing pr...

Страница 48: ...connecting the center with the top of the display indicates own ship s intended course namely own ship s previous heading just before this mode has been selected Target pips are painted at their measu...

Страница 49: ...d other moving objects move in accordance with their true courses and speed In ground stabilized TM all fixed targets such as landmasses appear as stationary echoes In the sea stabilized TM without se...

Страница 50: ...e heading line passing through the display center You can also reset the own ship symbol manually by pushing the CU TM RESET key or use the trackball to select the TM Res box at the bottom right corne...

Страница 51: ...system speed SPD and SB do following 1 Place the cursor on the SPD or SB field in the information area then push the left button to show the following dialog box 2 Put cursor on Speed source LOG BT in...

Страница 52: ...tom Tracking speed in deep waters without set and drift entry 5 Click the Close window button X to close the SENSORS dialog box Notes on speed input IMO Resolution A 823 19 for TT recommends that a sp...

Страница 53: ...n the information area 2 Push the right button to open the SPD CRS page Ref tgt kn kn kn kn kn kn CALC SPD CRS POSN 3 Use the trackball to select Manual speed and spin the scrollwheel to enter desired...

Страница 54: ...targets may be missed because of the poor contrast between desired echoes and the background noise on the display Adjust the gain so background noise is just visible on the screen From the control uni...

Страница 55: ...ecrease it 100 levels 0 100 are available 2 8 2 Manual adjustment of A C SEA The A C SEA control reduces the amplification of echoes at short ranges where clutter is the greatest and progressively inc...

Страница 56: ...e sequence of OFF 1 2 3 and 4 The higher the value the greater the suppression AUTO RAIN 2 9 2 Adjusting A C RAIN The vertical beam width of the antenna is designed to see surface targets even when th...

Страница 57: ...r information on the IEC is available from www iec ch IEC has no responsibility for the placement and context in which the extracts and contents are reproduced by the author nor is IEC in any way resp...

Страница 58: ...f OFF 1 2 and 3 The higher the value the greater the rejection 2 11 Measuring the Range The range to a target may be measured three ways with the fixed range rings with the cursor or with the VRM Use...

Страница 59: ...e trackball to place the arrow in the VRM1 or VRM2 box whichever VRM you want to use VRM boxes 2 The guidance area reads VRM on Push the left button to turn on the VRM The guidance area now reads L DE...

Страница 60: ...th the EBL Note Each EBL carries a range marker or a short line crossing the EBL at right angles and its distance from the EBL origin is indicated at the VRM readout whether or not the corresponding V...

Страница 61: ...pulse length You can select the pulse length for the 0 5 to 24 nm range scales as below 1 Use the trackball to select the PICTURE box at the left side of the screen 2 Push the right button to show th...

Страница 62: ...e which may be true or relative depending on the EBL bearing reference setting Note If relative motion is selected it is also possible to read CPA by using a VRM as shown in left hand figure below If...

Страница 63: ...heading relative 1 Use the trackball to select the MENU box at the right side of the screen 2 Push the left button to display the Main menu 3 Spin the scrollwheel to select Mark then push the scrollwh...

Страница 64: ...ip with suffix R or as a true bearing with suffix T To return the EBL origin to the screen center push the EBL OFFSET key again By trackball 1 Display an EBL following steps 1 3 in By trackball in sec...

Страница 65: ...onning position CCRP and the position of the antenna is more than 75 of the effective radius offcenter is not cancelled on short ranges To off center the radar picture do the following From the contro...

Страница 66: ...aking it easier to discriminate real targets from sea clutter Echo averaging uses scan to scan signal correlation technique based on the true motion over the ground of each target Thus small stationar...

Страница 67: ...left button or the scrollwheel to choose trail time as below The longer the trail interval the longer the length of the target trail Control Available setting Left button TRAILS key Off 15 sec 30 sec...

Страница 68: ...lwheel to display ON then push the scrollwheel PI line number Status ON or OFF PI 1 ON 032 0 T 5 60NM PI line orientation PI line interval Boxes not shown when PI line is OFF IL Index Line box 3 Use t...

Страница 69: ...window button X on the menu to close the menu PI line mode PI lines orientation may be selected from parallel or perpendicular This function is available when Number of Lines in the Parallel Index Li...

Страница 70: ...heel 3 Use the trackball to select the setting of Stern Mark 4 Spin the scrollwheel to select Off or On as appropriate then push the scrollwheel 5 Click the Close window button X on the menu to close...

Страница 71: ...ge scale of 3 nm or less on calm seas FAR Optimum setting for long range detection using a range scale of 6 nm or larger NEAR BUOY Optimum setting for detecting navigation buoys small vessels and othe...

Страница 72: ...2 Radar Operation 2 30 PICTURE1 PICTURE2 PICTURE3 PICTURE4 NEAR FAR NEAR BUOY FAR BUOY Picture setup options and default settings...

Страница 73: ...2 Radar Operation 2 31 ROUGH SEA SHIP HARBOR COAST Picture setup options and default settings con t...

Страница 74: ...they are labeled PICTURE 1 PICTURE 4 in the PICTURE box You can program them as below 1 Use the trackball to select the PICTURE box at the left side of the screen 2 Push the left button to select PIC...

Страница 75: ...e used to enter the setting 11 If necessary select Low Level Echo to reject low level echoes The setting range is 0 8 The higher the figure the stronger the low level echo that is erased 12 To save a...

Страница 76: ...s noise as follows 1 Use the trackball to select the PICTURE box at the left side of the screen 2 Push the right button to show the PICTURE menu PICTURE menu 3 Use the trackball to select the setting...

Страница 77: ...reject second trace echoes 1 Use the trackball to select the MENU box at the right side of the screen then push the left button 2 Spin the scrollwheel to select Echo then push the scrollwheel to open...

Страница 78: ...one Brilliance 1 Brilliance 4 independently 1 Use the trackball to select the BRILL box at the bottom left corner of the screen 2 Push the right button to show the BRILL dialog box 3 Use the trackball...

Страница 79: ...the trackball to select the ALARM ACK box then push the left button The normal color for the WATCH label is restored and the watch alarm timer is reset to the initial value and starts the count down...

Страница 80: ...e upper left position shows current antenna selection Note When network error is found the message Connection lost to Radar CPU or LAN Radar conn error appears To restore normal operation reset the po...

Страница 81: ...crollwheel to display Ant1 M then push the left button 4 Repeat step 3 and 4 to set other display and antenna combinations 5 Click Store Inter SW 6 Push the right button to close the menu 2 27 3 Selec...

Страница 82: ...lue Can be set Desired Value Can be set Item Commonly Controlled Item Commonly Controlled Item Commonly Controlled Item Commonly Controlled Item Commonly Controlled Desired Value Can be set Desired Va...

Страница 83: ...play when the performance monitor is active Checking radar performance 1 The radar is automatically set up as follows Range 24 nm Pulse Length Long Blind Sector Off A C Sea Off A C Rain Off Echo Stret...

Страница 84: ...ht 8 24 1 12 White Gray Black Note The above default settings are restored whenever the setting for Calibrated is ON Choosing color and brilliance set 1 Use the trackball to select the BRILL box at th...

Страница 85: ...RP as applicable The position of the own ship marker changes according to reference position as shown below If the CCRP is positioned outside of the effective display area the bearing scale is indicat...

Страница 86: ...ing Speed Course over ground Speed over ground Own ship data Own L L Data from sensor regardless of reference point selected 2 31 Cursor Position Data Cursor position data is shown at the top right si...

Страница 87: ...A drop mark is inscribed on the screen and range and bearing between own ship and the drop mark are shown below corresponding DROP MARK box 000 010 020 030 040 050 060 070 080 090 100 110 120 130 140...

Страница 88: ...start the anchor watch Alarm setting Alarm triggered Activating anchor watch 1 Open the main menu followed by the Mark menu 2 Enter desired range value 0 9 99 nm for the anchor watch in the Range fie...

Страница 89: ...e chart radar screen There are following predefined settings available IMO Base text indication DspBase In Chart Display dialog nothing checked in Standard Other 1 and Other 2 pages IMO Primary text i...

Страница 90: ...ing chart display setting for visible chart and navigation features Note 1 We recommend that you create separate chart databases for easy viewing of radar in chart radar mode and view chart details in...

Страница 91: ...utton to restore priority to the radar echo 2 36 2 Coast line only In the chart radar mode select the Coast Line Only box bottom left hand corner and hold down the left mouse button to temporarily era...

Страница 92: ...sets a safety contour see section 9 1 1 Choosing safety contour to select safety depth suitable for the ship The operator also sets the parameters for own ship predicted movement see section 9 3 Activ...

Страница 93: ...the target above the sea the size shape and material of the target and the atmospheric conditions Under normal atmospheric conditions the maximum range is equal to the radar horizon or a little short...

Страница 94: ...ring resolution are radar reflectors having an echoing area of 10 m2 Bearing accuracy One of the most important features of the radar is how accurately the bearing of a target can be measured The accu...

Страница 95: ...es If a target exists where it can be detected by the side lobes as well as the main lobe the side echoes may be represented on both sides of the true echo at the same range Side lobes show usually on...

Страница 96: ...ange the frequency match during each of the 12 slow sweeps will produce a response on the radar display thus a line of 12 dots equally spaced by about 0 64 nautical miles will be shown When the radar...

Страница 97: ...tion is no longer your objective 3 3 3 General remarks on receiving SART SART range errors When responses from only the 12 low frequency sweeps are visible when the SART is at a range greater than abo...

Страница 98: ...Morse coded pattern Note that the position on the radar display is not accurate RACON signal RACON marks on the radar display 3 5 Radar Target Enhancer RTE An RTE is a radar transponder is mounted on...

Страница 99: ...full accuracy after an abrupt course change The actual amount depends on gyrocompass specifications The amount of tracking delay is inversely proportional to the relative speed of the target Delay is...

Страница 100: ...ith the trackball Control unit RCU 020 Trackball With the cursor inside the effective display area you can access TT functions by spinning the scrollwheel or choosing appropriate TT function from the...

Страница 101: ...rget 5 Repeat steps 2 4 to continue entering reference marks Three may be entered Notes on speed input by reference target Reference targets are only used for the calculation of true speed Do not use...

Страница 102: ...able tracking At this point the broken square mark changes to a solid circle Targets automatically acquired are distinguished from those acquired manually The targets which are acquired manually are d...

Страница 103: ...the Tracked Target or reference target to cancel tracking 3 Push the right button to cancel tracking on the target selected Canceling tracking on all tracked targets 1 Use the trackball to select the...

Страница 104: ...ely after acquisition this plotting symbol is shown in broken lines Within one minute after acquisition a vector appears to show a trend of movement Within three minutes after acquisition the plotting...

Страница 105: ...s Within one minute after acquisition Steady tracking Manual plotting symbol in a bold solid circle within three minutes after acquisition flashing CPA alarm collision course Plotting symbol red flash...

Страница 106: ...ed targets are lost frequently you may want to disable the lost target alarm against tracked targets by maximum range or minimum speed See section 5 11 1 Enabling disabling audio alarm for lost target...

Страница 107: ...e Symb DISP box at the right side of the screen then push the left button 2 Open the Targets page Symbol display dialog box targets page 3 Select the Color box 4 Spin the scrollwheel to select color d...

Страница 108: ...ance RNG of the target from own ship True speed SOG and true course COG of the target CPA and TCPA A negative TCPA value means that you have already passed the closest point and the Tracked Target is...

Страница 109: ...an one page of data use or to scroll the list 4 The Refresh button updates data 5 Click the Close window button X to close the list or wait 30 seconds for the window to close automatically Sorting the...

Страница 110: ...e motion mode all fixed targets such as land navigational marks and ships at anchor remain stationary on the radar screen with vector length zero But in the presence of wind and or current the vectors...

Страница 111: ...n the Vector motion box Note that this also selects the vector mode for the past position display 2 Push the VECTOR TIME key Your selection appears in the vector length box see the illustration below...

Страница 112: ...ion orientation true or relative is controlled with TRAIL MODE on the TRAIL menu Past position display 4 10 1 Displaying and erasing past position points choosing past position plot interval 1 Use the...

Страница 113: ...x at the right side of the screen then push the left button Select the Tracking page 2 Select the Density box in the Target past positions window spin the scrollwheel to select Sparse Medium or Dense...

Страница 114: ...the predictor ON OFF The current setting is shown in the mouse functions area To set the time for the predictor put the cursor on the time indication next to Predictor spin the scrollwheel to choose...

Страница 115: ...ically To enter set and drift manually do the following 1 Place the cursor on the Position field in the information area 2 Push the right button Left click the arrows at top right corner of the SENSOR...

Страница 116: ...e lower right corner Push the left button to show the CPA and TCPA boxes SINGLE SINGLE AUTO MAN AUTO MAN xx xx xx xx xx xx xx xx CPA and TCPA settings 2 Spin the scrollwheel to select the CPA setting...

Страница 117: ...ition zone using the example at the bottom of the page 1 Use the trackball to select GZ1 box at the right side of the screen AZ1 AZ2 AZ status Blank AZ off SET Set AZ WORK AZ active SLEEP AZ asleep AZ...

Страница 118: ...lank 4 14 3 Acknowledging the acquisition zone alarm To acknowledge and silence the acquisition zone audio alarm push the ALARM ACK key or select the ALARM ACK box then push the left button 4 14 4 Acq...

Страница 119: ...after the lost target alarm is acknowledged 114 TT AUTO ACQ 100 full Warning Appears when capacity for automatically acquired targets is full 115 TT AUTO ACQ 95 full Warning Appears when capacity for...

Страница 120: ...and courses the targets and own ship s future movements are simulated in one second increments indicating their predicted positions in 30 second intervals as illustrated below The delay time represent...

Страница 121: ...d Position of target A at end of trial maneuver Position of target B at end of trial maneuver 4 16 2 Performing a trial maneuver To perform a trial maneuver do the following 1 Use the trackball to sel...

Страница 122: ...Course and speed may also be set with the EBL and VRM respectively Put the cursor in any one of the four trial maneuver related boxes and operate applicable control 11 Select TRIAL SET Push the left b...

Страница 123: ...follows Dynamic mode The trial is terminated when 60 minutes is shown in the Trial Time Box Static mode The trial is terminated when you terminate the trial maneuver manually To terminate the trial m...

Страница 124: ...test does not need echo signals gyro nor speed log input Three targets having different speeds and courses as shown in the table below are simulated automatically together with current targets These...

Страница 125: ...t the exact same range a target start is initiated Since receiver noise is random it is not three bang correlated and it is filtered out and not classified as an echo The same is true of radar interfe...

Страница 126: ...ar beam is super refracted strong echoes may be received at such long ranges that they appear on a different timebase sweep than the transmitted pulse This gives an incorrect range indication Second a...

Страница 127: ...low Type of Ship IMO nominal reporting interval Lost target indication reporting interval Pre set rate for automatic removal of lost target Class A speed between 0 14 kn 10 s 50 s 430 s Class A speed...

Страница 128: ...ts as desired The feature active and sleeping AIS targets is very effective for focusing on only those AIS targets which need supervision The Chart Radar further eases the task of the operator by auto...

Страница 129: ...ft Speed from reference targets The message shown right appears if you try to activate the AIS function when the above mentioned items are active 5 3 Turning AIS Display On Off Targets which are being...

Страница 130: ...t target Red in color Erased after acknowledged Broken square is overlaid on target selected to display its data A B or C shown to indicate data box location at the right side of the screen Real AtoN...

Страница 131: ...d min Length min 2 Check desired categories of AIS targets to show on the display in the AIS filter field 3 Select maximum number and maximum range of AIS symbols to show on the display 4 Set Priority...

Страница 132: ...0 000 when they are zoomed to overscale The left illustration shows the cal signs of targets and the right illustration shows the names of targets The left illustration shows AIS targets with Outlines...

Страница 133: ...On the AIS data box click check mark to activate corresponding target Alternatively left click the symbol of the target to activate Activated target 5 6 2 Activating all targets 1 Use the trackball to...

Страница 134: ...S target which you want to sleep 2 Push the scrollwheel The selected target symbol is then enclosed in a dashed square and AIS data is displayed in the AIS data box Sleeping target 3 Uncheck ship name...

Страница 135: ...TARGET DATA key By trackball Use the trackball to place the cursor on an AIS target symbol then push the scrollwheel The selected target is marked with a broken square and AIS data is shown in the AI...

Страница 136: ...ation 5 10 5 8 2 Detailed target data 1 Use the trackball to place the cursor on the desired AIS target in the data box at the right side of the screen 2 Push the left button to show detailed data Det...

Страница 137: ...limits You can set CPA and TCPA limits in the information area 1 Put the cursor on the text CPA OFF then left click to get the distance and time fields 2 Put the cursor on the distance value and use...

Страница 138: ...argets inside CPA limit that meet conditions set for CPA auto activate Select the setting for CPA auto activation as follows 1 Put the cursor on the text CPA auto act then left click to select desired...

Страница 139: ...size and color of the AIS symbol 5 10 1 AIS symbol brilliance 1 Use the trackball to select the BRILL box at the left side of the screen then push the right button BRILLIANCE menu 2 Select TGT Danger...

Страница 140: ...For the ECDIS mode show Symbol Display Info in the guidance area push the left button then click Chart Display on the menu 2 Open the Targets page Targets page 1 Select the color for AIS targets with...

Страница 141: ...red anchored active AIS target when time of period is 36 minutes Note 1 If a TT lost target mark is displayed when the ALARM ACK key is pushed or the ALARM ACK box is clicked to acknowledge an AIS los...

Страница 142: ...be a straight line Below are sample past position displays a Ship turning b Ship running straight c Ship reduced speed d Ship increased speed Sample past position displays 5 12 1 Displaying and erasin...

Страница 143: ...lotting interval 1 Use the trackball to select the Symb DISP box at the right side of the screen then push the left button 2 Select the Tracking page 3 Use the trackball to select the value of Target...

Страница 144: ...aring relative to own ship radar antenna To avoid the presentation of two target symbols for the same physical target the association function is incorporated If target data from both AIS and radar pl...

Страница 145: ...iff Enter the bearing difference from own ship to AIS target and tracked target setting range 0 0 9 9 SPD Diff Enter the speed difference between AIS target and tracked target setting range 0 0 9 9 kt...

Страница 146: ...he TARGET DATA key By trackball Use the trackball to place the cursor on an AIS target symbol then push the scrollwheel The selected target is marked with a broken square and AIS data is shown in the...

Страница 147: ...target in the data box at the right side of the screen 2 Push the left button to show detailed data The Target Dialog shows information from AIS and Tracked Targets Left hand side is data from AIS ta...

Страница 148: ...modify own ship information do following 1 Display Menu Info Chart Menu in the mouse functions area then push the left mouse button to open the Main menu 2 Choose AIS Own Ship Info from the menu then...

Страница 149: ...menu 2 Select Safety Message from the menu then push the scrollwheel to show the SAFETY MESSAGE dialog box SAFETY MESSAGE MESSAGE Filter All Name S17052004 103836 Status Unsent Send Org Vessel Call Si...

Страница 150: ...e then push the scrollwheel Select Addressed to MMSI to send the message to a specific ship AIS equipped or Broadcast to All to send to all nearby AIS transponder equipped ships For Addressed to MMSI...

Страница 151: ...e of the target Call sign and MMSI of the ship selected are shown in the Vessel field in the Safety Message menu 4 To send a message to the ship select Addressed to MMSI from the Address box and set o...

Страница 152: ...afety Message menu 2 Check Enable changes 3 In the Filter field select Received from the topmost box and the message to reply to in the box below it 4 Select Msg Type and Channel as appropriate 5 Ente...

Страница 153: ...terval of ship type 634 AIS message received Warming AIS message received 635 AIS target in ACQ ZONE Warming AIS target has entered an acquisition zone The target s symbol is red and flashing 636 AIS...

Страница 154: ...5 AIS Operation 5 28 This page intentionally left blank...

Страница 155: ...ight functions from left to right The Electronic chart area takes up 7 8 of the ECDIS display 1 2 3 4 5 1 Presentation mode 2 ECDIS mode 3 Display scale 4 Chart only switch 5 Name of display settings...

Страница 156: ...as which are not displaying the electronic chart The user interface contains information about settings parameters and selections used by ECDIS The nature of the information displayed can be either st...

Страница 157: ...rmation area The information area displays details about own ship position course and speed and the cursor s location on the chart Information from the positioning sensors HDG heading and its source i...

Страница 158: ...s and sensors connected to the system The Route display or Autopilot display is always displayed You can display one of them together with the Conning display Docking display or Chart legend When two...

Страница 159: ...he guidance area See figure at right 3 Push the right button to show the sidebar menu on the display 4 Spin the scrollwheel to choose desired sidebar from the menu then push the scrollwheel To remove...

Страница 160: ...PT Off track Perpendicular distance the ship is from the intended track To WPT The waypoint which the ship is approaching Dist WOP Wheel Over Point Distance to the point where rudder order for course...

Страница 161: ...dinal speed Transversal speed aft Information in docking sidebar The following information is shown in the docking sidebar ROT indicator Heading indicator Speed indicators Longitudinal speed and sourc...

Страница 162: ...the places and button to push to get desired dialog boxes on the display To close a dialog box click the X at the top right corner of the dialog box Note that only one dialog box may be shown at a ti...

Страница 163: ...rner contains a menu which provides additional functions See the figure at right Place the cursor on the triangle to show a menu from which to choose additional functions Note A menu will also appear...

Страница 164: ...Route User Chart or Notes on the status bar A drop down dialog box appears where you can choose either Monitor or Plan by clicking the appropriate button with the left button With user chart or Notes...

Страница 165: ...et Display and Approve dates as the current date there is a possibility that you can get a wrong presentation or some feature may be absent For how to set Display and Approve dates see section 7 11 Ch...

Страница 166: ...cludes safety contour and other chart alerts Name of the user chart to be used during route monitoring together with this planned route Name of the Notes to be used during route monitoring together wi...

Страница 167: ...Route on the status bar and click the Monitor button For more information about route selection see Chapter 11 Route Monitoring If the text Checked conditions differ appears in the menu this means tha...

Страница 168: ...lection is used ONLY when the last waypoint should be different than the one defined last in your route If needed use the Monitor Route menu to select it Confirming checked conditions of the route pla...

Страница 169: ...de If the text This has been changed after Route Planning Check is displayed re check your route against chart alerts Using planned Notes To check if planned Notes is selected open the Selections page...

Страница 170: ...d Note that the content of these pages depends on the sensors which are in use on the ship To display the SENSORS dialog box place the cursor on the position indication in the information area then pu...

Страница 171: ...tate When a position sensor state is changed to primary and another sensor was primary the sensor formerly primary becomes secondary Select the Primary navigation sensor as the sensor which is conside...

Страница 172: ...ected counter Click the OK button to reset The prompt window disappears 6 2 6 Verifying datum Datum is used to select between different models of the earth It is essential that you use datum in a unif...

Страница 173: ...disk and converted into the system s own internal format SENC Some parts of the charts may be date dependent i e they are visible after a set date or they are visible only for a limited period etc In...

Страница 174: ...formation from other sources RENC A service provider offering ENC delivery and update service as defined in IHO standard S52e3 Often an RENC provides both CD ROM and telecommunications based service t...

Страница 175: ...n RENC the system is unable to know the exact up to date situation For further details see section 7 11 Chart Viewing Dates and Seasonal Features of the Vector Chart You have loaded updates into your...

Страница 176: ...details of failed ENC conversions No No Open SENC Convert window Wait until all conversions are completed If any ENC conversion fails a Failed Senc Conversion window appears Highlight desired ENC in...

Страница 177: ...rent system date Approve loaded changes by setting Approve Until to current date Open Date Dependent Select All Set Approve Until current date Visually inspect ENC for changes Added objects are marked...

Страница 178: ...respective drive Spin the scrollwheel to show Menu Info Chart Menu in the guidance area then push the right button 2 Choose Load and Update Charts from the menu and from CD ROM from the sub menu see b...

Страница 179: ...the Load button to load those charts See also Interpretation of Load or Update Charts from loaded CD ROM dialog box on page 7 9 6 Before loading starts then automatically converts them into SENC forma...

Страница 180: ...an error is detected during conversion from ENC to SENC the following window appears To find the reason click the Details button 8 When conversion is completed the following window appears 9 Click th...

Страница 181: ...OM and for which you have permits RENC Canceled Charts The system will display charts on display which are canceled on RENC and normally on CD ROM Group If you have predefined a group of charts the sy...

Страница 182: ...7 load window Data for the selected CD ROM is displayed Cell ID Name of the chart Edition Edition number of the chart Base Including update number and issue date of base cell of the chart First Update...

Страница 183: ...CD ROM catalogue Messages which control reload If you try to load charts with the same edition already loaded into your hard disk or if you try to load the same update already loaded into your hard d...

Страница 184: ...oned in the box Note You cannot replace chart data which is already in use unless you only replace the latest base cell or update If you want to reload older data again you must first remove the corre...

Страница 185: ...D ROMs to find the missing update updates or contact your chart supplier The message above clearly indicates that this chart is not up to date and thus it does not fulfil SOLAS requirements Get the la...

Страница 186: ...NNN is a number from 001 to 999 and which includes an update To load charts without building a named CD ROM catalogue do the following 1 Spin the scrollwheel to display Menu Info Chart Menu in the gu...

Страница 187: ...n You can also initiate conversion from The SENC Convert window or from a cell status window 7 3 1 Speeding up SENC conversion The SENC conversion speed depends about how many other tasks the system i...

Страница 188: ...play dates can be set as issue dates automatically Do the following to set these options 1 Spin the scrollwheel to display Menu Info Chart Menu in the mouse function area then push the right button 2...

Страница 189: ...window appears The example above shows a queue of unfinished SENC conversions Note You can remove charts from the conversion list at any time Use the cursor to highlight desired amount of chart names...

Страница 190: ...the latest edition of this chart from the publisher immediately Failed means that the system completely failed to convert the ENC into the SENC and thus the ENC cannot be used Failure clearly indicate...

Страница 191: ...v ENC GB203000 000 edt 1 upd 0 1999 4 3 Perfect chart which is produced by a private chart producer i e chart doesn t have ENC status A private chart cannot fulfil SOLAS requirements Successful auto c...

Страница 192: ...us updates has failed in its SENC conversion The system cannot accept additional updates unless all previous updates have been successfully converted into the SENC Chart is partly usable but it is not...

Страница 193: ...rt or use the Groups button to choose a group of charts 4 Click the Convert button to initiate the SENC conversion of the charts Note that Convert only converts those charts which are not currently co...

Страница 194: ...ection 7 4 5 Removing an S57 chart cell from the system Chart Catalogue You can manage S57 charts See section 7 4 2 Catalogue of S57 cells Set Chart viewing dates You can view date dependency of the c...

Страница 195: ...eported by you S52 presentation library You can confirm the S52 presentation library revision number for S57 charts The current official Presentation library is shown in this example User permit You c...

Страница 196: ...the charts may be considerably less than the declared limits of it You can cursor pick any chart by going over its limit then you can view the information for it To display the catalogue do the follow...

Страница 197: ...he chart is an RENC then the chart is also up to date If the source of the chart is something other than an RENC then all loaded updates are included into the SENC Orange The chart is available for us...

Страница 198: ...and add charts into it When you load or update S57 charts from CD ROM you are able to define a group in Load or Update Charts from loaded CD ROM window To do this proceed as follows Using Load or Upd...

Страница 199: ...8 kn SB POSN 1 7 kn COG POSN 045 1 SOG POSN 2 0 kn NM 60 03 400 N 1 453 NM 024 58 372 E 352 0 6 Use the trackball to define a frame then the push the left button HDG 070 0 SPD CALC 1 8 kn SB POSN 1 7...

Страница 200: ...070 0 SPD CALC 1 8 kn SB POSN 1 7 kn COG POSN 045 1 SOG POSN 2 0 kn NM 60 03 400 N 1 453 NM 024 58 372 E 352 0 8 When you have completed entering frames click the Close Edit button North Up TM North...

Страница 201: ...9 Check Group as a qualifier for loading HDG 070 0 SPD CALC 1 8 kn SB POSN 1 7 kn COG POSN 045 1 SOG POSN 2 0 kn 60 03 400 N 1 453 NM 024 58 372 E 352 0 10 Click the Load button to load charts member...

Страница 202: ...ndow HDG 070 0 SPD CALC 1 8 kn SB POSN 1 7 kn COG POSN 045 1 SOG POSN 2 0 kn NM 60 03 400 N 1 453 NM 024 58 372 E 352 0 2 Click the Edit Group button then click the New button 3 Enter name for Group a...

Страница 203: ...DG 070 0 SPD CALC 1 8 kn SB POSN 1 7 kn COG POSN 045 1 SOG POSN 2 0 kn NM 60 03 400 N 1 453 NM 024 58 372 E 352 0 6 Select Group to view content of group in Chart Catalogue window HDG 070 0 SPD CALC 1...

Страница 204: ...from the list Select Group to activate a Group selection Select desired group Click Edit Group HDG 070 0 SPD CALC 1 8 kn SB POSN 1 7 kn COG POSN 045 1 SOG POSN 2 0 kn NM 60 03 400 N 1 453 NM 024 58 37...

Страница 205: ...logue To choose active group do the following 1 Choose Chart Catalogue from the Chart menu 2 Check Groups 3 Choose desired group from Edit Group list box The name of active group appears in the Active...

Страница 206: ...pdates displ until date until updates is displayed You can enter desired date by using the Display Until field The number after the date shows the number of updates for the displayed cell number of di...

Страница 207: ...ll from the system do the following 1 Choose Remove Charts from the Chart menu 2 Choose chart cells to remove from the system You can remove base cell 000 updates 001 and SENC format snc 3 Click the R...

Страница 208: ...al but the older pmt format creates confusion because it cannot support the user when chart edition changes The system display warnings associated with expiry date Examples are will expire warning 30...

Страница 209: ...tion Subscription period is 12 months and it starts when you order first permit s from an RENC User subscribes to an updating service Updating service has a renewable expiration date ENC is still avai...

Страница 210: ...NC format If the source of the chart is an RENC then the chart is also up to date If the source of the chart is something other than an RENC then all loaded updates are included into the SENC Orange T...

Страница 211: ...ot up to date Get or load latest updates from your RENC service Use Chart Menu Set Chart viewing dates to check charts The information of available charts and their up to date status is available both...

Страница 212: ...splayed and Approved Until are set based on Updates number Updates Displayed and Approved until as NVLD Not Valid indication If a chart in the chart radar is older than the associated chart in RENC fo...

Страница 213: ...update which was issued after the expiration date of the permit The user has a right to view a chart forever but it will not complete the requirements for having up to date charts To view the Chart Pe...

Страница 214: ...out expired subscription is activated every 12 hours after the subscription has expired Note The top half of this message display provides a warning that the Product List is not up to date 7 6 5 Manag...

Страница 215: ...7 43 Compare the content of the newly loaded public key with the known content of the public key of an RENC you use If the contents are the same you can accept the newly loaded public key by clicking...

Страница 216: ...using an RENC How to get started with a CD ROM service Make a Subscription End User Agreement with your chart distributor Send a list of charts to your distributor Remember subscription type You rece...

Страница 217: ...scription agreement order new Permits Load Permits into ECDIS Load BASE CD ROM into ECDIS Load the latest Update CD ROM into ECDIS You received new Permits etc You received a weekly or monthly packet...

Страница 218: ...oad BASE CD ROM into ECDIS Load the latest UPDATE CD ROM into ECDIS You received new Permits etc Remember subscription type 7 7 4 Base CD ROM from an RENC A Base CD ROM from an RENC contains all the c...

Страница 219: ...Update Charts from the Chart menu and from CD ROM from the sub menu If the following window appears you have to define location of CD ROM then click the Load button If you want to load from another ch...

Страница 220: ...urther details see Interpretation of Load or Update Charts from CD ROM on page 7 9 North Up TM y HDG 070 0 SPD CALC 1 8 kn SB POSN 1 7 kn COG POSN 045 1 SOG POSN 2 0 kn 60 03 400 N 1 453 NM 024 58 372...

Страница 221: ...7 Vector Chart Material 7 49 9 If error is detected during conversion from ENC to SENC the following window appears 10 When conversion is completed the following window appears...

Страница 222: ...hart menu Load or Update Charts and next menu select from CD ROM North Up TM ECDIS only HDG 070 0 SPD CALC 1 8 kn SB POSN 1 7 kn COG POSN 045 1 SOG POSN 2 0 kn 60 03 400 N 1 453 NM 024 58 372 E 352 0...

Страница 223: ...rt menu 2 Click the Load File button 3 Choose correct drive from the Look in list box Permits are available in two formats PERMIT TXT which contain permits and their editions and subscription types Th...

Страница 224: ...ch may appear when loading a permit If you try to load a One off permit for a chart for which you already have a Subscription permit you get the following message If you load permits from a different...

Страница 225: ...w and on the next several pages 7 8 2 Additional messages in S57 chart load Issue control of Base and Update CD ROM from RENC CD ROMs from an RENC contain issue control If you later use a CD ROM catal...

Страница 226: ...t has been updated too many times as new edition instead of an update Ask for new permits from your chart agent A chart was not converted into SENC because your permit was for different edition You ca...

Страница 227: ...tional messages in S57 SENC conversion Messages which contain only notice You do not have a permit Messages which require careful attention Permit for a chart has expired You have a permit but it is v...

Страница 228: ...chart scale If true motion reset is active ZOOM IN and ZOOM OUT keep the relative position of your ship with respect to the display If true motion reset is on ZOOM IN and ZOOM OUT keep the relative p...

Страница 229: ...of Chart Display Colours used for depth presentation on the electronic chart are controlled by setting values for Shallow Contour Safety Depth Safety Contour and Deep Contour Soundings on the electron...

Страница 230: ...0 m is presented as Safety Contour in this electronic chart Chart zero 0 m Chart zero 0 m Shallow water 5 m Shallow water 5 m Ship s safety depth 10 m Ship s safety depth 10 m Obstruction of depth les...

Страница 231: ...Contour and Deep Contour on the preceding page TM reset In the true motion mode own ship moves until it reaches the true motion reset borderline set here and then it jumps back to an opposite position...

Страница 232: ...m highlights updates so that all the objects pertaining to updates are highlighted although some of them have not been changed Standard Other 1 and Other 2 pages The Standard page contains chart featu...

Страница 233: ...nd display mode Units of depth and height 7 9 5 Controlling visible navigation features Symbol display Visibility control of the navigation features is divided into five pages in the Symbol Display di...

Страница 234: ...positions Density Choose density of past position of points Style Choose style of presentation of target s past position Events These marks are based on voyage log records User Event display event sy...

Страница 235: ...st box TT Std or small for Tracked Targets AIS ROT min limit to display AIS target with curved speed vector Note source of ROT must be ROT gyro on target vessel Association conditions Set appropriate...

Страница 236: ...Areas Choose to show areas on the display Color fill for the areas can be chosen as transparent from 25 to 75 and as No color fill If No color fill is chosen only the boundaries of the areas are visi...

Страница 237: ...s if Velocity Vector Time Increments Choose OFF or ON to hide or show ticks of velocity vector Note that this controls both own ship and targets ticks If ticks will be too tightly spaced they will be...

Страница 238: ...tions area and then push the left mouse button Move the cursor over the small triangle on the Chart Display or symbol dialog box Choose Save as from the Chart Display or Symbol Display menu and then p...

Страница 239: ...se IMO Primary Only in Chart Radar mode IMO Standard IMO All Other You can find display setting in use on upper status bar For more information see section 6 1 ECDIS Overview To select desired IMO Cha...

Страница 240: ...highlight the locations from which you can use the Info request to know additional information about the above mentioned features Below are examples of these symbols For further details see section 7...

Страница 241: ...lanning date whichever is applicable to your current usage of charts For details on how to set Display Approve date see section 7 11 2 Approving and highlighting vector chart updates If the charts you...

Страница 242: ...e cursor in the Display Until field use the scrollwheel to set desired date and confirm by pushing the scrollwheel 7 11 4 Setting approve until date 1 Open the Chart menu 2 Choose Set Chart viewing da...

Страница 243: ...orrect date in order to see the chart with update 1 and update 2 4 The date in which update 3 was issued Display and Approve dates have to be set to correct date in order to see the chart with update...

Страница 244: ...o 2005 01 02 You can see a box shaped Caution area on the screen Display date is now set to 2005 09 08 and Approve date is 2005 9 09 You can see a new area Restricted Area inserted into existing area...

Страница 245: ...rt and end as shown below YYMMDD Full date for date start and date end MMDD The same date every year MM The same month every year The example below shows how a user can find using Info query seasonal...

Страница 246: ...le shows how a user can find using the Info query seasonal the starting and ending month and day in every year MMDD This example shows how a user can find using the Info query seasonal the starting an...

Страница 247: ...An example of a seasonal chart feature The next two figures show a caution area which is valid from April 1 to November 15 The figure below shows the attributes of the caution area in the example abov...

Страница 248: ...hart symbols from the submenu to show on the ECDIS Appendix 2 contains examples of plots with symbols The Return dialog window appears when you choose something from the submenu of ECDIS Chart 1 When...

Страница 249: ...tion 7 9 3 Controlling visible chart features chart display 7 13 2 Choosing desired object from the list of found objects To specify desired SENC and object for information request do the following 1...

Страница 250: ...7 Vector Chart Material 7 78 Detailed information for the chosen object appears in the Object window ECDIS mode Chart radar mode 5 To close the windows click the X on the window you wish to close...

Страница 251: ...en a vector chart object you can view detailed information about it in the Object window ECDIS mode Chart radar mode Object name and validity period Pictorial presentation Additional coded text inform...

Страница 252: ...l 7 80 7 13 4 About vector chart coding Note If in the chart radar mode you click the View content button neither text nor pictures are displayed and the following message appears Tidal information is...

Страница 253: ...7 Vector Chart Material 7 81 More information is available in text More information is available as a picture...

Страница 254: ...t common example of this practice is a beacon or buoy in which the body and the top mark are defined separately Another example is lights and recommended track Still another example is measurement mil...

Страница 255: ...7 Vector Chart Material 7 83 Recommended track defined by two beacons...

Страница 256: ...7 Vector Chart Material 7 84 Recommended track defined by a building and a beacon...

Страница 257: ...7 Vector Chart Material 7 85 Measurement mile tails tails...

Страница 258: ...s information is based on information in an RENC One example of an RENC is PRIMAR You get the status of cells in an RENC via telecommunications if you have optional telecommunication installed in your...

Страница 259: ...known by your chart radar To view updates by their numbers open the Chart menu choose Chart Cell Status to display the Chart Cell Status window then click the Details button You will get a Chart Cell...

Страница 260: ...wn right appears the permit for the chart is for another edition Then the contents of the Cell Status window change as in this example at right Note that the SENC row is now empty After the SENC conve...

Страница 261: ...from the chart display If a mariner needs to make obsolete any of the official objects he deletes them Then in practice the deleted features are still visible but they are displayed a certain way to i...

Страница 262: ...nge symbols do not cover all possibilities Experienced users can use true symbols to create their own cartography 8 2 Displaying Manual Updates 8 2 1 Controlling visibility of orange symbols from manu...

Страница 263: ...tains updates and other set chart viewing dates features When you accept manual updates as permanent the system sets Display Until of manual updates as current date of the system To set Approve Until...

Страница 264: ...ur session by clicking the Accept Manual Updates as Permanent button then the chart radar stores your manual updates permanently If you need to leave your manual update session and discard all modific...

Страница 265: ...example for the newly inserted feature Inserting new orange symbols using new When you want to create a new object from scratch you start creating by clicking the New button in the Manual Update Plan...

Страница 266: ...efine position of symbol then click the Accept button Now you have two alternatives If you want to add a text then continue from step 11 Otherwise go to step 14 11 If you would like to include textual...

Страница 267: ...to display the Manual Update Planning dialog box 2 Click the Copy button in the Manual Update Planning dialog box 3 Place the cursor on the desired object and press left button 4 Choose object from t...

Страница 268: ...teps 1 3 on page 8 6 to display the Manual Update Planning dialog box 2 Click the Delete button in the Manual Update Planning dialog box 3 Place the cursor on the desired chart object then push the le...

Страница 269: ...push left mouse button Click Accept button 1 Follow steps 1 3 on page 8 6 to display the Manual Update Planning dialog box 2 Click the Modify button click the object on the chart which you want to edi...

Страница 270: ...ed down to modify a point The example below shows how to set position for a point This method is also applicable to insert or append new points for existing chart features 1 Activate Position Edit 2 I...

Страница 271: ...Manual Updates 8 11 The example below shows how to define an area for an existing chart feature 1 Activate Position Edit 2 Choose Set Center 3 Place cursor on requred point and push left mouse button...

Страница 272: ...d with your session Then you terminate your session by clicking the Accept Manual Updates as Permanent button and the chart radar stores your manual updates permanently If you need to leave your manua...

Страница 273: ...y is reserved for simple orange symbols Single All self understandable chart objects which can be created based on a single chosen chart object Examples are different kind of restricted and warning ar...

Страница 274: ...of available chart objects 5 Click the Accept New Object button New object is displayed in the List 6 Then click the Edit Properties button 7 Click the Edit Position button 8 Select Insert Point in t...

Страница 275: ...Easy Lateral Sea Mark from the Category list box 4 Select appropriate items from Type Shape Region and Side 5 Click the Accept New Object button New object is displayed in the List 6 Then click the E...

Страница 276: ...lave object 6 Click the Set as Nav Aid Slave button If you need more than one slave object continue from step 5 7 When you are ready with master and its slave objects click the Accept New Object butto...

Страница 277: ...Accept button 1 Follow steps 1 3 on page 8 6 to display the Manual Update Planning dialog box 2 Click the Copy button in the Manual Update Planning dialog box 3 Place the cursor on a desired object t...

Страница 278: ...cept button 6 Click the Edit Properties button 7 If you want to modify the position of the object click the Edit Position button Otherwise continue from step 13 8 Place the cursor on the desired locat...

Страница 279: ...8 Manual Updates 8 19 12 10 11 9 13 7 8 Set positions with cursor and push left mouse button Click Accept button...

Страница 280: ...mouse button 1 Follow steps 1 3 on page 8 6 to display the Manual Update Planning dialog box 2 Click the Delete button in the Manual Update Planning dialog box 3 Place the cursor on the chart object t...

Страница 281: ...lue highlight desired value in the Properties List then you can edit in the Property Value field using Alternatives field or enter Numeric or Textual value If the Object has a linked object you can al...

Страница 282: ...8 6 to display the Manual Update Planning dialog box 2 Press the Modify button select object on chart then click the Edit Properties button Object window appears An Object window appears 3 Click the...

Страница 283: ...1 Activate Position Edit 2 Insert point with left mouse button 3 If necessary change lat and lon position Place cursor on digit push thumbwheel and then roll thumbwheel Example of how to define a new...

Страница 284: ...ther cases when you need to know what was known by your chart radar To check any situation in the past you can use either Display Until and Approve Until to specify exact date of interest Alternativel...

Страница 285: ...reas using the largest scale chart available which may not be the visualised chart You can choose objects which are included for calculation of danger area for example restricted areas A window lists...

Страница 286: ...art alert calculation of the route if there are indications of danger areas in the route For more information see section 9 4 Route Planning Modify your route if necessary and do the chart alert calcu...

Страница 287: ...ick the alert item you wish to process 6 Choose what alert type you desire Click the Indication button to display visual alert or Alarm Warn button to get the audible alert The item chosen is moved fr...

Страница 288: ...monitored route crosses the area defined on the Chart Alerts page You can choose from the following areas Safety Contour Areas To Be Avoided User Chart Danger Area Traffic Separation Zone Inshore Traf...

Страница 289: ...Follow the procedure below to turn alert area highlighting on 1 Spin the scrollwheel to show Chart Display Info Standard Display then push the left mouse button 2 Click the right or left arrow tab to...

Страница 290: ...Plan User Chart dialog box Danger Symbol must checked otherwise danger symbols of a user chart cannot not be used in the chart alert The dangerous symbol is drawn in red instead of dark yellow color...

Страница 291: ...be used in the chart alert The dangerous area is drawn in red instead of dark yellow color may be different depending on Palette in use In the Area page you can include areas in the chart alert by ch...

Страница 292: ...ers X Print Optimization parameters X Selftest Presentation Library Acess Server and Diagnostic X Close 1 Spin the scrollwheel to show Menu Info Chart menu in the guidance area then push the left butt...

Страница 293: ...Chart Alerts 9 9 The figures below show how a watch sector is displayed on the chart radar display Chart alert always uses the largest scale chart available no matter which chart is chosen for displa...

Страница 294: ...r 10 Route Planning 3 Choose dangerous objects to be monitored during route monitoring on the Alerts page in the Plan Route dialog box shown below a Open the Plan Route dialog box by selecting User Ch...

Страница 295: ...lections made in the Chart alert parameters sub menu To find chart alerts by route leg do the following 1 In the Check page of the Plan Route dialog box the Alerts by leg field has a selection box whe...

Страница 296: ...chart alerts for a route by alert category do the following 1 In the Check page of the Plan Route dialog box the Legs by alert field has a selection box where you can choose desired leg number Alerts...

Страница 297: ...s a route monitor which facilitates safe use of routes You can check your route plan for safe water and you can attach a user chart and Notes which you intend to use together with a route plan To show...

Страница 298: ...9 Chart Alerts 9 14 This page intentionally left blank...

Страница 299: ...oute Using the above mentioned data the system calculates speed course and length for each leg ETAs for each waypoint fuel consumption and WOP It also calculates safe water areas based on user defined...

Страница 300: ...ization Description of Plan Route menu 1 Place the cursor on Route in the status bar and the following dialog box appears 2 Click the Plan button to open the Plan Route dialog box The Plan Route dialo...

Страница 301: ...to plan route Backup and Restore You can make a backup of a route to a floppy disk or restore a route from a floppy disk See Chapter 14 Backup Operations Report Generate report of planned route Full W...

Страница 302: ...anned route options only available in ECDIS mode WPT mark cannot be turned off 10 2 Choosing Datum Selection of datum is very important especially if you manually enter latitude longitude positions or...

Страница 303: ...alog box Place the cursor on an item spin the scrollwheel to change value then push the scrollwheel Do this for all waypoints of your route 7 Use the Alerts page to define safety contour and other spe...

Страница 304: ...g radius for each waypoint CH LIM m Define channel limit for each leg Margin m Define extension for channel to be checked against selected alerts Spd MIN kn Define minimum speed of ship used with a le...

Страница 305: ...sailing conditions Enable changes Check here in order to enable editing Note A route may only be modified when using the north up or course up mode Ignore during monitoring Chart objects in this list...

Страница 306: ...ime used for the Chart Alert check is subject to chart data base and route distance When the Start button is clicked one of the dialog boxes shown right appears as a reminder To continue click the OK...

Страница 307: ...n be calculated between two specified waypoints Second part is calculated ETA which may differ from planned ETA if it is impossible for them to agree with chosen optimization method Also total length...

Страница 308: ...Use this page if you are going to use the exchange function to choose planned route as monitored route If you do not use this page to define To WPT and Final WPT for steering in the planning mode cha...

Страница 309: ...ers for the route planning are Latitude and longitude of the waypoint Channel limits to the waypoint Turning radius of the waypoint 10 4 2 Changing waypoint position To change position of a waypoint y...

Страница 310: ...lwheel to confirm Entering distance and direction for next waypoint Position of WPT can be defined using distance and direction between two waypoints 1 Place the cursor on Route in the status bar clic...

Страница 311: ...nt data To change other data of a waypoint such as name steering mode turning radius min max speed do the following 1 Place the cursor on a desired field and spin the scrollwheel to change data 2 Push...

Страница 312: ...aypoints page Enter direction and distance for waypoint then click the OK button INSERT MODIFY NEXT WPT Current WPT 1 Next WPT NM OK 10 4 5 Inserting a waypoint If you want to insert a waypoint betwee...

Страница 313: ...e Copy from window place the cursor in the Route box spin the scrollwheel to choose the route from which to copy waypoints then push the scrollwheel 4 Enter first waypoint to copy in First WPT to copy...

Страница 314: ...number in the Copy after WPT box if applicable If you want to enter them before a WPT in the route where WPTs will be imported enter waypoint number in the Copy before WPT box Spin the scrollwheel to...

Страница 315: ...for optimization Max Speed This calculation uses the maximum speed defined in the ship parameters and multiplies by all reduction factors weather ice fouling etc together with speed limits given for...

Страница 316: ...own below it The monitor display shows ETD speed limit and calculated ETA 10 5 3 Planning a speed profile A speed profile is defined by general max speed and optimization types These values are given...

Страница 317: ...oute menu To display the report viewer choose Route Plan from the status bar place the cursor on the triangle in the Plan Route dialog box choose Report then push the scrollwheel To close the report v...

Страница 318: ...ng 10 20 Changing font used in report If you want to change the size of the font for the report 1 Place the cursor on the triangle in the report window 2 Choose desired option from the list then push...

Страница 319: ...es detailed information on each waypoint in a plan route To display the report viewer Place the cursor on the triangle in the Plan Route dialog box choose Full WPT Report from the menu then push the s...

Страница 320: ...an from the status bar place the cursor on the triangle in the Plan Route dialog box choose Passage Plan Report from the menu then push the scrollwheel To close the report click X in the right corner...

Страница 321: ...10 Route Planning 10 23 An example of passage plan report Notes text notes are placed between waypoints based on their position in which leg defined Notes will be activated...

Страница 322: ...10 Route Planning 10 24 This page intentionally left blank...

Страница 323: ...section 9 1 Chart Alerts Each leg has information about planned speed shown inside a rectangle Each leg has information about planned course to steer Note In order to display charts with correctly up...

Страница 324: ...x To display this dialog box choose Route from the status bar then click the Monitor button When you have chosen a route to monitor the system chooses a next waypoint automatically Check that the To w...

Страница 325: ...Monitor Route dialog box choose Route from the status bar then click the Monitor button 2 Place the cursor in the Final WPT box spin the scrollwheel to choose a waypoint 3 Push the scrollwheel to con...

Страница 326: ...e functions area push the left mouse button then click an arrow tab to display the Route menu WPT mark enables display of a waypoint s number in a route Leg marks enables display of planned speed and...

Страница 327: ...combination of a route plan user chart and Notes which you did not plan to be used together If the conditions defined during route plan do not meet the conditions during route monitoring Mon Route ap...

Страница 328: ...ollowing messages Current selection is different This means the name of user chart and or Notes in the monitoring mode is not the same as route planning check Remedy Click the Use button to choose use...

Страница 329: ...ss Turn enabled and Assisted turn Go Track mode Goto Track Track Great circle and Track Turn Permanent alerts are available regardless of the steering mode used and these are as follows Outside channe...

Страница 330: ...o it Final WPT Indicates waypoint number of final waypoint and estimated time and distance to it Monitored route is optimized using Max Speed Speed profile There are three calculation strategies Plan...

Страница 331: ...ime table The table below shows how the system calculates ETAs Type of chosen speed profile optimization on Route Monitor dialog box Used speed from current point to the To WPT Used speed from the To...

Страница 332: ...nitoring while the system is in automatic route steering Leave automatic route steering and choose a new route 364 Route Cancel disabled Appears when you try to cancel current monitored route while th...

Страница 333: ...ed in chart alert calculation and or display on the radar Navigation lines Displayed on both displays radar chart radar Navigation lines are reference lines for coast line Coast line Displayed on the...

Страница 334: ...played on the connected Radar nor is it used in chart alert calculation It is possible to have both the monitored and planned user chart at the same time if separate plan and monitor units are used Ev...

Страница 335: ...n mode on the menu Push the scrollwheel to show the sub menu shown below Go Monitor mode Go Monitor mode Switch from plan mode to monitor mode Go Monitor mode Move Mon to Plan mode Switch user chart c...

Страница 336: ...if the amount of symbols intended for the Radar display is less than 20 Note than lines are counted both from lines and area objects If the user chart has more than 60 lines or 20 symbols and if the...

Страница 337: ...12 User Chart Control 12 5 Below are some examples of sub charts Note the position used for points to collect the sub charts...

Страница 338: ...ecommended to use native datum of the chart 12 4 Choosing User Chart to use in Monitoring Mode The user chart which is chosen for the monitoring mode is indicated in the UChart field in the status bar...

Страница 339: ...ing mode user chart To activate the planning mode and choose a user chart for the planning mode do the following 1 Put the cursor on UChart in the status bar 2 Place the cursor on the down triangle ma...

Страница 340: ...position check New start position Check Danger Line if you want to use the line in chart alert calculation Use the cursor to specify position for line point then push the left button 4 Click the Symb...

Страница 341: ...modify user chart Note The user chart may only be modified in the Course up or North up mode Point box Shows the current and total number of points Name Permits naming of current point Position Manual...

Страница 342: ...s the current and total number of symbols Style You can choose either Label displayed only on chart radar or Symbol displayed also on TT display Name If available user can give name to symbol Symbol I...

Страница 343: ...e line Depth contour Coast line Navigation and route lines may also be displayed on the Radar screen Depth contours and coastlines are visible only on the chart radar display Danger Line Check to use...

Страница 344: ...al box Shows the current and total number of tidal points Name Permits naming of current tide Type User can choose type of tide here Position Manually enter latitude and longitude of tide in this box...

Страница 345: ...object then gives a name and chooses if it is displayed on radar and or if it is used for safe water calculation Danger Area Area box Number of current area appears in this field User can choose area...

Страница 346: ...the Area window and use the scrollwheel to enter applicable number Use the Info feature to find area Place the cursor on the desired corner point of the area on the electronic chart then push the scro...

Страница 347: ...e appropriate user chart object page in the Plan User Chart dialog box To modify user chart areas see section 12 6 5 Area page To add a new user chart object you have following two methods available U...

Страница 348: ...page 2 Choose desired user chart object 3 Enter co ordinates in the Position field To change a co ordinate place the cursor to the right of the digit to change in the appropriate box push the left bu...

Страница 349: ...opy box enter the number of the object from which to begin copying 6 In the Number of records box enter number of records to copy 7 Click the Copy button to copy 12 8 Joining Two or More User Charts T...

Страница 350: ...play and you can choose which chart objects to display from the Mariner page in the Symbol Display dialog box Below are some examples from the same user chart with different selections This user chart...

Страница 351: ...12 User Chart Control 12 19 An example with only symbols and points displayed Note that this is also a very good example how many and where the points should be defined No symbols displayed...

Страница 352: ...re Combine Point report Line report Area report Symbols report Tidal report Full report Report for radar Close 3 Choose desired report from the report group then push the scrollwheel 4 To print the re...

Страница 353: ...ether with the notice of the proximity of the relevant point While the ship sails notebook pages records in the chosen Notes file are compared with own ship position once per minute to choose Notes Fu...

Страница 354: ...ed and planned routes Below is an example of how to know which Notes is used in the monitoring mode and which is used in the planning mode Select Notes Monitor Plan X DISP DISP The Notes field in the...

Страница 355: ...the planning mode Select Chooses Notes to use monitor or planning mode Unselect Unselect removes Notes from active use Create Creates new Notes Notes can be named using up to 30 alphanumeric character...

Страница 356: ...ield on the status bar If the text Notes is red this means that the workstation is in the planning mode for Notes To activate the monitoring mode and choose Notes for the monitoring mode do the follow...

Страница 357: ...cord appears something like the dialog box shown right View record page If View all records is chosen Opens View Record page Choose View all records You can view any Notes record by clicking the arrow...

Страница 358: ...r white depending on color scheme this means that the workstation is in the monitoring mode for Notes To activate the planning mode and choose Notes for the planning mode do the following Move cursor...

Страница 359: ...notes distance is fixed to 10 NM Description The operator may edit a Notes message record which appears on the screen after the ship has passed the calculated point To edit the text put the cursor in...

Страница 360: ...Edit Record page of the Plan Notes dialog box check Enable changes Roll the trackball to place the cursor on the location desired for Notes then push the left button In the Range box enter the range...

Страница 361: ...t button Entering latitude and longitude in position field 1 Open the Edit page of the Plan Notes dialog box then check Enable changes 2 Choose desired Notes following section 13 5 2 Choosing Notes re...

Страница 362: ...In the Notes field choose the source Notes 3 Enter first Notes record to copy in the First page to copy field 4 Enter number of Notes records to copy in the Number of pages to copy field 5 Copy to No...

Страница 363: ...here backup and restore operations are initiated Selection of file category Operation on local hard disk Operation with all files in category Operation on backup device medium Choosing appropriate fil...

Страница 364: ...ick the OK button Deleting a file You can delete a file as follows 1 Choose desired file category 2 Choose desired file from the Hard Disk field 3 Click the Delete button 14 3 Floppy Disk Operations B...

Страница 365: ...imes it is useful to save route information as an ASCII text file for use with some other application or to restore some ASCII text produced by some other application to the chart radar The following...

Страница 366: ...ant to make a backup of chart material to backup chart radar open the Backup Restore dialog box and do the following 1 Choose file category 2 Choose Drive for backup of chart radar at Drive in the Bac...

Страница 367: ...estore dialog box and do the following 1 Choose file category 2 At Drive in the Backup Device window choose the drive where backup chart radar is stored Then click the Restore button 1 2 Note After th...

Страница 368: ...14 Backup Operations 14 6 This page intentionally left blank...

Страница 369: ...use on the ship 15 1 1 Sensors dialog box description Speed Course page Manual speed If checked user can enter value kn for speed Note This is used only if there are no other speed or SOG sensors cho...

Страница 370: ...atitude and longitude values will appear in red and with additional text in the following conditions Kalman filter has excluded the sensor from its estimated position Additional text is Excluded Recei...

Страница 371: ...Note The ability to check datum of position is a relatively new feature for position receivers It was introduced in standard IEC 61162 1 Ed2 published in July 2000 Only EPFS for example GPS or DGPS wh...

Страница 372: ...nd drift Check the Manual box to manually set speed and course of drift Note that you can choose manual drift only if there are no automatic sources for SOG and COG In other words you have neither a d...

Страница 373: ...f poor accuracy KALMAN filter GPS in diff mode or SYLEDIS selected as PRIMARY GPS in diff mode or SYLEDIS selected as SECONDARY Any other than GPS in diff mode or SYLEDIS selected as PRIMARY Any other...

Страница 374: ...ARY Any other than GPS in diff mode or SYLEDIS selected as SECONDARY Secondary position of the own ship used by the system Selected and position exists Secondary position of own ship is is not valid S...

Страница 375: ...o magnetic North man if the value has been manually entered or corr which is displayed in red if the value includes gyro correction Manual COURSE GYRO 1 GYRO 2 GYRO from RADAR Alarm 402 No Course Avai...

Страница 376: ...erage of SOG COG from all selected Decca Loran or Ref Target KALMAN filter calculation result from the movement of position SOG COG used by the system Selected and value existts SOG COG from all Avera...

Страница 377: ...Not selected or no value Not available HDG 071 0 SPD CALC 1 8 kn SB POSN 1 7 kn COG POSN 045 1 SOG POSN 2 0 kn 59 31 206 N 024 36 731 E WGS 84 DGPS Drift used by the system is shown in the Other page...

Страница 378: ...hosen alerts are generated if the system does not have a valid position available No alerts are generated for position jumps of the position sensors chosen to be used with the filter as long as the fi...

Страница 379: ...hip symbol or Radar target to desired location Drag and drop means that you place the object on desired location by rolling the trackball while pressing and holding down the left button then anchoring...

Страница 380: ...ng other than dead reckoning then the indication OFFSET is displayed at the upper part of the information area Also the range and bearing of the offset are shown in the Posn page of the Sensors dialog...

Страница 381: ...he Sensors dialog box then open the Position page 2 Uncheck Chart Align 3 Check that the indication OFFSET is not shown in the upper part of the information area to the right of the position source in...

Страница 382: ...art on Radar screen Correct Tracked Target positions on chart radar display Correct radar drawn on chart radar display Compensate courses used in route monitoring and automatic route steering If you h...

Страница 383: ...nstallation parameters C Map Ed3 installation Radar Initialize Navigation parameters X Priority Alert Chart Alert parameters Optimization parameters X Print Navigation parameters X Print Optimization...

Страница 384: ...ing North True wind angle true wind speed Wind angle reference True North Theoretical True wind angle true wind speed Wind angle reference Heading The illustration below shows wind speed and direction...

Страница 385: ...Description Receive R elative Apparent Wind and Calculate True Wind R Relative is extracted from the MWV sentence read as Apparent data and North and Theoretical are calculated Receive T heoretical Wi...

Страница 386: ...dialog box The output sentence of the items below changes according to setting of Rel Wind and True Wind Rel Wind True wind Output T True North or R Apparent The reference field of the MWV sentence i...

Страница 387: ...age in the Sensor menu depends on sensors connected In this example there are two transducers bow and aft installed The system displays depth value as depth below the transducer If required you can ac...

Страница 388: ...on to B Adapter which is an interface to various navigation sensors 702 Engine Control Comm Error Lost connection to engine control which could be an interface to various navigation sensors 705 Gyro E...

Страница 389: ...accessed with the mouse Spin the scrollwheel to display Event Info MOB in the guidance area then push the left or right button as appropriate Left button Event Records an event to the logbook You can...

Страница 390: ...push the scrollwheel 3 Choose Details Log from the menu then push the scrollwheel 4 The following window appears Confirm that you want to open the log by clicking the OK button Otherwise click the Can...

Страница 391: ...nd distance counter value Viewing the voyage log To open the voyage log do the following Alert Log Alert Queue 1 Spin the scrollwheel to show Menu Info Chart Menu in the guidance area then push the le...

Страница 392: ...scrollwheel 4 If the Voyage page is not already open click the Voyage tab to open it Set desired limits for speed and course and also logging interval using the scrollwheel When the speed or course ch...

Страница 393: ...wish you can also enter Lat and Lon values manually Position fixes defined by Line of Position LOP A plotted line on which a vessel is located determined by observation or measurement of the range or...

Страница 394: ...play is on in chart display settings If dead reckoning is active the button Use for DR is visible and clicking it will make the LOP position a new starting point for DR Time transfer If the observatio...

Страница 395: ...danger target log To open the Danger Target log do the following Alert Log Alert Queue 1 Spin the scrollwheel to show Menu Info Chart Menu in the guidance area then push the left button 2 Choose Reco...

Страница 396: ...A 10 0NM 30 min CPA Auto act OFF Lost TGT alarm FILT SINGLE xx xx AUTO MAN AIS DISP ALL Saving past track of a chosen tracked target or AIS target To save past track of chosen tracked target or AIS ta...

Страница 397: ...Details of chart chosen for display 16 2 5 Printing details voyage or danger targets log This procedure is the same if you make User Chart from Details Voyage or Danger Targets log Printing entire lo...

Страница 398: ...logs In each log Details Voyage or Danger Targets log you can choose font size for printed version To change font size do the following 1 Open desired log 2 Place the cursor on the triangle on the up...

Страница 399: ...as follows Alert Log Alert Queue 1 Spin the scrollwheel to show Menu Info Chart Menu in the guidance area then push the left button 2 Choose Record from the menu then push the scrollwheel 3 Choose Bac...

Страница 400: ...wheel 5 The system will ask you if you are sure to reset chosen log Click the OK button to reset the chosen log 16 2 8 Making a user chart from a log past track You can create a user chart from any lo...

Страница 401: ...NM Check to have the system filter the chosen log so that the minimum distance between points in the user chart is 0 3 nm Elements will be displayed on radar Check to display the chart on the radar s...

Страница 402: ...rt Menu in the guidance area then push the left button Choose Record from the menu then push the scrollwheel 2 Choose Alert Log from the menu then push the scrollwheel The Alert Log appears on the dis...

Страница 403: ...n the guidance area then push the left button Choose Record from the menu then push the scrollwheel 2 Choose Reset from the menu then push the scrollwheel 3 Choose Distance Counter from the submenu th...

Страница 404: ...16 Recording Functions 16 16 This page intentionally left blank...

Страница 405: ...TEX message When NAVTEX message is received in ECDIS an alert 798 NAVTEX message received appears To display NAVTEX message 1 Display Menu Info Chart Menu in the mouse functions area then push the lef...

Страница 406: ...17 NAVTEX Messages 17 2 This page intentionally left blank...

Страница 407: ...or watch Alarm setting Alarm triggered 18 2 Activating Anchor Watch To activate the anchor watch do the procedure shown below 1 Open the main menu 2 Select Anchor Watch 3 Enter desired value in the Dr...

Страница 408: ...18 Anchor Watch 18 2 18 3 Deactivating Anchor Watch To deactivate the anchor watch do the procedure shown below 1 Open the main menu 2 Select Anchor Watch 3 Click the Stop Anchor Watch button...

Страница 409: ...sed to control steering and navigation calculation or used during route planning To open the Initial Settings menu do the following 1 Place the cursor on the text SINGLE on the lower right corner of t...

Страница 410: ...meters See Chapter 14 Backup Operations for details Installation parameters The chart radar system parameters are set by the installation parameters Radar initialize For radar initialization Note Acce...

Страница 411: ...ameters are relative to ship steering and they are very important to get correct function of the integrated navigation system They must be maintained carefully Modification requires a good knowledge o...

Страница 412: ...sh the scrollwheel 6 Modify optimization parameters by placing the cursor in the desired edit box and using the scrollwheel to set value Push the scrollwheel to confirm Note 1 HFO Heavy fuel oil DO Di...

Страница 413: ...charts For S57 charts this tool is the color differentiation test diagram The color differentiation test diagram is a part of ECDIS Chart 1 and you can use it as follows 1 Spin the scrollwheel to show...

Страница 414: ...uipped control unit To activate the grey scale test do the following 1 Spin the scrollwheel to show Menu Info Chart Menu in the guidance area then push the left button 2 Select Initial Settings from t...

Страница 415: ...isplay with the left button and the following display appears Grey scale test pattern 7 Check for proper display of gray shades 8 Click the Exit button with the left button to close the display 9 Clic...

Страница 416: ...19 Parameters Setup 19 8 This page intentionally left blank...

Страница 417: ...warning is yellow in begin of warning there is a short beep and they flash until acknowledged If a warning is not acknowledged within 60 seconds then the short beep is repeated Caution color of cautio...

Страница 418: ...e happens i e they can only be seen on workstation where it happens Each workstation has own alert numbers for alerts generated by radar overlay Alert range is Alert 100 Alert 111 for Chart radar numb...

Страница 419: ...acknowledged state Priorities from 10 and 14 indicate acknowledged state You may view the alerts in the Alert Queue Place the cursor on the alert text and then push the right mouse button See the exam...

Страница 420: ...Roll the scrollwheel to choose Initial Settings then push the scrollwheel 3 Place the cursor in the Initial Settings dialog box to show the menu displayed at left 4 Spin the scrollwheel to choose Prio...

Страница 421: ...are reported to CAM This interface is based on IEC 61162 1 and IEC 80 520 INF Based on rules set by IMO MSC 252 83 Central Alert Management can remotely acknowledge some of the alerts and the rest ge...

Страница 422: ...VAILABLE 1 8 NO VALID HEADING SENSOR HAS BEEN FOUND VERIFY AND CHOOSE HEADING SENSORS IN SENSORS FUNCTION Alert number 405 LOG DATA UNRELIABLE 7 14 LOG GIVES 0 KN SPEED WHICH DOES NOT CORRESPOND WITH...

Страница 423: ...number 352 ROUTE ILLEGAL ETA WAYPOINT 4 ETA WAYPOINT DOESN T EXIST IN ROUTE FILE OR ETA WAYPOINT IS NOT BETWEEN NEXT AND FINAL WAYPOINT VERIFY IN ROUTE MONITOR THAT A VALID ROUTE IS CHOSEN Alert numb...

Страница 424: ...mber 392 ROUTE FILE NOT FOUND 4 CANNOT READ ROUTE IN MONITOR MODE MOVE ROUTE TO PLAN MODE TO MAKE SOME MODIFICATION OF WP DATA IN WP PAGE FOR EXAMPLE CHANGE RADIUS OF ANY WP Alert number 454 ROUTE END...

Страница 425: ...N RECEIVED FROM TRACKED AIS TARGET WITHIN DEFINED REPORTING INTERVAL OF SHIP TYPE Alert number 634 AIS MESSAGE RECEIVED 3 634 AIS MESSAGE RECEIVED 10 AIS MESSAGE RECEIVED AIS MESSAGE RECEIVED When AIS...

Страница 426: ...SENSORS Alert number 710 ECHO SOUNDER ERROR 6 13 ECHO SOUNDER DATA IS NOT RECEIVED CORRECTLY VERIFY ECHO SOUNDER OPERATION Alert number 711 WIND SENSOR ERROR 6 13 WIND SENSOR DATA IS NOT RE CEIVED COR...

Страница 427: ...NSOR Alert number 730 DGPS POS SOURCE CHANGE 5 12 DGPS POSITION SENSOR IN CHANNEL NUMBER 4 HAS CHANGED ITS OPERATION MODE FROM NORMAL TO DIFFERENTIAL OR FROM DIFFERENTIAL TO NORMAL CHECK SENSORS AND I...

Страница 428: ...STALLATION PARAMETERS CHECK THAT SENSOR OUTPUTS POSITION IN WGS 84 DATUM Alert number 742 DATUM MISMATCH 6 13 POSITION SENSOR IN CHANNEL NUMBER 5 OUTPUTS POSITION ANOTHER DATUM AS SET IN ECDIS INSTALL...

Страница 429: ...CHECK IP ADDRESSES Alert number 765 NO LAN ADATER INSTALLED 5 12 INSTALLATION MISTAKE NO LAN ADAPTER S DEFINED INSTALL CHART RADAR SW AGAIN Alert number 766 LAN ADATER 1 PARAM ERROR 6 13 INSTALLATION...

Страница 430: ...RSION OF SOFTWARE TO LAN ADAPTER Alert number 780 LANADATER2 VERSION ERROR 6 13 VERSION OF LAN ADAPTER 2 SOFTWARE IS NOT THE SAME WITH CHART RADAR SOFTWARE LOAD CORRECT VERSION OF SOFTWARE TO LAN ADAP...

Страница 431: ...INSHORE TRAFFIC ZONE 5 12 Alert number 865 RESTRICTED AREA 5 12 Alert number 866 CAUTION AREA 5 12 Alert number 867 OFFSHORE PRODUCTION AREA 5 12 Alert number 868 MILITARY PRACTICE AREA 5 12 Alert nu...

Страница 432: ...13 NO HEADING REFERENCE AVAILABLE FOR RADAR PROCESSOR WHICH IS SOURCE FOR RADAR OVERLAY CHECK ARPA PROCESSOR Alert number 106 LAN RADAR CONNECT FAILURE 5 12 FAILURE TO ESTABLISH LAN CONNECTION FOR ARP...

Страница 433: ...AVAILABLE FOR RADAR OVERLAY CHECK CONNECTORS AND CABLING FOR RADAR OVERLAY Alert number 202 RADOV NO TRIGGER 6 13 NO TRIGGER AVAILABLE FOR RADAR OVERLAY CHECK CONNECTORS AND CABLING FOR RADAR OVERLAY...

Страница 434: ...number 213 Radar STBY Warning 13 13 Alert number 214 TT Auto ACQ 100 full 6 13 Alert number 215 TT Auto ACQ 95 full 7 14 Alert number 216 TT Man ACQ 100 full 6 13 Alert number 217 TT Man ACQ 95 full 7...

Страница 435: ...LURE 5 12 FAILURE INSIDE ECDIS PROCESSOR BETWEEN DLL INTERFACE SW AND ECDIS SOFTWARE SWITCH POWER ON OFF AND REINSTALL ECDIS SW Alert number 159 RADOV NO ECHODATA 7 14 FAILURE TO RECEIVE RADAR ECHO DA...

Страница 436: ...5 12 FAILURE TO ESTABLISH LAN CONNECTION FOR ARPA FEATURES BETWEEN ECDIS PROCESSOR AND ARPA PROCESSOR CHECK LAN CONNECTORS AND CABLES POWER ON OFF AND REINSTALL ECDIS SW Alert number 257 LAN RADAR DL...

Страница 437: ...20 Alerts 20 21 Alert number 267 TT Man ACQ 95 full 7 14 Alert number 268 TT System error Alert number 269 Radar CPU Warning 13 13 Alert number 270 TT lost REF target 6 13...

Страница 438: ...or is supervised and if fault is detected then alert ALARM SENSOR LOST including number 70 85 depending of serial channel and source indication label for example AIS POS1 etc is created For example Al...

Страница 439: ...he procedure for adjustment is shown in Adjustment of Sweep Timing in the Installation Manual Heading Adjustment of radar echo heading The procedure for adjustment is shown in s Heading Alignment in t...

Страница 440: ...tion on the chart radar is not necessary If synchro or stepper gyro data is fed to the chart radar the heading indication on the chart radar must be adjusted to match that of the gyro For the adjustme...

Страница 441: ...off the radar power switch before servicing the antenna unit Post a warning sign near the switch indicating it should not be turned on while the antenna unit is being serviced Prevent the potential r...

Страница 442: ...sor units if it is dusty Once every 3 to 6 months Cabling Check that all cabling is firmly connected and is not damaged Exposed bolts and nuts of antenna unit Exposed bolts and nuts are subject to cor...

Страница 443: ...r motor 10 000 h Carbon brush MG120 5X6X11 D8G X band 10 000 h Check for wear when replacing magnetron Replace if worn Magnetron MAF 1425B X band 12 kW MG4010 X band 12 kW MG5436 X band 25 kW MG5223F...

Страница 444: ...e battery Radar The GC Gyro Converter board in the radar processor unit carries a battery which backs up data The life of the battery is about five years When the battery has expired the self test for...

Страница 445: ...s after the picture freezes the buzzer sounds the ALARM ACK key blinks and alarm signal is output Turn the power off and on again marks and noise appear but no echoes fuse may have blown Check fuse in...

Страница 446: ...box LAN adapter cable may have loosened Check sensor selections in SENSORS dialog box Connect LAN adapter cable S57 chart cannot been moved or zoomed in or out S57 chart drawing process is frozen Ope...

Страница 447: ...Marks and indications appear but no noise or echo 1 IF amplifier 2 Signal cable between antenna and processor unit 3 Video amplifier board 1 Replace IF amplifier 2 Check continuity and isolation of co...

Страница 448: ...are not displayed 1 Adjust the brilliance of range rings on the BRILL menu to see if intensity is increased 2 SPU board 1 Replace associated circuit board if unsuccessful 2 Replace SPU board Poor disc...

Страница 449: ...board Marks indications and noise appear but no echo Transmission leak representing own ship position is absent 1 TX fuse 2 Magnetron 3 Modulator board 4 SPU board 1 If fuse is blown replace it If it...

Страница 450: ...ard Replace SPU board Echo stretch is ineffective neither ES1 ES2 nor ES3 is displayed SPU board Replace SPU board Range rings are not displayed 1 Adjust the brilliance of range rings on the BRILL men...

Страница 451: ...service technicians For further details see the service manual 1 Spin the scrollwheel to show Menu Info Chart Menu in the guidance area then push the left button 2 Select the Initial Setting menu 3 P...

Страница 452: ...responding on screen location becomes larger or smaller with control operation 9 Operate the trackball The trackball s X and Y location is shown in the X and Y boxes 10 Spin the scrollwheel Confirm th...

Страница 453: ...est TT Test Close Go Back Key Beep Wheel Drive Alarm Level TTG Display TTG with VRM Go Back Ship and Route DB Spd Crs Posn Other Record Select Unselect Report Close DB Monit Alerts Selection Waypoints...

Страница 454: ...parameters Priority Alert Chart Alert parameters Optimization parameters Print Navigation parameters Print Optimization parameters Selftest Presentation library Access Server and Diagnostic Close Go...

Страница 455: ...ndard or Other in the Other 1 and Other 2 pages in the Chart Display dialog box To open the IHO ECDIS Chart 1 on the display do the following 1 Spin the scrollwheel to show Menu Info Chart Menu in the...

Страница 456: ...Appendix 2 IHO ECDIS Chart 1 AP 4 Information about the chart display 1 Information about the chart display 2...

Страница 457: ...Appendix 2 IHO ECDIS Chart 1 AP 5 Nature and Man made features Port features...

Страница 458: ...Appendix 2 IHO ECDIS Chart 1 AP 6 Depths Currents etc Seabed Obstructions Pipelines etc...

Страница 459: ...Appendix 2 IHO ECDIS Chart 1 AP 7 Traffic routes Special areas...

Страница 460: ...Appendix 2 IHO ECDIS Chart 1 AP 8 Aids and Services Buoys and Beacons...

Страница 461: ...Appendix 2 IHO ECDIS Chart 1 AP 9 Topmarks Color test diagram...

Страница 462: ...Appendix 2 IHO ECDIS Chart 1 AP 10 Mariners navigational symbols...

Страница 463: ...AP 11 Appendix 3 Interpreting S57 Charts The following examples give you a short introduction to the features of S57 charts Paper chart or simplified symbols Two color or multi color depth...

Страница 464: ...Appendix 3 Interpreting S57 Charts AP 12 Plain or symbolized boundaries Limited or full light sectors...

Страница 465: ...Appendix 3 Interpreting S57 Charts AP 13 Shallow safety and deep contours Shallow 2m Safety 5m and Deep 10m Shallow 5m Safety 10m and Deep 20m Safety depth 6m Safety depth 10m...

Страница 466: ...Appendix 3 Interpreting S57 Charts AP 14 Shallow pattern Items on Standard page of Chart Display dialog box Unknown object or presentation Chart data coverage...

Страница 467: ...Appendix 3 Interpreting S57 Charts AP 15 Land features Water and seabed features Traffic routes...

Страница 468: ...Appendix 3 Interpreting S57 Charts AP 16 Cautionary areas Information areas Buoys and beacons Lights...

Страница 469: ...Appendix 3 Interpreting S57 Charts AP 17 Fog signals Radars Services...

Страница 470: ...Appendix 3 Interpreting S57 Charts AP 18 Items on Other page in Chart Display dialog box Information about chart data Land features Soundings...

Страница 471: ...Appendix 3 Interpreting S57 Charts AP 19 Depth contour labels Depth contours magnetics currents Seabed pipelines obstructions Obstructions with soundings...

Страница 472: ...Appendix 3 Interpreting S57 Charts AP 20 Low accuracy Services and small craft facilities Special areas...

Страница 473: ...Appendix 3 Interpreting S57 Charts AP 21 Additional information available Important text Text on Other page in Chart Display dialog box Names for position reporting...

Страница 474: ...Appendix 3 Interpreting S57 Charts AP 22 Light descriptions Nature of seabed Geographic names etc...

Страница 475: ...Appendix 3 Interpreting S57 Charts AP 23 Swept depths magnetics Berth and anchorage numbers National language land elevation...

Страница 476: ...Appendix 3 Interpreting S57 Charts AP 24 This page intentionally left blank...

Страница 477: ...on our Internet pages at www C MAP no or by downloading the Chart Product Catalogue also available on the web site Price quotations can be obtained via your chart dealer or direct from your local C MA...

Страница 478: ...use with the FCR 2x07 A4 2 1 What is SENC delivery ENCs can be distributed as ENC delivery or SENC delivery Both deliveries can be used in FCR 2x07 In ENC delivery charts are distributed directly fro...

Страница 479: ...2 CM ENC service SENC delivery Chart data distributed through the service is S57 ed 3 0 or ed 3 1 coded ENC in CM ENC format When using charts loaded and updated using CM ENC service on ECDIS there ar...

Страница 480: ...ents as primary aid of navigation National Hydrographic Organization NHO may have arranged similar subscription service as RENC on its own waters Chart data distributed through the service is S57 ed 3...

Страница 481: ...CM 93 3 Prof CM 93 3 Prof and CM 93 2 services When using any of mentioned above you will always have indication No ENC Available on upper right corner of ECDIS If there is indication No ENC Available...

Страница 482: ...information about S57 charts displayed on the electronic chart display area The information is displayed with reference to your ship s position if automatic TM reset is active or with reference to th...

Страница 483: ...oosing CM93 3 chart material to use To activate S57 chart material onto the display do the following Put the cursor just above the chart scale indication in the information area Activate S57 Chart app...

Страница 484: ...T keep the relative position pointed by the cursor with respect to the display The system automatically chooses next larger or smaller scale If a chart with larger compilation scale is available at yo...

Страница 485: ...ilable from an RENC SENC Display charts stored in your hard disk in SENC format C MAP Display charts of CM93 ed 3 chart database stored on ECDIS 2 View Filters Name Display also cell names in graphica...

Страница 486: ...license 3 month or 1 year Database version available on CD ROM label Based on this information C MAP is able to process a code that is delivered onboard as a text string or a file called password usr...

Страница 487: ...ble on DVD Note CM ENC is not yet available A4 5 1 Load of CM93 3 database to ECDIS Charts are available on CM93 3 professional CD ROM To load them from CD to ECDIS proceed as follows 1 Menu Chart Men...

Страница 488: ...same time at the same workstation 1 Menu Chart Menu C Map Ed3 Load and register for use The following dialog box appears insert CD ROM DVD 2 Click Load database to hard disk button 3 Wait until loadin...

Страница 489: ...sional and CM ENC C Map generates own license A4 6 1 Add license from file To get access to CM93 3 chart data base you have to enter a code which is received from C Map directly or through Chart agent...

Страница 490: ...x Click Close button If the above dialog box appears it indicates that there is mismatch between chart database and password usr Check that you have password usr which is delivered to you to be used t...

Страница 491: ...this string manually into ECDIS To enter code proceed as follows Menu Chart Menu C MAP Ed3 Licenses Add string received from C MAP to the License string field then click the Add License button Click t...

Страница 492: ...w license to view chart database after the expiration date When warning of license s expiration appears contact your chart agent to renew your C MAP license s After expiration charts of expired licens...

Страница 493: ...tly from the ECDIS They are able to create an update order file from the ECDIS and send this by email directly to updates c map no This automatic email server will process the update request prepare t...

Страница 494: ...utton then select the drive where to save the Chart Update Order file When Chart Update Order file is generated and saved to destination the following dialog box appears Click the OK button Update ord...

Страница 495: ...ve received an update file via e mail then you can load it to ECDIS Open the Chart menu and select C MAP Ed 3 in the menu Select Update Charts in C MAP Ed 3 menu and Apply Updates from e mail in Updat...

Страница 496: ...dix 4 C MAP CM 93 3 Charts AP 44 In C MAP Chart Update dialog box select drive where updates are saved and click the Apply Updates button When completed the following dialog box appears Click the OK b...

Страница 497: ...can see a list of changes for every updated chart as follows Open the Chart menu and select C MAP Ed 3 in the menu Select Update Charts in C MAP Ed 3 menu and Apply Updates from e mail in Update char...

Страница 498: ...Appendix 4 C MAP CM 93 3 Charts AP 46 Select from the list shown below Select a chart from the list Click the X button In the RTU dialog box click the X button...

Страница 499: ...rom the menu Select C Map Update Status in C Map Ed 3 menu 2 C Map Database Update Status dialog appears The Following information is available Database version number ENC version 227 Date of Update f...

Страница 500: ...e menu Select C Map Update Status in C Map Ed 3 menu 2 C Map Database Update history viewer appears The following information is available Loading date of Database with version number ENC BASE version...

Страница 501: ...move CM93 3 charts from ECDIS using Unregister This will remove license and entire database from ECDIS Open the Chart menu and select C MAP Ed 3 from the menu Select Load and register for use from the...

Страница 502: ...Appendix 4 C MAP CM 93 3 Charts AP 50 Confirm your action by clicking the OK button Close CM 93 3 Database Administrator dialog box by clicking X in upper right corner...

Страница 503: ...he following parameters are used Baud rate 38 400 bps HDT THS AIVDM AIVDO and AIALR All other sentences 4800 bps Data bits 8 D7 0 Parity none Stop bits 1 D0 D1 D2 D3 D4 D5 D6 D7 Start bit Stop bit Dat...

Страница 504: ...xxxxx x x x x x hh CR LF 6 5 4 3 2 1 1 MMSI of the addressed AIS unit 2 AIS channel of reception 3 Message type 4 Message sequence number 5 Type of acknowledgement ACK Acknowledge alarm Recipient of s...

Страница 505: ...hh CR LF 7 6 5 4 3 2 1 1 Local datum W84 WGS84 W72 WGS72 S85 SGS85 P90 PE90 999 User defined IHO datum code 2 Local datum subdivision code 3 Lat offset min N S 4 Lon offset min E W 5 Altitude offset...

Страница 506: ...epth Recipient of sentences Expected nominal interval of sentences 5 s Alarm generated if message not received 22 s 2 s DPT x x x x x x hh CR LF 4 3 2 1 1 Water depth relative to trancsducer in meters...

Страница 507: ...tal dilution of precision 7 Antenna altitude above below mean sealevel m 8 Geoidal separation m 9 Age of differential GPS data 10 Differential reference station ID 0000 1023 11 Checksum NOTE 0 fix not...

Страница 508: ...Mode indicator see note 6 Checksum NOTE Positioning system Mode indicator A Autonomous D Differential E Estimated dead reckoning M Manual input S Simulator N Data not valid The Mode indicator field s...

Страница 509: ...r of satllite in use 00 99 6 HDOP 7 Antenna altitude metres re mean sea level geoid 8 Geoidal separation 9 Age of differential data 10 Differential reference station ID 11 Checksum HDT Heading true Re...

Страница 510: ...s 5 s Alarm generated if message not received 22 s 2 s MWV x x a x x a A hh CR LF 6 5 4 3 2 1 1 Wind angle 0 to 359 degrees 2 Reference R relative T true 3 Wind speed 4 Wind speed units KN M N 5 Statu...

Страница 511: ...Appendix 5 Digital Interface AP 59 NRX NAVTEX received data...

Страница 512: ...ences Expected nominal interval of sentences 1 5 s Alarm generated if message not received 22 s 2 s E Estimated dead reckoning M Manual input S Simulator N data not valid ROT Rate of turn Recipient of...

Страница 513: ...x x x A x x A x x A hh CR LF 11 10 9 8 7 6 5 4 3 2 1 1 Longitudial water speed knots 2 Transverse water speed knots 3 Status water speed A data valid V data invalid 4 Longitudial ground speed knots 5...

Страница 514: ...of sentences Expected nominal interval of sentences 1 5 s Alarm generated if message not received 12 s 2 s 1 Heading degrees true VDR Set and drift VDR x x T x x M x x N hh CR LF 4 3 2 1 1 Direction d...

Страница 515: ...ee note 6 Checksum NOTE Positioning system Mode indicator A Autonomous D Differential E Estimated dead reckoning M Manual input S Simulator N Data not valid The positioning system Mode indicator field...

Страница 516: ...C 2 Local alarm number identifier 3 Alarm condition A threshold exceeded V not exceeded 4 Alarm s acknowledge state A acknowledged V unacknowledged 5 Alarm s description text 6 Checksum AIVDM VHF data...

Страница 517: ...on demand ABM x x x xxxxxxxxx x xx s s x hh CR LF 9 8 7 6 5 4 3 2 1 1 Total number of sentences needed to transfer the message 1 to 9 2 Message sentence number 1 to 9 3 Message sequence identifier 0 t...

Страница 518: ...te A acknowledged V unacknowledged 5 Alarm s description text 6 Checksum BBM UAIS Broadcast binary message Transmit of sentences Expected nominal interval of sentences on demand BBM x x x x xx s s x h...

Страница 519: ...s true 4 Course reference B M W R P see note 5 Vessel soeed 6 Speed refereence B M W R P see note 7 Vessel set degrees true Manually entered 8 Vessel drift speed Manually entered 9 Speed units K km h...

Страница 520: ...ee note 2 7 VRM2 range 8 EBL2 degrees 9 Cursor range from own ship 10 Cursor bearing degrees clockwise from 0 11 Range scale in use 12 Range units K N S 13 Display rotation see note 1 14 Checksum NOTE...

Страница 521: ...Appendix 5 Digital Interface AP 69 SSD AIS ship static data Transmit of sentences Expected nominal interval of sentences on demand...

Страница 522: ...device 2 Label assigned to target n 3 Additional label pairs 4 Checksum TTD Tracked target data TTD hh hh x s s a x hh CR LF 5 4 3 2 1 1 Total hex number of sentences need to transfer the messages 2...

Страница 523: ...relative T R 4 Target speed 5 Target course degrees true relative T R 6 Distance of closet point of approach 7 Time to CPA min increasing 8 Speed distance units K N S 9 User data e g target name 10 Ta...

Страница 524: ...tion flags 0 to 15 Serial interface radar processor unit input ports Heading sensor Baud rate is fixed at 38 4 kbps Complies with IEC 61162 2 LTC1535 Isolated RS485 Transceiver Logical High A B 0 2V L...

Страница 525: ...vers and receivers TD A TD B Logical High A B 0 2V Logical Low A B 0 2V Serial interface LAN adapter input ports Log wind depth and navigation sensors Baud rate is fixed at 4800 bps Complies with IEC...

Страница 526: ...bps Complies with IEC 61162 2 Other port Baud rate is fixed at 4800 bps Complies with IEC 61162 1 Output port TD A TD B SP487 TD A GND Isolated RS485 Transceiver Logical High A B 4 0V Logical Low A B...

Страница 527: ...UZ Board 03P9362 Trackball Assy TA4726N CONTROL UNIT RCU 015 PNL Board 03P9344 Trackball Assy TA4726N DISPLAY UNIT MU 201CE Noise Filter Power Supply DVI I F Board LCD Unit Backlight Unit Inverter Boa...

Страница 528: ...A FCR 2117 2817 03P9244 B FCR 2127 2827 SCANNER CHASSIS RSB 096 24 rpm RSB 097 42 rpm RF MODULE RTR 078 FCR 2117 2817 RTR 079 FCR 2127 2827 MIC ASSEMBLY RU 9601 FCR 2117 2817 RU 9603 FCR 2127 2827 MO...

Страница 529: ...03P9347 MOTOR D8G 516 2003 10 SYMBOL NAME Transceiver unit RTR 081 FCR 2827W FURUNO Model FCR 2827W Unit Transceiver Unit RTR 081 ELECTRICAL PARTS LIST REMARKS PRINTED CIRCUIT BOARD TB 03P9349 IF AMP...

Страница 530: ...03P9346 SCANNER CHASSIS RSB 098 21 26 rpm RSB 099 21 26 rpm RSB 100 45 rpm RSB 101 45 rpm RSB 102 45 rpm RF MODULE RTR 080 MIC ASSEMBLY RU 9760A MOTOR RM 7398 RSB 098 099 21 26 rpm 200 220V 3 RM 7435...

Страница 531: ...HG3_DC12V TB1 RELAY 2003 10 Antenna unit RSB 104 105 for FCR 2837SW FURUNO Model FCR 2837SW Unit Antenna Unit RSB 104 105 ELECTRICAL PARTS LIST SYMBOL NAME REMARKS PRINTED CIRCUIT BOARD TB 03P9349 BP...

Страница 532: ...2837SW Unit Transceiver Unit RTR 082 ELECTRICAL PARTS LIST SYMBOL NAME REMARKS PRINTED CIRCUIT BOARD TB 03P9349 IF AMP 03P9335 PWR 03P9348 MD 03P9244 RFC 03P9346 MIC ASSEMBLY RU 9760A MOTOR TR LIMITER...

Страница 533: ...unit MU 231CE FAN F62LM 012 K FAN Drive Board FAN CONTROLLER DVI I F Board FPI NO SW Noise Filter 5220 0123 1 Power Supply HYPERION OBL03131 Display unit MU 231CE inside rear cover LCD Unit FLC59UXC8...

Страница 534: ...play unit MU 201CE DVI I F Board FPI NO SW Noise Filter 5220 0123 1 Power Supply HYPERION OBL03131 Display unit MU 201CE inside rear cover Connector Board AC1457 LCD Unit NL128102AC31 02 Inverter Boar...

Страница 535: ...cation AP 83 Control unit RCU 020 BUZ Board 03P9362 Trackball Assy TA4726N PNL Board 03P9343 Control unit RCU 020 rear cover removed Control unit RCU 015 Trackball Assy TA4726N PNL Board 03P9344 Contr...

Страница 536: ...P9348 Circulator RC 3686 Diode Limiter RU 9099 IF Board 03P9355 MIC Assy RU 9601 FAR 2117 2817 RU 9603 FAR 2127 2127 5A 2827 Transceiver unit RTR 078 079 for FCR 2117 BB 2127 BB 2817 2827 upper half M...

Страница 537: ...D Board 03P9244 B Magnetron MG5436 Pulse Transformer RT 9203 Transceiver unit RTR 079 for FCR 2117 BB 2127 BB 2817 2827 lower half Antenna unit RSB 103 for FCR 2827W BP Board 03P9347 RF Board 03P9349...

Страница 538: ...3P9349 PWR Board 03P9348 IF Amplifier 03P9335 MIC Assy RU 9601 Diode Limiter RU 9099 Circulator RC 3686 RFC Board 03P9346 Underneath MD Board 03P9244 Pulse Converter RT 9023 Magnetron MG5436 Circulato...

Страница 539: ...20V 3 RM 7435 RSB 099 21 26 rpm 380 440V 3 RM 9519 RSB 100 45 rpm 220V 3 50 Hz RM 9520 RSB 101 45 rpm 220V 3 60 Hz RM 9521 RSB 102 45 rpm 440V 3 60 Hz MIC Assy RU 9760A Behind plate Diode Limiter RU 9...

Страница 540: ...Appendix 6 Parts List and Parts Location AP 88 RFC Board 03P9346 Magnetron MG5223F MD Board 03P9244 Pulse Transformer RT 9773 Antenna unit RSB 098 099 100 101 102 for FCR 2137S BB 2837S cover opened...

Страница 541: ...m 200 V 3 50 Hz For RSB 104 26 rpm 220 V 3 60 Hz RM 7345 For RSB 105 21 rpm 380 V 3 50 Hz For RSB 105 26 rpm 440 V 3 60 Hz TB Board 03P9349 Antenna unit RSB 104 105 for FCR 2837SW cover opened MSS Boa...

Страница 542: ...7SW IF Board 03P9335 TB Board 03P9349 RFC Board 03P9346 RF PWR Board 03P9348 MD Board 03P9244 Magnetron MG5223F Beneath plate MIC Assy RU 9760A Circulator RC4910S TR Limiter TL378A Fan Motor MSS 09B24...

Страница 543: ...Drive FD 235HF 000 165 010 Hard Disk MHV2040 AC 000 159 044 10 SDRAM DIMM Board 77 G1136 44G 000 164 603 10 BACKPLANE Board PCI 5S RS R40 000 170 056 10 Power Supply UPF250 AA BG 000 165 006 11 CPU B...

Страница 544: ...Appendix 6 Parts List and Parts Location AP 92 This page intentionally left blank...

Страница 545: ...single or multicolor 32 Scan system Interlace horizontal 48 3 kHz vertical 60 Hz Picture FCR 2107 series FCR 2807 series Size 20 1 inch LCD 23 1 inch LCD Display range 408 306 470 4 352 8 Resolution...

Страница 546: ...7S Ferrite circulator with TR limiter FCR 2827W 2837SW 2 3 Display related specifications Minimum range 20 m w raw video 0 2 m w digitize error Range discrimination 20 m w raw video 0 6 m w digitize e...

Страница 547: ...ines best position from gyro data and EPFS Navigation planning Planning by Rhumb line Great circle Route creation Route data may be transferred to radar Route data may be transferred from ECDIS Route...

Страница 548: ...1A 5 5 S band antenna Model Antenna voltage input at wind speed 100 kt 200 VAC 3 50 Hz 220 VAC 3 60 Hz 380 VAC 3 50 Hz 440 VAC 3 60 Hz 220 VAC 3 50 Hz HSC 220 VAC 3 60 Hz HSC 440 VAC 3 60 Hz HSC FCR...

Страница 549: ...e pulse max output Level difference 9 0 11 0 dB 1 phase pulse 2 phase pulse 8 2 PM 51 S band Frequency 3020 3080 MHz Input power Min 5 dBm Max 15 dBm Power output 15 dBm 2 phase pulse max output Power...

Страница 550: ...This page is intentionally left blank...

Страница 551: ...stem 14 3 Battery replacement 22 4 Bearing measurement 2 18 Brilliance 1 4 2 36 2 42 CCRP 2 43 CD ROM catalogue removal 7 10 CD ROM dialog box 7 8 Cell details 7 86 Cell status 7 85 Cell status button...

Страница 552: ...ea 6 3 overview 6 1 palette 6 2 route sidebar 6 6 scrollwheel usage 1 8 sidebar 6 4 Echo averaging 2 24 Echo stretch 2 24 Edit Group button 7 25 Edit record page 13 7 Event recording 16 1 False echoes...

Страница 553: ...s list 75 Parts location 81 Passage plan report 10 22 Past position display AIS 5 14 TT 4 14 Performance monitor 2 41 Permanent messages charts 7 2 PI lines bearing reference 2 26 displaying 2 26 mode...

Страница 554: ...m other routes 10 15 waypoints information 11 3 waypoints inserting 10 14 WPT table report 10 19 Sailing directions 7 67 SART 3 4 Scrollwheel incrementing direction 1 16 usage on ECDIS display 1 8 Sea...

Страница 555: ...12 14 objects used in 12 1 objects adding 12 15 objects deleting 12 16 objects editing 12 16 objects importing 12 17 objects modifying 12 16 objects position 12 16 planning mode 12 7 reports 12 20 use...

Страница 556: ......

Отзывы: