Software Control:
xT microscope Control Software
4-16
Sample Navigation
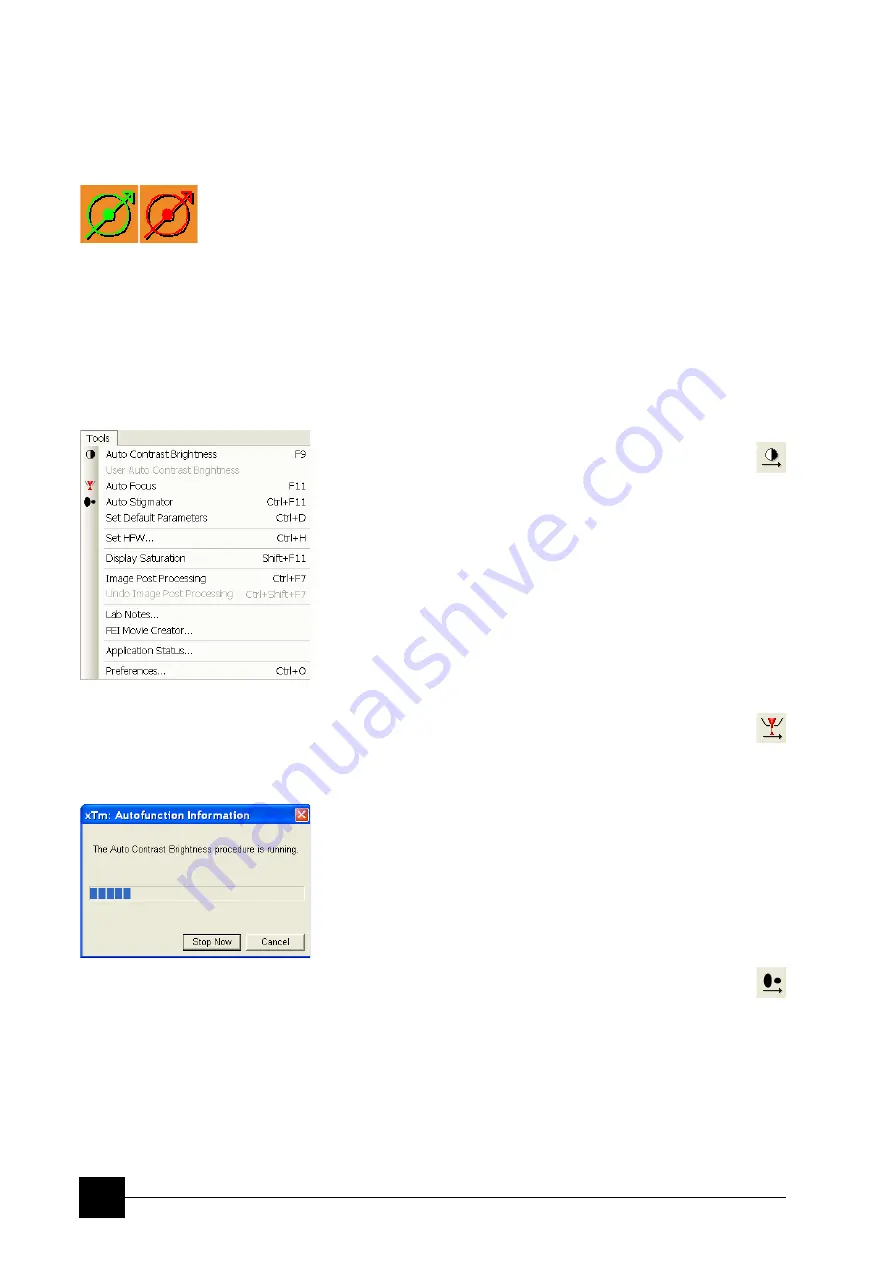
toggles on / off function that enables to navigate live electron images
(scan field) towards desired places on a specimen using either
paused or loaded image of that specimen (usually taken at much
lower magnification).
The Sample Navigation can be selected independently for any quad,
regardless of its actual content and status. A tick next to the menu
item indicates that the function is selected for the active quad. As
soon as this quad is paused, the Sample Navigation indicator appears
in the upper right corner of the quad. The indicator is green as long as
the paused image can be used to navigate the live images, otherwise
turns read (e.g. when the stage rotation or tilt changes).
Navigation Montage...
This procedure takes the image of the sample to be used in the
Sample Navigation (see Chapter 7).
The Tools Menu (Alt + T)
opens the Tools menu functions:
Auto Contrast Brightness (ACB) (F9)
activates the automatic contrast and brightness routine. The system
attempts to set the Contrast and Brightness of the selected detector in
the active quad to suit the actual sample and conditions so that the
majority of grey levels is displayed.
User Auto Contrast Brightness
examines gray levels of the active quad image and stores their
minimum and maximum. Next time the ACB function is used, it
attempts to set the Contrast and Brightness so that the resulting
image gray levels lies between this minimum and maximum instead of
full black and white.
A tick next to this menu item indicates the user gray level limits active.
Clearing the tick reverts the ACB to its default setting.
Auto Focus (F11)
The system attempts to automatically correct the WD
(independently of the WD or Z-coordinate) in 10 steps according to
the magnification value. If the procedure fails, lower the magnification
to max. 1000×. One can also start the Reduced Area feature (see
above) to select a point of the sample to be focused on prior to the
Auto Focus start.
Note:
When ACB / Auto Focus is activated the dialogue appears to show the
progress. The function can be interrupted by clicking the
Stop Now
button, which leaves the setting at the actual stage of progress.
Clicking the
Cancel
button before the function ends returns the setting
to its original value.
Auto Stigmator (Ctrl + F11)
activates the automatic procedure to correct the astigmatism
(see Chapter 5).
Set Default Parameters (Ctrl + D)
loads default settings for the actual
Vacuum Mode
. The function
switches UI to quad Image mode and selects the default detector for
quad 1 and the CCD camera for quad 4. The microscope and image
parameters are selected so that there is a big chance to get an usable
image immediately.
Содержание Quanta FEG 250
Страница 8: ...C vi...
Страница 28: ...System Operation Quanta FEG System States 3 10...
Страница 108: ...Alignments 1 Gun Alignment 6 6...
Страница 114: ...Alignments 154 Water Bottle Venting 6 12 154 Water Bottle Venting...
Страница 152: ...System Options Automatic Aperture System 9 4...
Страница 154: ...System Options Nav Cam 9 6 401 NAV CAM AUTOBRIGHTNESS...
Страница 177: ...System Options Cooling Stage Waterless Cooling Stage 9 29...


