QX1000 Manual II: Administrator's Guide
Administrator’s Menus
QX1000; (SW Version 5.3.x)
131
Restriction
radio buttons:
•
Selecting
Any
blocks or allows all host IP addresses. This
selection is not present for the
Management Access
,
Blocked
and
Allowed IP List
rules.
•
Selecting
Single IP
will require the IP address of the allowed
or blocked host.
•
Selecting
IP/Mask
will require the subnet to be allowed or
blocked, specified by an IP address and the Maskbits. The
following are
Maskbit
examples:
255.0.0.0= /8,
255.255.0.0 = /16,
255.255.255.0 = /24,
255.255.255.255= /32
•
Single URL
requires the hostname of the allowed or blocked
host.
•
Group
indicates the user-defined groups that include IP
addresses that should to be allowed or blocked.
The
Description
field is used to insert an optional description of
the filtering rule.
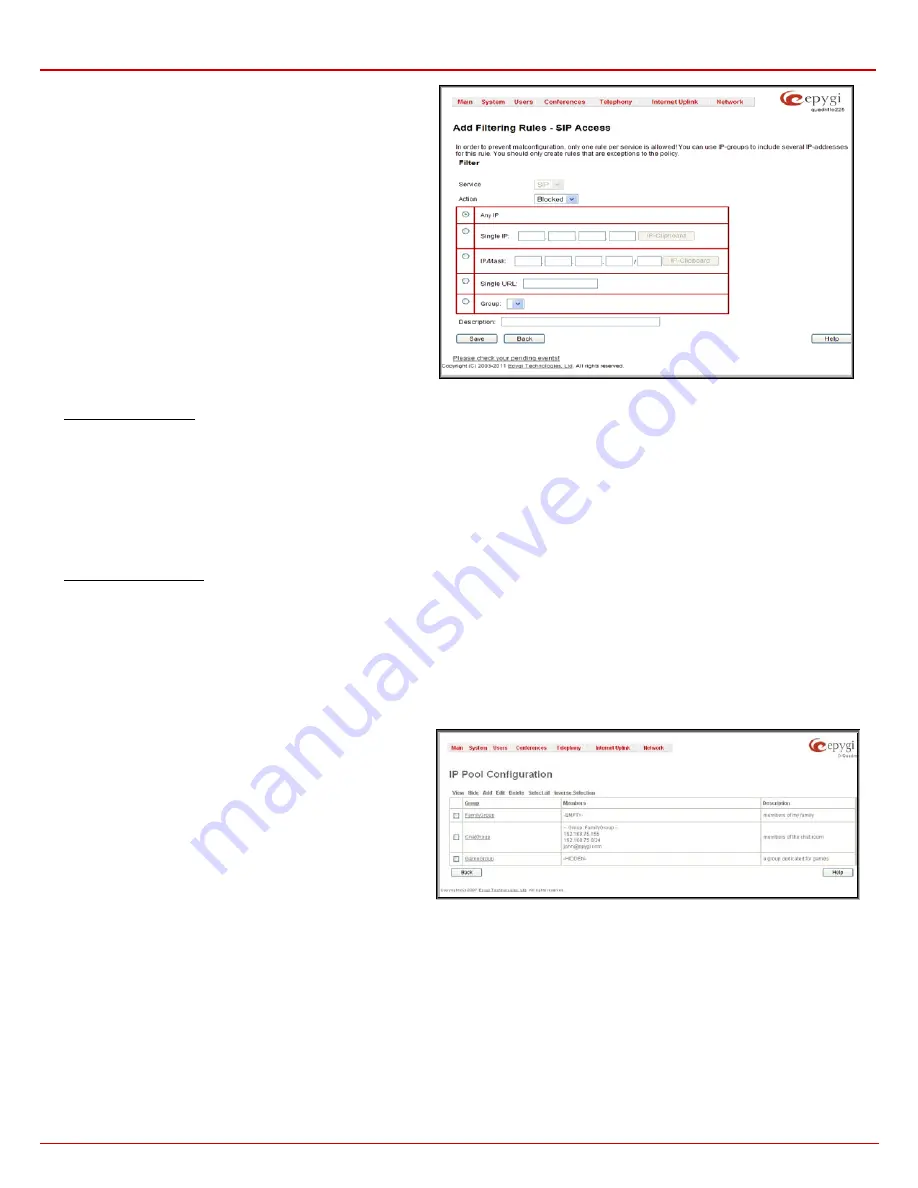
Fig. II-220: Filtering Rules - Page to add a rule for Incoming Traffic
To Add a Filtering Rule
1.
Select the
Filter
link (Management Access, Call Control Access, SIP Access, Blocked IP List and Allowed IP List) to add a rule for it. The
corresponding
Filter
table will appear in the same window.
2.
Click
Add
on the
Filtering Rules
page. A page where a new rule may be added will appear in the browser window. The page will be named
corresponding to the selected filter.
3.
Select a service name from the
Service
list to configure a rule for it. If the list has a default value, do not change the default values.
4.
Select an action from the
Action
list that is used in the rule. If the list has a default value, do not change the default values.
5.
Choose the restriction type by selecting
Any
,
Single IP
,
IP/Mask
or
Single URL
and enter the required information in the text fields or select a
group.
6.
Insert a
Description
, if needed.
7.
To add a rule with these parameters, press
Save
.
To Delete Filtering Rules
1.
Select the
Filter
link to delete a rule from its table. The appropriate
Filter
table will appear in the same window.
2.
Check one or more checkboxes of the corresponding rules that should be deleted from the rules table. Press
Select all
if all rules should to be
deleted.
3.
Press the
Delete
button on the
Filtering Rules
page.
4.
Confirm the deletion by clicking on
Yes
, or cancel by clicking on
No
.
IP Pool
The
Manage IP Pool Groups
link opens the
IP Pool Configuration
page.
The
IP
Pool
table is the list of all added groups and the members
assigned to these groups. If a group is empty,
EMPTY
will be
indicated in the
Members
column. If hidden, group members will
still remain active but
HIDDEN
will be displayed in the
Members
column.
The
IP Pool Configuration
is used to add groups of IP addresses
that have the same restriction criteria. When adding a new filtering
rule, groups may be used instead of several IP addresses.
IP Pool
Configuration
offers the following components:
View
makes hidden groups visible.
Hide
makes group members hidden and adds the
HIDDEN
comment in the member column.
Fig. II-221: IP Pool Configuration page
Add
opens the
Add Group
page where a new group may be added. This page consists of the
Group Name
text field (requiring the group name)
and the
Group Description
text field (requiring the optional group description), as well as standard
Save
and
Back
buttons to apply or abort
changes.
Edit
opens the
Edit Group
page where the service parameters can be modified. It provides the same components as the
Add Group
page. To
operate with
Edit
, only one record may be selected, otherwise the error message “One row must be selected” will appear.
Please Note:
Changing a group name will also change the references to this group, including groups where this group is a member of, and all
affected filter rules (enabled and disabled ones, in all chains). Deleting a group will also delete any reference to the corresponding group, including
filter-rules and member relations to the other groups.


