3-32
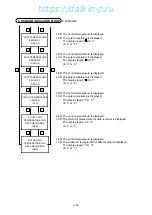
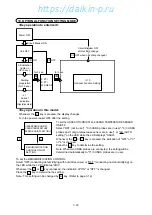
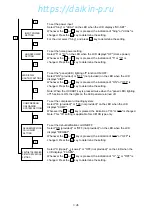
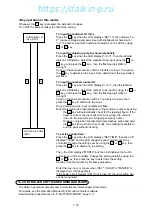
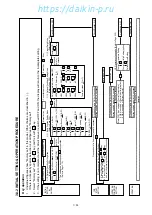
To input the container I.D. (No.):
Press the
key when the LCD displays "SET I.d", then display "i.d.-
C" (name of shipping company input with alphabetical character) or
"i.d.-n" (number input with numerical character) on the LED by using
or key.
To input the shipping company name (alphabet):
Press the
key when the LED displays "i.d.-C" , then the leftmost
digit on LCD flashes. Select the alphabet to be input using the
or
key, and press the
key , then the flashing digit shifts to
the right.
Carry on the same procedure until the 4 letters are input , then press
the
key to determine the input. Once determined, the input letters
will flash.
To input the numbers (numeral):
Press the
key when the LED displays "i.d.-n" , then the leftmost
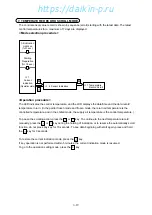
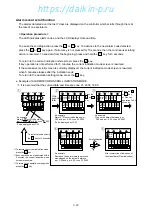
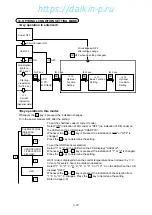
CONTAINER I.D.
(No.) INPUT
CONTROLLER TIME
INPUT
S
S
<Key operation in this mode>
Whenever the
key is pressed, the indication changes.
Turn OFF the power breaker to confirm the setting.
S
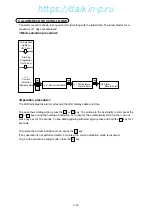
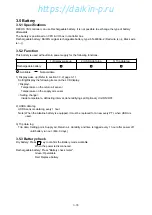
14. CONTROLLER SOFTWARE DOWNLOAD MODE
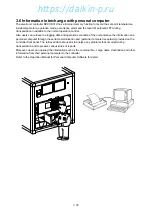
The data on personal computer and a controller are interchanged in this mode.
For details, see the Operation Manual For Personal computer software.
Downloading is possible even in "3. BATTTERY MODE". page 3-11.
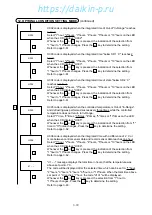
digit on LCD flashes. Select the number to be input by using the
or
key, and press the
key , then the flashing digit shifts to
the right.
Carry on the same procedure until the 7 numbers are input , then
press the
key to determine the input.
Once determined, the input numbers will flash.
Note) Determining the last-digit figure of the container number by using
the
key will automatically check for the last-digit figure. If the
figure is correct, the input will end. If it is wrong, the unit will
return to the input screen of shipping company name.
However, only when the last-digit figure flashes, press and hold
the
key for a period of 3 seconds, thus making it possible to
end the input without checking.
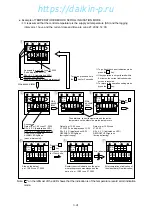
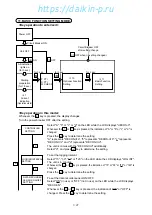
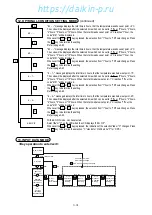
To set the control time:
Press the
key when the LCD displays "SET TIME", then the LCD
displays "YEAR" and the LED shows the year currently set in the
controller. Change the setting year by using the
or
key, then
press the
key to determine the setting.
Then, the LCD displays "MONTH" and the LED displays the month
currently set in the controller. Change the setting month by using the
or
key, then press the key to determine the setting.
Set day, time and minute by the same procedure.
Enter the day, hour or minute when "DAY", "HOUR" or "MINUTE" is
displayed on LCD respectively.
If the power circuit breaker (CB) is not turned off, the new setting will
not be recognized.
https://daikin-p.ru
Содержание LXE10E-1
Страница 161: ...7 9 https daikin p ru ...
Страница 162: ...7 14 Schematic wiring diagram LXE10E 1 7 10 https daikin p ru ...
Страница 163: ...7 15 Stereoscopic wiring diagram LXE10E 1 7 11 https daikin p ru ...

