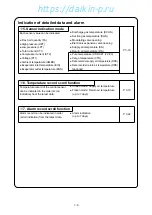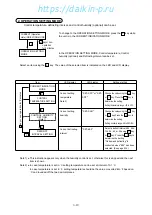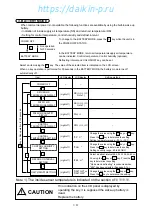
3.3.2 Mode operation procedure
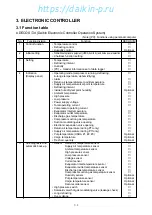
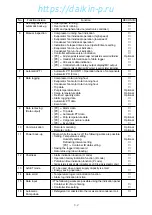
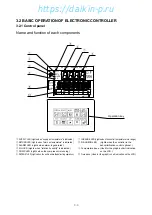
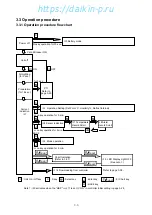
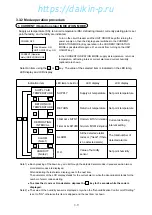
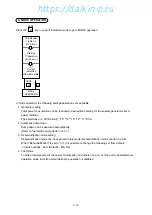
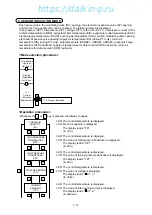
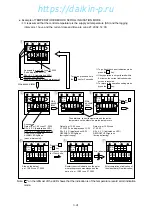
1. CURRENT (Operation state) INDICATION MODE
Supply air temperature (SS), return air temperature (RS), defrosting interval, currently existing alarm, set
point humidity, and humidity are indicated.
3-9
POWER OFF
CURRENT (Operation
state) INDICATION MODE
Circuit breaker: ON
UNIT ON/OFF Key: ON
Turn on the circuit breaker and the UNIT ON/OFF key after turning the
power supply on, then the display panel switches to the CURRENT
INDICATION MODE. (Key operation in the CURRENT INDICATION
MODE is possible after approx. 21 seconds from turning on the UNIT
ON/OFF key.)
In the CURRENT INDICATION MODE, supply air temperature, return air
temperature, defrosting interval, current alarm and current humidity
(optional) are shown.
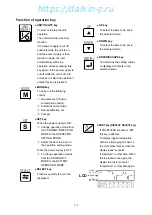
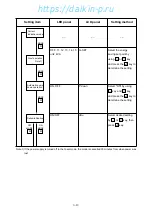
Select an item using the
or
key. The value of the selected item is indicated on the LED lamp,
LED display and LCD display.
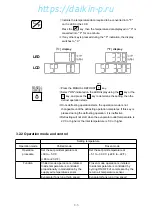
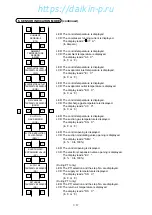
LED lamp to be lit on
LED display
LCD display
Indication item
SUPPLY
RETURN
Chilled mode: SUPPLY
Frozen mode: RETURN
ALARM
R.H.
Supply air temperature
Return air temperature
Chilled mode: SUPPLY air temperature
Frozen mode: RETURN air temperature
All the detected alarms
codes or ("Good" if there
is no detected alarm)
Value of humidity
sensor
Set point temperature
Set point temperature
Current defrosting
interval setting
The total number of
detected alarms
Set point humidity
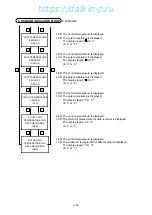
SUPPLY AIR
TEMPERATURE
RETURN AIR
TEMPERATURE
DEFROSTING
INTERVAL
ALARM
(Note 1)
HUMIDITY
(Note 2)
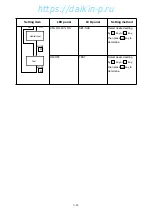
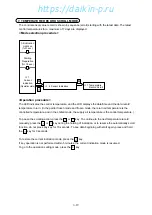
Note 1)
●
Each pressing of the down key, scrolls through the detected alarm codes in sequence when two or
more alarm codes are displayed.
After indicating the last alarm, display goes to the next item.
The numerator of the LCD display stands for the current alarm, while the denominator stands for the
number of alarm codes existing.
●
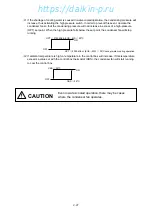
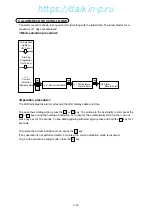
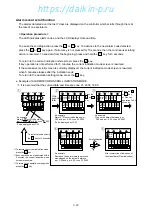
To erase the d code or H code alarm, depress the
key for 3 seconds while the code is
displayed.
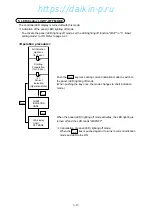
Note 2)
●
The value of the humidity sensor is displayed only when the "Dehumidification Control on/off Setting"
is set to "ON", otherwise this item is skipped and the next item is shown.
https://daikin-p.ru
Содержание LXE10E-1
Страница 161: ...7 9 https daikin p ru ...
Страница 162: ...7 14 Schematic wiring diagram LXE10E 1 7 10 https daikin p ru ...
Страница 163: ...7 15 Stereoscopic wiring diagram LXE10E 1 7 11 https daikin p ru ...

