REAR SUSPENSION AND DRIVE LINE 4-6
4. Remove nut and bolt securing spring to front hanger.
5. Remove "U ” bolt retaining nuts, withdraw
“ U”
bolts
and spring plate from spring-to-axle housing
attachment.
6. Withdraw spring from vehicle.
7. Inspect spring--replace bushings, repair or replace
spring unit as outlined in this section.
BUSHING REPLACEMENT
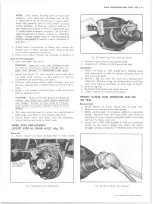
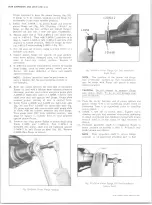
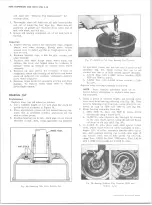
1. Place spring on press and press out bushing using a
suitable rod, pipe or tool (fig. 14).
2. Press in new bushing; assure that tool presses on
steel outer shell of bushing.
SPRING LEAF
Replacement
1. Place spring assembly in a bench mounted vise and
remove spring clips.
2. Position spring in vise jaws, compressing leaves at
center and adjacent to center bolt.
3. File peened end of center bolt and remove nut. Open
vise slowly to allow spring assembly to expand.
4. Wire brush and clean spring leaves. Inspect spring
leaves to determine if replacement is required; also
replace defective spring leaf liners at this time.
5. Align center holes in spring leaves by means of a
long drift and compress spring leaves in a vise.
6. Remove drift from center hole and install a new
center bolt—peen bolt to retain nut.
7. Align spring leaves by tapping with hammer, then
bend spring clips into place or install bolts and
spacer if so equipped.
NOTE:
Spring clips should be bent sufficiently
to maintain alignment, but not tight enough to
bind spring action.
Installation
1. Position spring assembly on axle housing. Make sure
spring is in position at both spring hangers.
NOTE:
The shackle assembly must be attached
to the rear spring eye before installing shackle
to rear hanger (fig. 13).
2. Install spring retainer plate and
“ U”
bolts--loosely
install retaining nuts, but do not torque at this time.
3. Jack frame as required to align spring and shackle
with spring hangers.
4. Install shackle bolt and nut and again reposition
spring, if necessary to align front eye--install front
eye bolt and nut.
5. Lower vehicle so that weight of vehicle is on suspen
sion components and torque affected suspension
parts to specifications.
6. Lower vehicle and remove from hoist.
SHACKLE REPLACEMENT
1. Raise vehicle on hoist. Place adjustable lifting de
vice under axle.
2. Remove load from spring by jacking frame.
3. Loosen spring-to-shackle retaining bolt, but do not
remove.
4. Remove shackle-to-frame bracket retaining bolt--
then remove shackle bolt from spring eye (fig. 13).
5. Position shackle to spring eye and loosely install re
taining bolt--do not torque retaining bolt at this time.
6. Position shackle to frame bracket and install retain
ing bolt.
7. Rest vehicle weight on suspension components and
torque both s h a c k l e bolt retaining nut s to
specifications.
8. Lower vehicle and remove from hoist.
DRIVE LINE
REAR AXLE
INDEX
Page
Component Parts Replacem ent......................................................... . .
Series 10 3300, 3500 lb. Capacity Axles and
Series 20 5500 lb. Capacity Axles
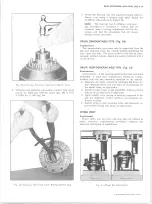
Axle Assembly R e m o v a l................................................................ ....
Axle Shaft-Removal .........................................................................
Axle Shaft Installation ................................................................ ..
Wheel Bolt Replacement .............................................................. .....
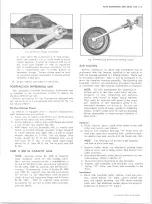
Pinion Flange, Dust Deflector and/or Seal ................................ .....
Positraction Differential Unit on the Vehicle Check ................ ....
5200 Through 11,000 lb. Capacity Axles
Axle Assembly ................................................................................ .....
.........................................................................................
Installation .......................................................................................
Axle Vent
........ . .................................................... ..4-16
Page
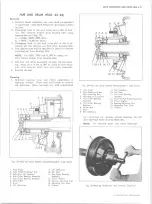
Axle Shaft (Except 11,000 lb. A x le s ).........................................
Axle Shaft (11,000 lb. Axles) .......................................................
Hub and Drum ................................................................................
Removal .......................................................................................
Cleaning ..............................................
......................................
Bearing C u p ...................................................................................
.......................................................
Non-Demountable Type Drum . ................................... ..
Wheel Bolt ....................................................................... ..
Hub S t u d .......................................................................................
Oil Sleeve and Bearing Thrust Spacer.......................................
Wheel Hub O il S e a l.....................................................................
Installation ..................................................................................
Bearing A djustm ent.....................................................................
Drive Pinion O il Seal (Except 5500 lb. D a n a ) ...........................
No-Spin Differential U n i t ..............................................................
On The Vehicle Check ..............................................................
Specifications ......................................................... See Specification Section
10-30 CHEVROLET TRUCK SERVICE MANUAL
Содержание 10 1971 Series
Страница 1: ......
Страница 96: ......
Страница 100: ...10 30 CHEVROLET TRUCK SERVICE MANUAL Fig 4 10 30 Series Truck Frame FRAME 2 4 ...
Страница 120: ......
Страница 203: ...ENGINE 6 25 Fig 22L Engine Mounts 10 30 CHEVROLET TRUCK SERVICE MANUAL ...
Страница 215: ...ENGINE 6 37 REAR M O U NT Fig 21V Engine Mounts 10 30 CHEVROLET TRUCK SERVICE MANUAL ...
Страница 218: ......
Страница 249: ......
Страница 250: ...EMISSION CONTROL SYSTEMS 6T 4 Fig 3 Combination Emission Control System Routing V8 10 30 CHEVROLET TRUCK SERVICE MANUAL ...
Страница 324: ......
Страница 339: ...FUEL TANK AND EXHAUST SYSTEMS 8 15 SPECIAL TOOLS Fig 22 Special Tools 1 J 23346 Fuel Tank Gauge Remover and Installer ...
Страница 340: ......
Страница 365: ...10 30 CHEVROLET TRUCK SERVICE MANUAL Fig 43 Power Steering Pump M ounting STEERING 9 25 ...
Страница 368: ......
Страница 386: ......
Страница 390: ...ELECTRICAL BODY AND CHASSIS 12 4 10 30 CHEVROLET TRUCK SERVICE MANUAL ...
Страница 391: ......
Страница 392: ...ELECTRICAL BODY AND CHASSIS 12 6 Fig 5 Rear Lighting Composite 10 30 CHEVROLET TRUCK SERVICE MANUAL ...
Страница 409: ...ELECTRICAL BODY AND CHASSIS 12 23 Fig 27 Engine Compartment CA30 02 10 30 CHEVROLET TRUCK SERVICE MANUAL ...
Страница 410: ...ELECTRICAL BODY AND CHASSIS 12 24 18DK GRN 19 Fig 28 Instrument Panel CA30 02 10 30 CHEVROLET TRUCK SERVICE MANUAL ...
Страница 411: ...ELECTRICAL BODY AND CHASSIS 12 25 Fig 29 Instrument Panel CA30 02 10 30 CHEVROLET TRUCK SERVICE MANUAL ...
Страница 412: ...ELECTRICAL BODY AND CHASSIS 12 26 fh Ar r kk 4 Fig 30 Engine Compartment C A K A 10 20 CA30 03 z _ ...
Страница 416: ...ELECTRICAL BODY AND CHASSIS 12 30 Fig 34 Engine Compartment CA KA10 20 CA30 04 10 30 CHEVROLET TRUCK SERVICE MANUAL ...
Страница 420: ...ELECTRICAL BODY AND CHASSIS 12 34 Fig 38 Engine Compartment C A K A 1 0 20 06 16 10 30 CHEVROLET TRUCK SERVICE MANUAL ...
Страница 422: ...ELECTRICAL BODY AND CHASSIS 12 36 Fig 40 Instrument Panel C A K A 10 20 06 16 10 30 CHEVROLET TRUCK SERVICE MANUAL ...
Страница 423: ...ELECTRICAL BODY AND CHASSIS 12 37 Fig 41 R ear Lamps C A K A 1 0 20 06 16 10 30 CHEVROLET TRUCK SERVICE MANUAL ...
Страница 424: ...ELECTRICAL BODY AND CHASSIS 12 38 Fig 42 Engine Compartment CA KA10 20 CAl30 14 34 10 30 CHEVROLET TRUCK SERVICE MANUAL ...
Страница 426: ...ELECTRICAL BODY AND CHASSIS 12 40 Fig 44 Instrument Panel CA KA10 20 CA30 14 34 10 30 CHEVROLET TRUCK SERVICE MANUAL ...
Страница 428: ......
Страница 432: ......
Страница 449: ...SPECIFICATIONS 9 10 30 CHEVROLET TRUCK SERVICE MANUAL ...
Страница 463: ......
Страница 464: ......
Страница 465: ......
Страница 466: ......


