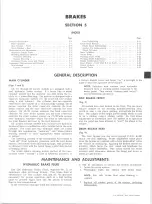


BRAKES 5-13
Fig. 30— Installing Pull Back Spring
6. Disengage the link end from the anchor pin and then
from the secondary shoe.
7. Remove hold-down pins and springs using any suit
able tool.
8. Remove the actuator assembly.
NOTE:
The actuator, pivot and override spring
are an assembly. It is not recommended that
they be disassembled for service purposes,
unless they are broken. It is much easier to
assemble and disassemble the brakes by leaving
them intact.
9. Separate the brake shoes by removing adjusting screw
and spring.
10. Remove parking brake lever from secondary brake
shoe.
11. Clean dirt out of brake drum. Inspect drums for
roughness, scoring or out of round. Replace or
recondition drums as necessary.
12. Carefully pull lower edges of wheel cylinder boots
away from cylinders and note whether interior is
wet with brake fluid. Excessive fluid at this point
indicates leakage past piston cups requiring overhaul
of wheel cylinder.
NOTE
: A slight amount of fluid is nearly always
present and acts as lubricant for the piston.
13. Inspect backing plate for oil leakage past axle shaft
oil seals. Install new seals if necessary.
14. Check all brake flange plate attaching bolts to make
sure they are tight. Clean all rust and dirt from
shoe contact faces on flange plate, using fine emery
cloth.
Installation (Figs. 29 thru 34)
CAUTION:
Make certain to install recommended
shoe and lining assemblies. Otherwise, serious
fade or permanent failure may occur.
1. Inspect new linings and make certain there are no
nicks or burrs or bonding material on shoe edge
where contact is made with brake flange plate or on
any of the contact surfaces.
Fig. 31— Checking Actuating Lever
" " - v ___ ——
NOTE:
Keep hands clean while handling brake
shoes. Do not permit oil or grease to come in
contact with linings.
2. Lubricate parking brake cable.
3.
Lubricate fulcrum end of parking brake lever and
the bolt with brake lube, then attach lever to sec
ondary shoe with bolt, spring washer, lock washer
and nut. Make sure that lever moves freely.
4. Before installation, make certian the adjusting screw
is clean and lubricated properly.
NOTE:
Loose adjustment may occur from an
adjusting screw that is not properly operating.
Fig. 3 2 — Using D rum -to-Brake G au ge J —21177
10-30 CHEVROLET TRUCK SERVICE MANUAL
Содержание 10 1971 Series
Страница 1: ......
Страница 96: ......
Страница 100: ...10 30 CHEVROLET TRUCK SERVICE MANUAL Fig 4 10 30 Series Truck Frame FRAME 2 4 ...
Страница 120: ......
Страница 203: ...ENGINE 6 25 Fig 22L Engine Mounts 10 30 CHEVROLET TRUCK SERVICE MANUAL ...
Страница 215: ...ENGINE 6 37 REAR M O U NT Fig 21V Engine Mounts 10 30 CHEVROLET TRUCK SERVICE MANUAL ...
Страница 218: ......
Страница 249: ......
Страница 250: ...EMISSION CONTROL SYSTEMS 6T 4 Fig 3 Combination Emission Control System Routing V8 10 30 CHEVROLET TRUCK SERVICE MANUAL ...
Страница 324: ......
Страница 339: ...FUEL TANK AND EXHAUST SYSTEMS 8 15 SPECIAL TOOLS Fig 22 Special Tools 1 J 23346 Fuel Tank Gauge Remover and Installer ...
Страница 340: ......
Страница 365: ...10 30 CHEVROLET TRUCK SERVICE MANUAL Fig 43 Power Steering Pump M ounting STEERING 9 25 ...
Страница 368: ......
Страница 386: ......
Страница 390: ...ELECTRICAL BODY AND CHASSIS 12 4 10 30 CHEVROLET TRUCK SERVICE MANUAL ...
Страница 391: ......
Страница 392: ...ELECTRICAL BODY AND CHASSIS 12 6 Fig 5 Rear Lighting Composite 10 30 CHEVROLET TRUCK SERVICE MANUAL ...
Страница 409: ...ELECTRICAL BODY AND CHASSIS 12 23 Fig 27 Engine Compartment CA30 02 10 30 CHEVROLET TRUCK SERVICE MANUAL ...
Страница 410: ...ELECTRICAL BODY AND CHASSIS 12 24 18DK GRN 19 Fig 28 Instrument Panel CA30 02 10 30 CHEVROLET TRUCK SERVICE MANUAL ...
Страница 411: ...ELECTRICAL BODY AND CHASSIS 12 25 Fig 29 Instrument Panel CA30 02 10 30 CHEVROLET TRUCK SERVICE MANUAL ...
Страница 412: ...ELECTRICAL BODY AND CHASSIS 12 26 fh Ar r kk 4 Fig 30 Engine Compartment C A K A 10 20 CA30 03 z _ ...
Страница 416: ...ELECTRICAL BODY AND CHASSIS 12 30 Fig 34 Engine Compartment CA KA10 20 CA30 04 10 30 CHEVROLET TRUCK SERVICE MANUAL ...
Страница 420: ...ELECTRICAL BODY AND CHASSIS 12 34 Fig 38 Engine Compartment C A K A 1 0 20 06 16 10 30 CHEVROLET TRUCK SERVICE MANUAL ...
Страница 422: ...ELECTRICAL BODY AND CHASSIS 12 36 Fig 40 Instrument Panel C A K A 10 20 06 16 10 30 CHEVROLET TRUCK SERVICE MANUAL ...
Страница 423: ...ELECTRICAL BODY AND CHASSIS 12 37 Fig 41 R ear Lamps C A K A 1 0 20 06 16 10 30 CHEVROLET TRUCK SERVICE MANUAL ...
Страница 424: ...ELECTRICAL BODY AND CHASSIS 12 38 Fig 42 Engine Compartment CA KA10 20 CAl30 14 34 10 30 CHEVROLET TRUCK SERVICE MANUAL ...
Страница 426: ...ELECTRICAL BODY AND CHASSIS 12 40 Fig 44 Instrument Panel CA KA10 20 CA30 14 34 10 30 CHEVROLET TRUCK SERVICE MANUAL ...
Страница 428: ......
Страница 432: ......
Страница 449: ...SPECIFICATIONS 9 10 30 CHEVROLET TRUCK SERVICE MANUAL ...
Страница 463: ......
Страница 464: ......
Страница 465: ......
Страница 466: ......