4-25
4.29 WATER-COOLED CONDENSER
The water-cooled condenser is of the shell and coil
type with circulating water through the cupro-nickel coil.
The refrigerant vapor is admitted to the shell side and is
condensed on the outer surface of the coil.
Rust, scale and slime on the water-cooling surfaces
inside of the coil interfere with the transfer of heat,
reduce system capacity, cause higher head pressures and
increase the load on the system.
By checking the leaving water temperature and the
actual condensing temperature, it can be determined if
the condenser coil is becoming dirty. A larger than
normal difference between leaving condensing water
temperature and actual condensing temperature,
coupled with a small difference in temperature of
entering and leaving condensing water, is an indication of
a dirty condensing coil.
To find the approximate condensing temperature,
with the unit running in the cooling mode, install a gauge
0 to 36.2 kg/cm
@
(0 to 500 psig) on the compressor
discharge service valve.
For example: if the discharge pressure is 10.3 kg/cm
@
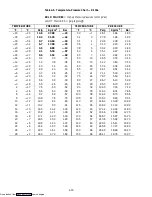
(146.4 psig), and referring to Table 4-6, R-134a
pressure-temperature chart, the 10.3 kg/cm
@
(146.4 psig)
converts to 43
_
C (110
_
F).
If the water-cooled condenser is dirty, it may be
cleaned and de-scaled by the following procedure:
a. Turn unit off and disconnect main power.
b. Disconnect water pressure switch tubing by
loosening the two flare nuts. Install 1/4 inch flare cap on
water-cooled condenser inlet tube (replaces tubing flare
nut). De-scale tubing if necessary.
What You Will Need:
1. Oakite composition No. 22, available as a powder in
68 kg (150 lb) and 136 kg (300 lb).
2. Oakite composition No. 32, available as a liquid in
cases, each containing 3.785 liters (4 U.S. gallon) bottles
and also in carboys of 52.6 kg (116 lbs) net.
3. Fresh clean water.
4. Acid proof pump and containers, or bottles with
rubber hose.
NOTE
When Oakite compound No. 32 is being used for
the first time, the local Oakite Technical Service
representative should be called in for their
suggestions in planning the procedure. They will
show you how to do the work with a minimum
dismantling of equipment: how to estimate the
time and amount of compound required; how to
prepare the solution; how to control and
conclude the de-scaling operation by rinsing and
neutralizing equipment before putting it back
into service. Their knowledge of metals, types of
scale,
water
conditions
and
de-scaling
techniques will be invaluable to you.
What You Will Do --- (Summary)
:
1. Drain water from condenser tubing circuit. Clean
water tubes with Oakite No. 22 to remove mud and slime.
2. Flush.
3. De-scale water tubes with Oakite No. 32 to remove
scale.
4. Flush.
5. Neutralize.
6. Flush.
7. Put unit back in service under normal load and check
head (discharge) pressure.
Detailed Procedure:
1. Drain and flush the water circuit of the condenser
coil. If scale on the tube inner surfaces is accompanied by
slime, a thorough cleaning is necessary before de-scaling
process can be accomplished.
2. To remove slime or mud, use Oakite composition No.
22, mixed 170 grams (6 ounces) per 3.785 liters (1 U.S.
gallon) of water. Warm this solution and circulate through
the tubes until all slime and mud has been removed.
3. After cleaning, flush tubes thoroughly with fresh
clean water.
4. Prepare a 15% by volume solution for de-scaling, by
diluting Oakite compound No. 32 with water. This is
accomplished by slowly adding 0.47 liter (1 U.S. pint) of the
acid (Oakite No. 32) to 2.8 liters (3 U.S. quarts) of water.
WARNING
Oakite No. 32 is an acid --- therefore be sure that
the acid is slowly added to the water. DO NOT
PUT WATER INTO THE ACID! --- this will
cause spattering and excessive heat.
Wear rubber gloves and wash the solution from
the skin immediately if accidental contact
occurs. Do not allow the solution to splash onto
concrete.
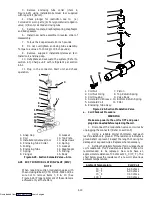
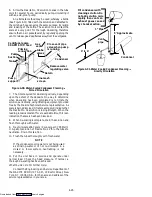
5. Fill the tubes with this solution by filling from the
bottom. See Figure 4-30. Important: --- be sure to provide
a vent at the top for escaping gas.
Downloaded from
Содержание 69NT40-489
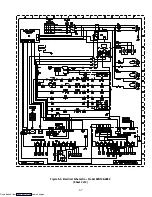
Страница 1: ...Model 69NT40 489 T 259 Rev F Downloaded from ManualsNet com search engine ...
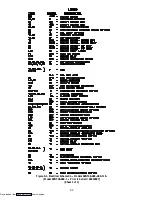
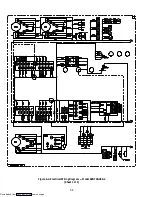
Страница 100: ...5 9 Figure 5 4 Electrical Wiring Diagram Model 69NT40 489 2 Sheet 2 of 2 Downloaded from ManualsNet com search engine ...
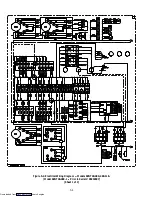
Страница 141: ...5 50 Figure 5 25 Electrical Schematic Model 69NT40 489 19 Sheet 1 of 2 Downloaded from ManualsNet com search engine ...
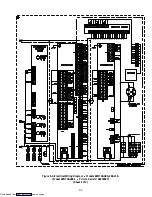
Страница 142: ...5 51 Figure 5 25 Electrical Schematic Model 69NT40 489 19 Sheet 2 of 2 Downloaded from ManualsNet com search engine ...
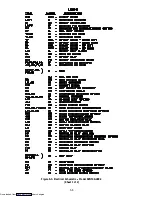
Страница 149: ...5 58 Figure 5 29 Electrical Schematic Models 69NT40 489 50 Sheet 1 of 2 Downloaded from ManualsNet com search engine ...
Страница 150: ...5 59 Figure 5 29 Electrical Schematic Models 69NT40 489 50 Sheet 2 of 2 Downloaded from ManualsNet com search engine ...
Страница 157: ...5 66 Figure 5 33 Electrical Schematic Models 69NT40 489 62 Sheet 1 of 2 Downloaded from ManualsNet com search engine ...
Страница 158: ...5 67 Figure 5 33 Electrical Schematic Models 69NT40 489 62 Sheet 2 of 2 Downloaded from ManualsNet com search engine ...
Страница 161: ...5 70 Figure 5 35 Electrical Schematic Models 69NT40 489 78 Sheet 1 of 2 Downloaded from ManualsNet com search engine ...
Страница 162: ...5 71 Figure 5 35 Electrical Schematic Models 69NT40 489 78 Sheet 2 of 2 Downloaded from ManualsNet com search engine ...
Страница 165: ...5 74 Figure 5 37 Electrical Schematic Models 69NT40 489 80 Sheet 1 of 2 Downloaded from ManualsNet com search engine ...
Страница 166: ...5 75 Figure 5 37 Electrical Schematic Models 69NT40 489 80 Sheet 2 of 2 Downloaded from ManualsNet com search engine ...
Страница 169: ...5 78 Figure 5 39 Electrical Schematic Models 69NT40 489 30 31 Sheet 1 of 2 Downloaded from ManualsNet com search engine ...
Страница 170: ...5 79 Figure 5 39 Electrical Schematic Models 69NT40 489 30 31 Sheet 2 of 2 Downloaded from ManualsNet com search engine ...

