4-22
4.28 CONTROLLER AND DATACORDER
a. Handling of Controller and DataCORDER
Here is a list of guidelines that should be followed
when handling the Controller or DataCORDER
modules. These steps should be implemented when
replacing either module, when doing
any
arc welding on
the unit, or
when service to the refrigeration unit requires
handling and removal of the Controller.
CAUTION
Remove Controller/DataCORDER modules and
unplug all connectors before performing any arc
welding on any part of the container.
Do not remove wire harnesses from modules
unless you are grounded to the unit frame with a
static safe wrist strap.
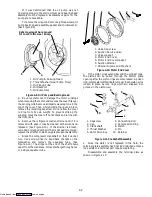
1. Obtain a grounding wrist strap and a static
dissipation mat. The wrist strap, when properly
grounded, will dissipate any potential build up on the
body. The dissipation mat will provide a static free work
surface on which to place and/or service the Controller.
Note: Use a dissipation mat, order CTD P/N
07-00277-00.
2. Disconnect and secure power to the unit.
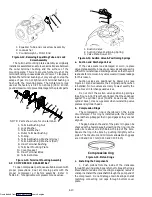
3. Place strap on wrist and attach the ground or clip
end of the wrist strap to any exposed unpainted metal
area on the refrigeration unit frame (bolts, screws, etc.).
4. Carefully remove the Controller/DataCORDER.
Do not touch any of the electrical components if possible.
Place the Controller on the static mat.
5. If you are servicing the refrigeration unit, you
are free to remove the ground strap from your wrist and
complete your work.
6. Upon completion of your service work, put the
wrist strap back on, and re-install the Controller into the
refrigeration unit.
b. Removing and Installing Controller Module
Removal:
1. Disconnect all front wire harness connectors
(MA, MB, MC, KA & KB) and move wiring out of way.
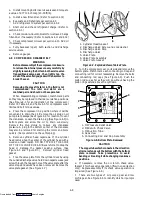
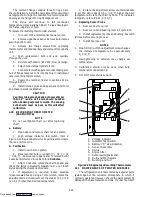
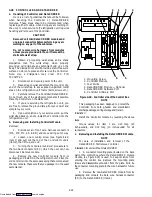
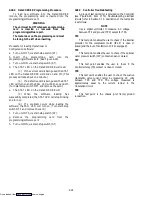
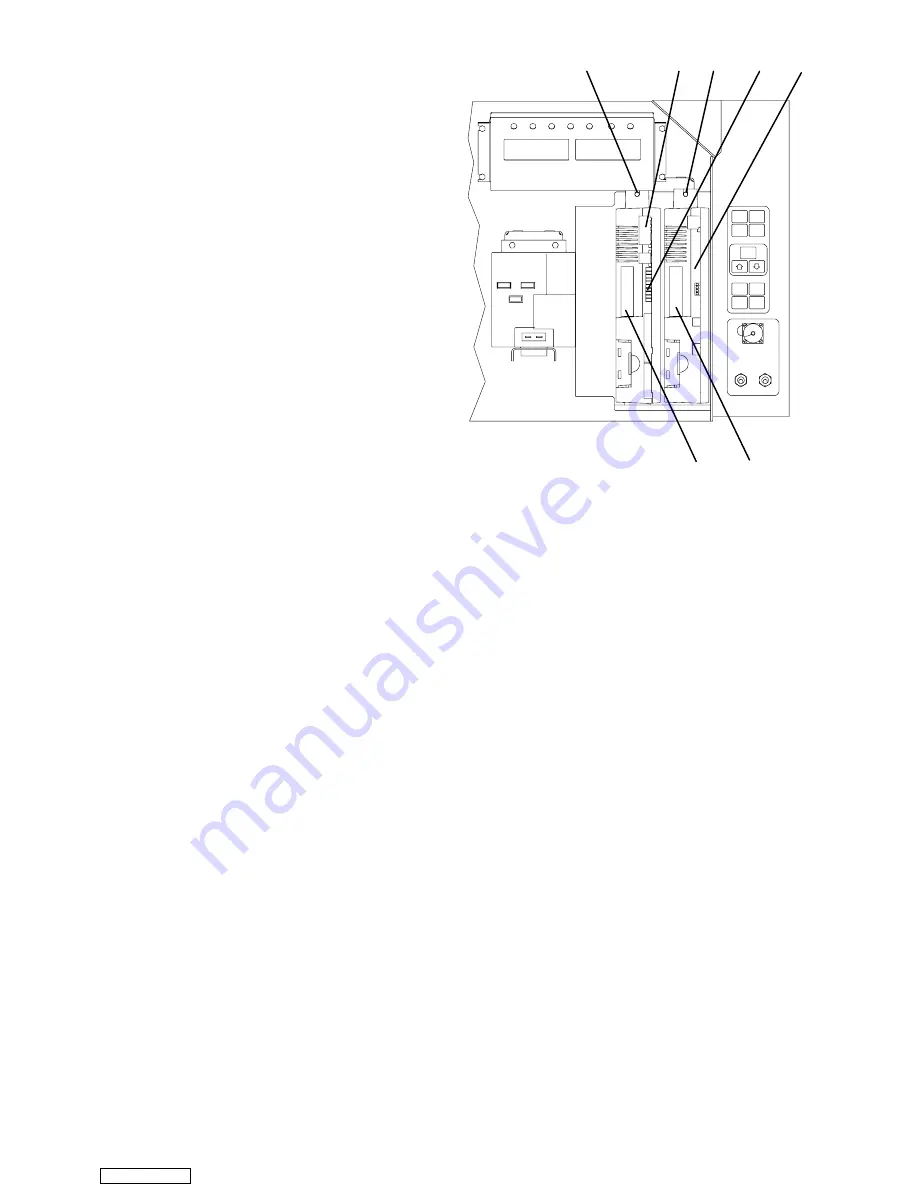
-2. Loosen one mountig screw (see Figure 4-29,
item 1) and pull out the top of the Controller module
(item2), then lift up and out.
3. Turning the module around wiil give access to
the two back connectors (EC) which the user can now
disconnect. Remove module.
4. Remove the new Controller module from its
packaging and install it in the refrigeration unit. Place the
old Controller into the same packaging that accompanied
the new module.
Make sure that you package it in the exact
same manner.
1
2
1. Mounting Screw
2. Controller Module
3. Test Points
4. DataCORDER Module --- Optional
5. DataCORDER Software Port
6. Controller Software Port
3
4
1
5
6
Figure 4-29. Controller side of the Control Box
NOTE
This packaging has been designed to protect the
Controller from both physical and electrostatic
discharge damage during storage and transit.
Installation:
Install the Controller module by reversing the above
steps.
Torque values for item 1 are 0.23 mkg (20
inch-pounds), and 0.12 mkg (10 inch-pounds) for all
connectors.
c. Removing and Installing the DataCORDER Module
NOTE
For ease of installation and removal of the
DataCORDER, first remove Controller.
Installation for units without DataCORDER:
1. A connector mounting plate (located on the back
wall of the control box where the DataCORDER module
mounts, see Figure 4-29) is used to keep moisture from
entering the control box. Remove the mounting plate
screws and disassemble connector from the plate. Wire tie
the connector mounting plate to the wire harness for future
use
2. Remove the new DataCORDER module from its
packaging and connect the back wire harness connector
(ED) to the DataCORDER (item 4).
Downloaded from
Содержание 69NT40-489
Страница 1: ...Model 69NT40 489 T 259 Rev F Downloaded from ManualsNet com search engine ...
Страница 100: ...5 9 Figure 5 4 Electrical Wiring Diagram Model 69NT40 489 2 Sheet 2 of 2 Downloaded from ManualsNet com search engine ...
Страница 141: ...5 50 Figure 5 25 Electrical Schematic Model 69NT40 489 19 Sheet 1 of 2 Downloaded from ManualsNet com search engine ...
Страница 142: ...5 51 Figure 5 25 Electrical Schematic Model 69NT40 489 19 Sheet 2 of 2 Downloaded from ManualsNet com search engine ...
Страница 149: ...5 58 Figure 5 29 Electrical Schematic Models 69NT40 489 50 Sheet 1 of 2 Downloaded from ManualsNet com search engine ...
Страница 150: ...5 59 Figure 5 29 Electrical Schematic Models 69NT40 489 50 Sheet 2 of 2 Downloaded from ManualsNet com search engine ...
Страница 157: ...5 66 Figure 5 33 Electrical Schematic Models 69NT40 489 62 Sheet 1 of 2 Downloaded from ManualsNet com search engine ...
Страница 158: ...5 67 Figure 5 33 Electrical Schematic Models 69NT40 489 62 Sheet 2 of 2 Downloaded from ManualsNet com search engine ...
Страница 161: ...5 70 Figure 5 35 Electrical Schematic Models 69NT40 489 78 Sheet 1 of 2 Downloaded from ManualsNet com search engine ...
Страница 162: ...5 71 Figure 5 35 Electrical Schematic Models 69NT40 489 78 Sheet 2 of 2 Downloaded from ManualsNet com search engine ...
Страница 165: ...5 74 Figure 5 37 Electrical Schematic Models 69NT40 489 80 Sheet 1 of 2 Downloaded from ManualsNet com search engine ...
Страница 166: ...5 75 Figure 5 37 Electrical Schematic Models 69NT40 489 80 Sheet 2 of 2 Downloaded from ManualsNet com search engine ...
Страница 169: ...5 78 Figure 5 39 Electrical Schematic Models 69NT40 489 30 31 Sheet 1 of 2 Downloaded from ManualsNet com search engine ...
Страница 170: ...5 79 Figure 5 39 Electrical Schematic Models 69NT40 489 30 31 Sheet 2 of 2 Downloaded from ManualsNet com search engine ...

