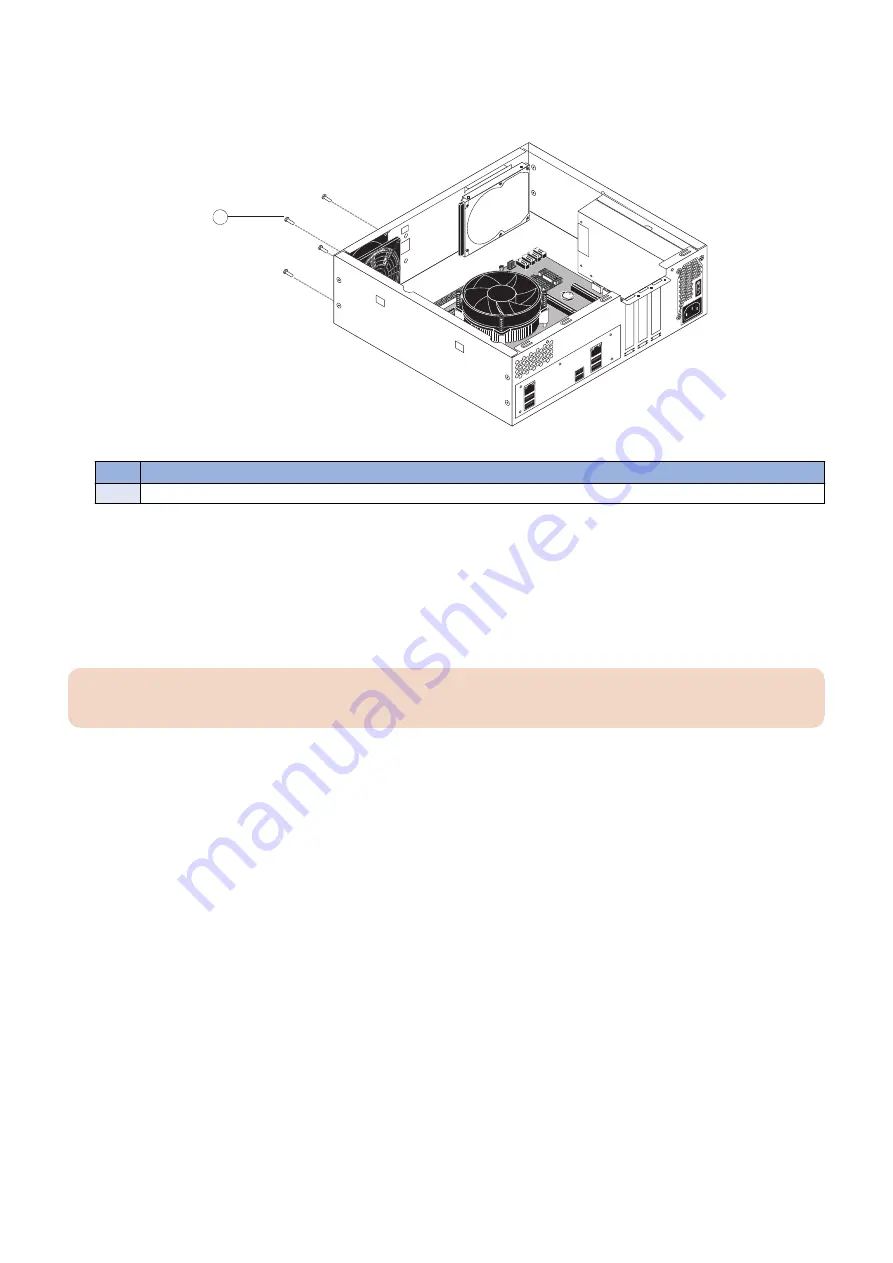
4. Align the four holes on the fan with the four holes in the chassis, and replace the four rivets that secure the fan to the chassis
(see below figure).
Hold the fan firmly against the chassis, and push each rivet all the way until it snaps into the locked position. Make sure that
the fan is tightly secured to the chassis.
1
Figure 25: Replacing the chassis fan
No.
Item
1
Rivet (1 of 4)
5. Connect the fan cable connector to FRONT FAN connector (J30) on the motherboard.
The cable connector is keyed to fit only one way.
6. Reassemble the imagePASS and verify its functionality (see
“To reinstall and verify the imagePASS” on page 38
).
■ Power supply
This section describes how to remove and replace the power supply. For more information about the power supply, see
.
IMPORTANT:
Do not open the power supply for service or troubleshooting purposes. Opening the power supply voids the warranty.
● To remove the power supply and power switch
1. Access and open the imagePASS, as described on
“Accessing the imagePASS” on page 16
.
2. Remove the 24-pin power cable from the motherboard(see
“Motherboard jumpers” on page 23
3. Remove the 4-pin power cable from the motherboard(see
“Motherboard jumpers” on page 23
).
4. Remove the power cable from the power connector on the HDD(see
“Motherboard jumpers” on page 23
).
5. Remove the power supply cables from the plastic clips that secure them to the chassis.
6. Remove the four screws that attach the power supply to the chassis(see below figure)
First remove the two screws that attach the power supply duct to the chassis. Remove the remaining two screws.
Set the screws aside so that you can replace them later.
3. REPLACING PARTS
34
Содержание imagePASS-P2
Страница 1: ...Revision 1 1 imagePASS P2 Service Manual ...
Страница 6: ...Introduction 1 Introduction 2 Specifications 6 ...
Страница 13: ...Using the imagePASS 2 Using the imagePASS 9 ...
Страница 16: ...Figure 3b The imagePASS Tools menu 2 Using the imagePASS 11 ...
Страница 17: ...REPLACING PARTS 3 Replacing Parts 13 ...
Страница 44: ...INSTALLING SYSTEM SOFTWARE 4 Installing System Software 40 ...
Страница 64: ...TROUBLESHOOTI NG 5 Troubleshooting 60 ...
Страница 84: ...2 Stepped Screw M4 2x 3 4x Screw with Toothed Washer M4x8 Stepped Screw M4 4 4x 8x 6 INSTALLATION PROCEDURE 79 ...
Страница 87: ...2 2x Stepped Screw M4 3 Screw with Toothed Washer M4x8 Stepped Screw M4 6x 4 4x 8x 6 INSTALLATION PROCEDURE 82 ...
Страница 88: ...5 4x Screw with Toothed Washer M4x8 6 Crossover Ethernet Cable 1x 2x 7 2x 8 2x 6 INSTALLATION PROCEDURE 83 ...


