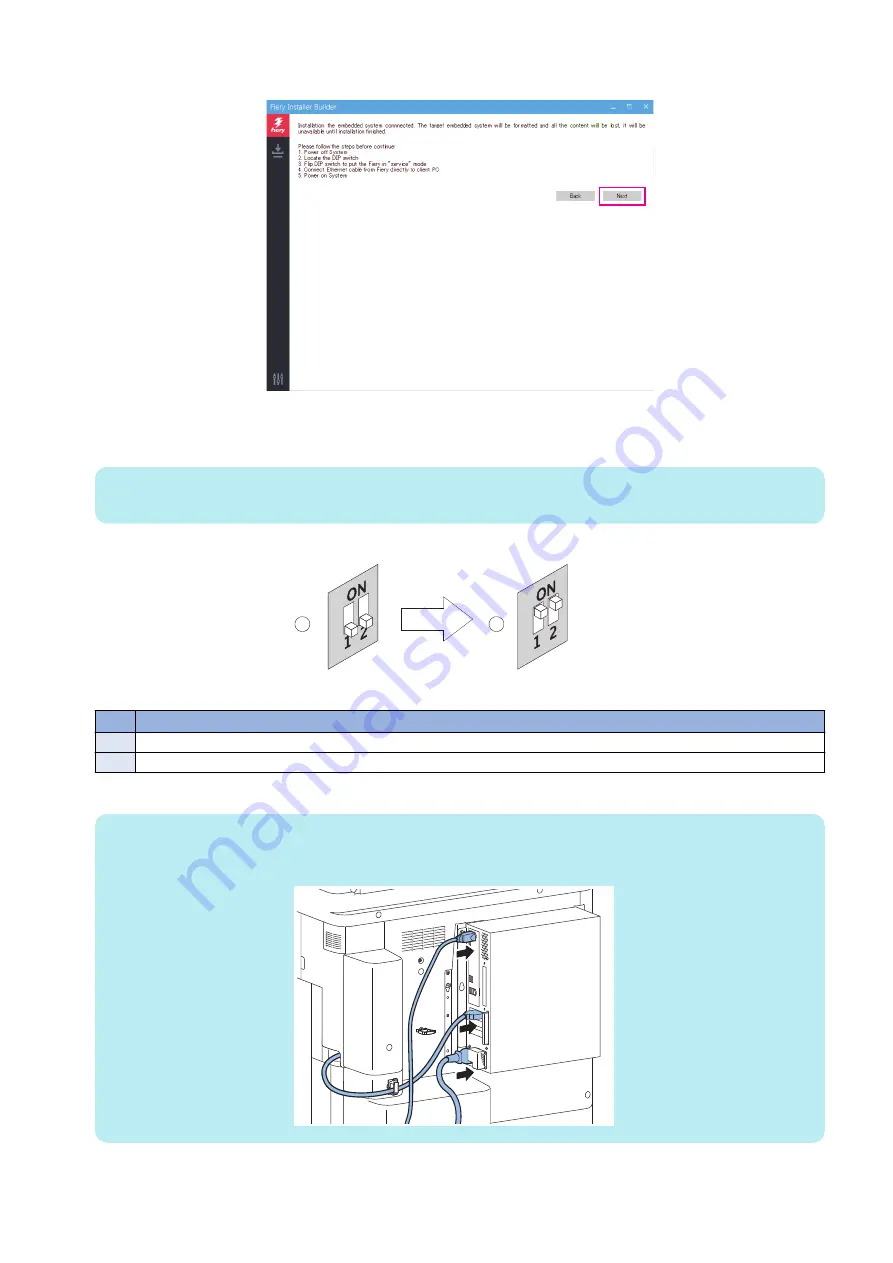
6. Read the instructions in the windows, and click Next.
7. Switch off the Host Machine and confirm that the imagePASS is cut off. (see
“Starting, shutting down, rebooting, and restarting
8. Remove all external cables from the imagePASS, except the power cable and interface cable.
NOTE:
Be sure to leave the power cable connected between the imagePASS and the power outlet.
9. Flip both of the imagePASS service switches to the Service (ON) position.
1
2
Figure 31: Flipping the imagePASS service switches
No.
Item
1
Flip the service switches from Normal (OFF) position...
2
...to Service mode (ON) position.
10. Connect the Ethernet cable between the imagePASS network port and an Ethernet port on the Windows computer.
NOTE:
• Ethernet port: Connected to the imagePASS upper part (for the user network).
• Ethernet cable: Use crossover cable
11. Switch on the Host Machine and confirm that the imagePASS becomes ON.
Wait approximately 15 seconds for the imagePASS to start up and show 00 on the LED display.
4. INSTALLING SYSTEM SOFTWARE
56
Содержание imagePASS-P2
Страница 1: ...Revision 1 1 imagePASS P2 Service Manual ...
Страница 6: ...Introduction 1 Introduction 2 Specifications 6 ...
Страница 13: ...Using the imagePASS 2 Using the imagePASS 9 ...
Страница 16: ...Figure 3b The imagePASS Tools menu 2 Using the imagePASS 11 ...
Страница 17: ...REPLACING PARTS 3 Replacing Parts 13 ...
Страница 44: ...INSTALLING SYSTEM SOFTWARE 4 Installing System Software 40 ...
Страница 64: ...TROUBLESHOOTI NG 5 Troubleshooting 60 ...
Страница 84: ...2 Stepped Screw M4 2x 3 4x Screw with Toothed Washer M4x8 Stepped Screw M4 4 4x 8x 6 INSTALLATION PROCEDURE 79 ...
Страница 87: ...2 2x Stepped Screw M4 3 Screw with Toothed Washer M4x8 Stepped Screw M4 6x 4 4x 8x 6 INSTALLATION PROCEDURE 82 ...
Страница 88: ...5 4x Screw with Toothed Washer M4x8 6 Crossover Ethernet Cable 1x 2x 7 2x 8 2x 6 INSTALLATION PROCEDURE 83 ...


