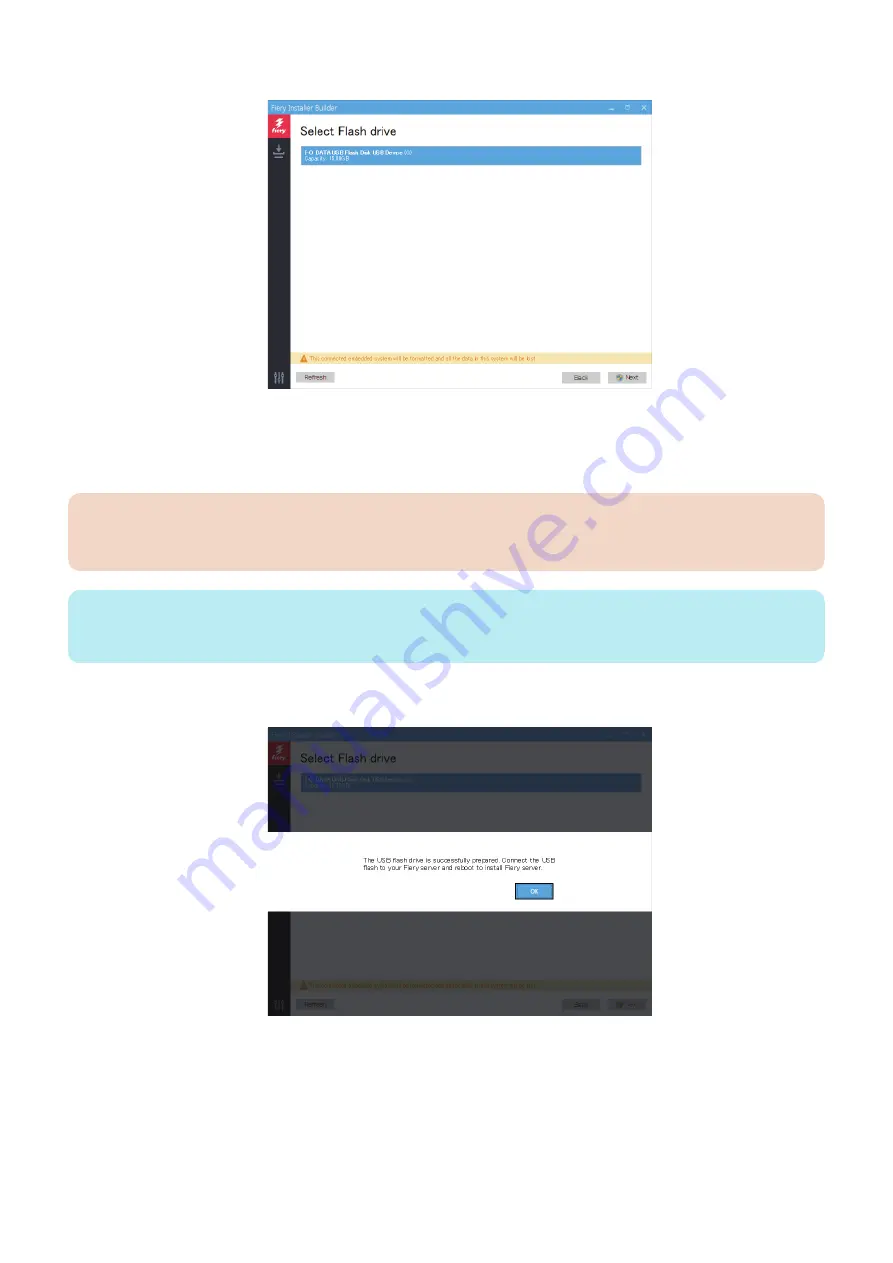
5. At the Select Flash drive window, click the USB flash drive that you attached to the computer, and click Next.
If more than one USB devices are displayed, make sure to select the USB flash drive that you attached for loading the system
software.
A warning message “This USB flash drive will be formatted and all the data in this USB flash drive will be lost.” appears.
Click Next to format the USB flash drive and proceed.
IMPORTANT:
All the data on the USB flash drive will be lost when you format the USB flash drive. Make sure that no valuable data is
stored on the device.
NOTE:
It may take approximately 30 to 40 minutes to format the USB flash drive and load the files on to the drive. Do not interrupt the
operation.
6. Once the preparation is done, safely disconnect the USB flash drive from the computer.
You can use this USB flash drive as a source for system software installation.
■ Install the system software using the prepared USB flash drive
You can install the system software using the prepared USB flash drive.
● To install the system software
1. Remove all the USB devices that may be connected to the imagePASS.
2. If possible, print the Configuration pages (see
“Printing the Configuration pages” on page 58
The Configuration pages contain a list of any installed options and a record of the customer’s current Setup configuration.
4. INSTALLING SYSTEM SOFTWARE
52
Содержание imagePASS-P2
Страница 1: ...Revision 1 1 imagePASS P2 Service Manual ...
Страница 6: ...Introduction 1 Introduction 2 Specifications 6 ...
Страница 13: ...Using the imagePASS 2 Using the imagePASS 9 ...
Страница 16: ...Figure 3b The imagePASS Tools menu 2 Using the imagePASS 11 ...
Страница 17: ...REPLACING PARTS 3 Replacing Parts 13 ...
Страница 44: ...INSTALLING SYSTEM SOFTWARE 4 Installing System Software 40 ...
Страница 64: ...TROUBLESHOOTI NG 5 Troubleshooting 60 ...
Страница 84: ...2 Stepped Screw M4 2x 3 4x Screw with Toothed Washer M4x8 Stepped Screw M4 4 4x 8x 6 INSTALLATION PROCEDURE 79 ...
Страница 87: ...2 2x Stepped Screw M4 3 Screw with Toothed Washer M4x8 Stepped Screw M4 6x 4 4x 8x 6 INSTALLATION PROCEDURE 82 ...
Страница 88: ...5 4x Screw with Toothed Washer M4x8 6 Crossover Ethernet Cable 1x 2x 7 2x 8 2x 6 INSTALLATION PROCEDURE 83 ...


